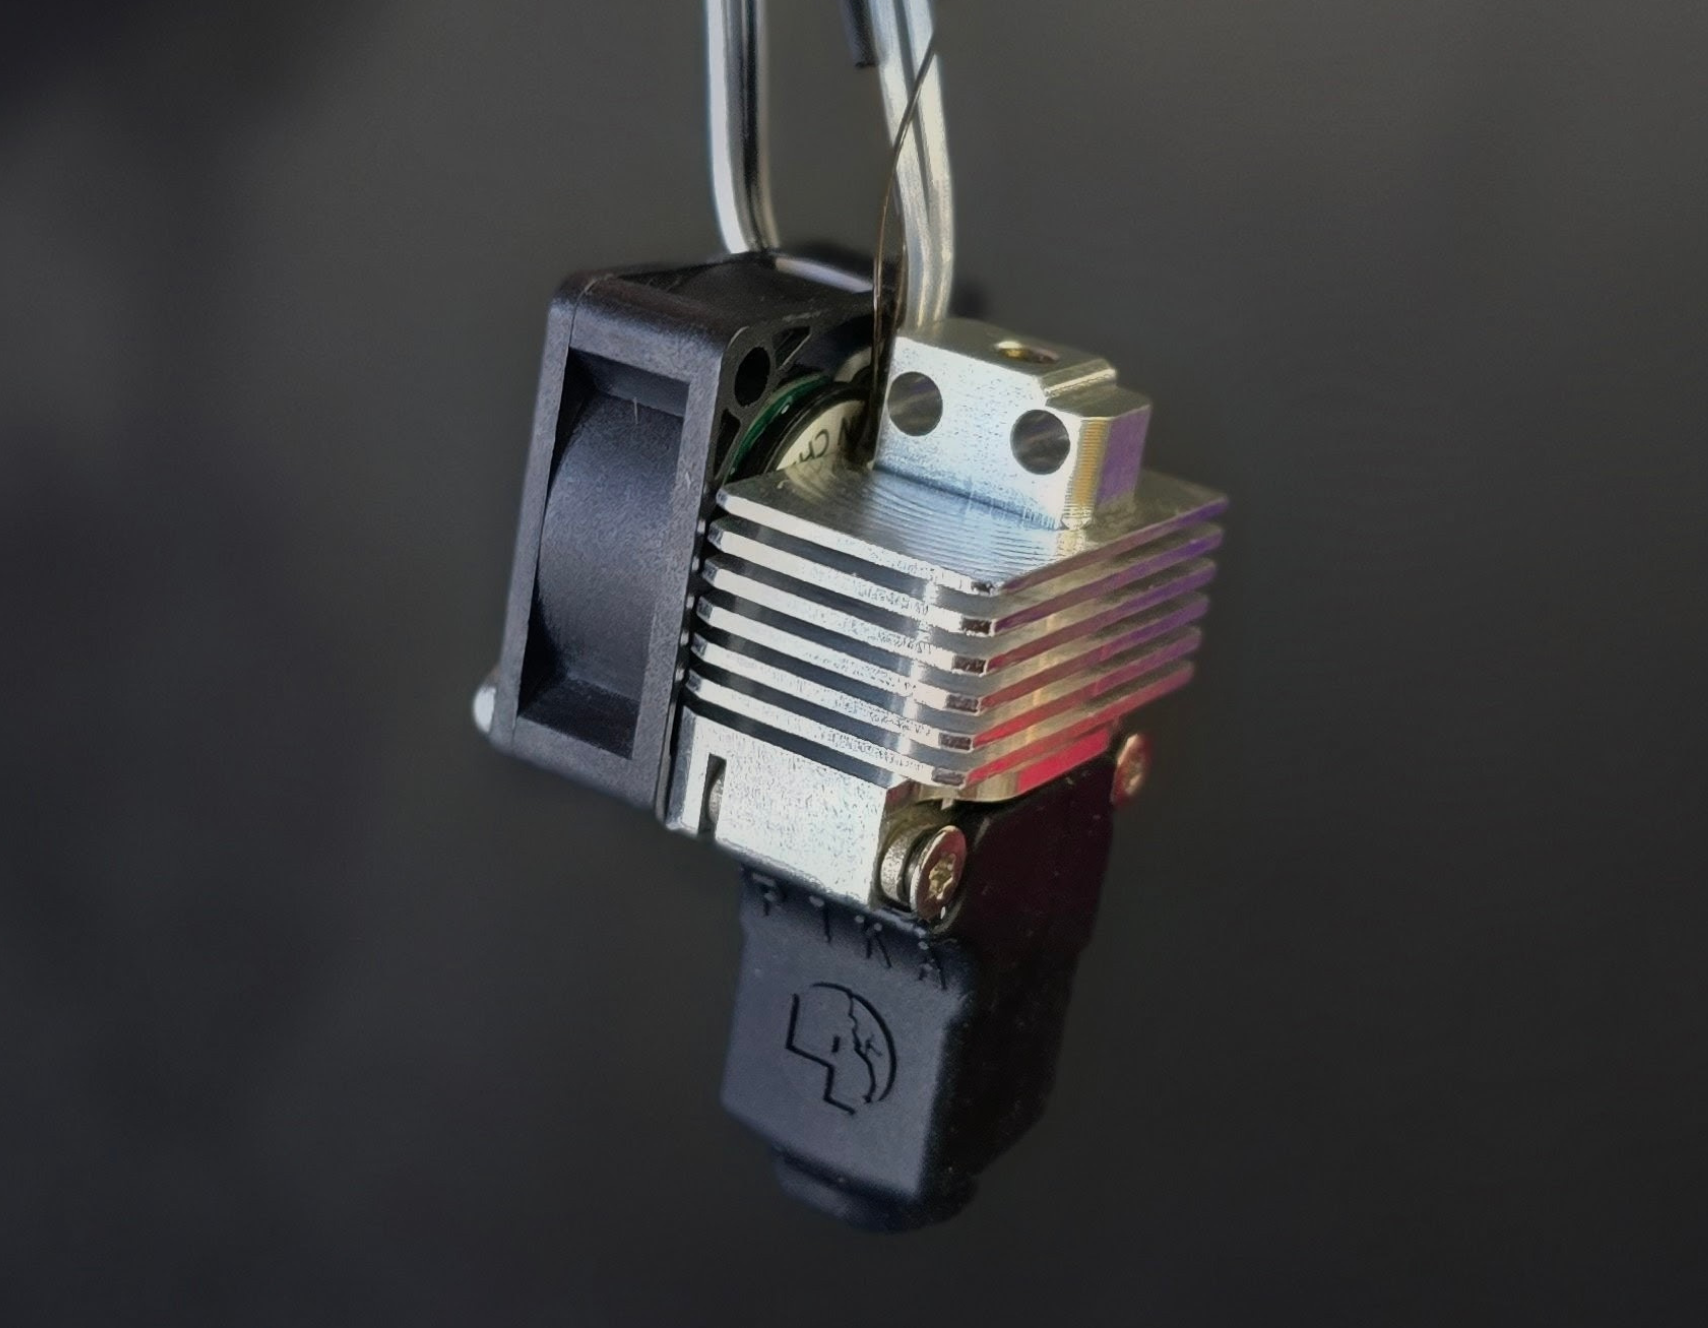
Pika for Bambu X1 Series Assembly Instructions
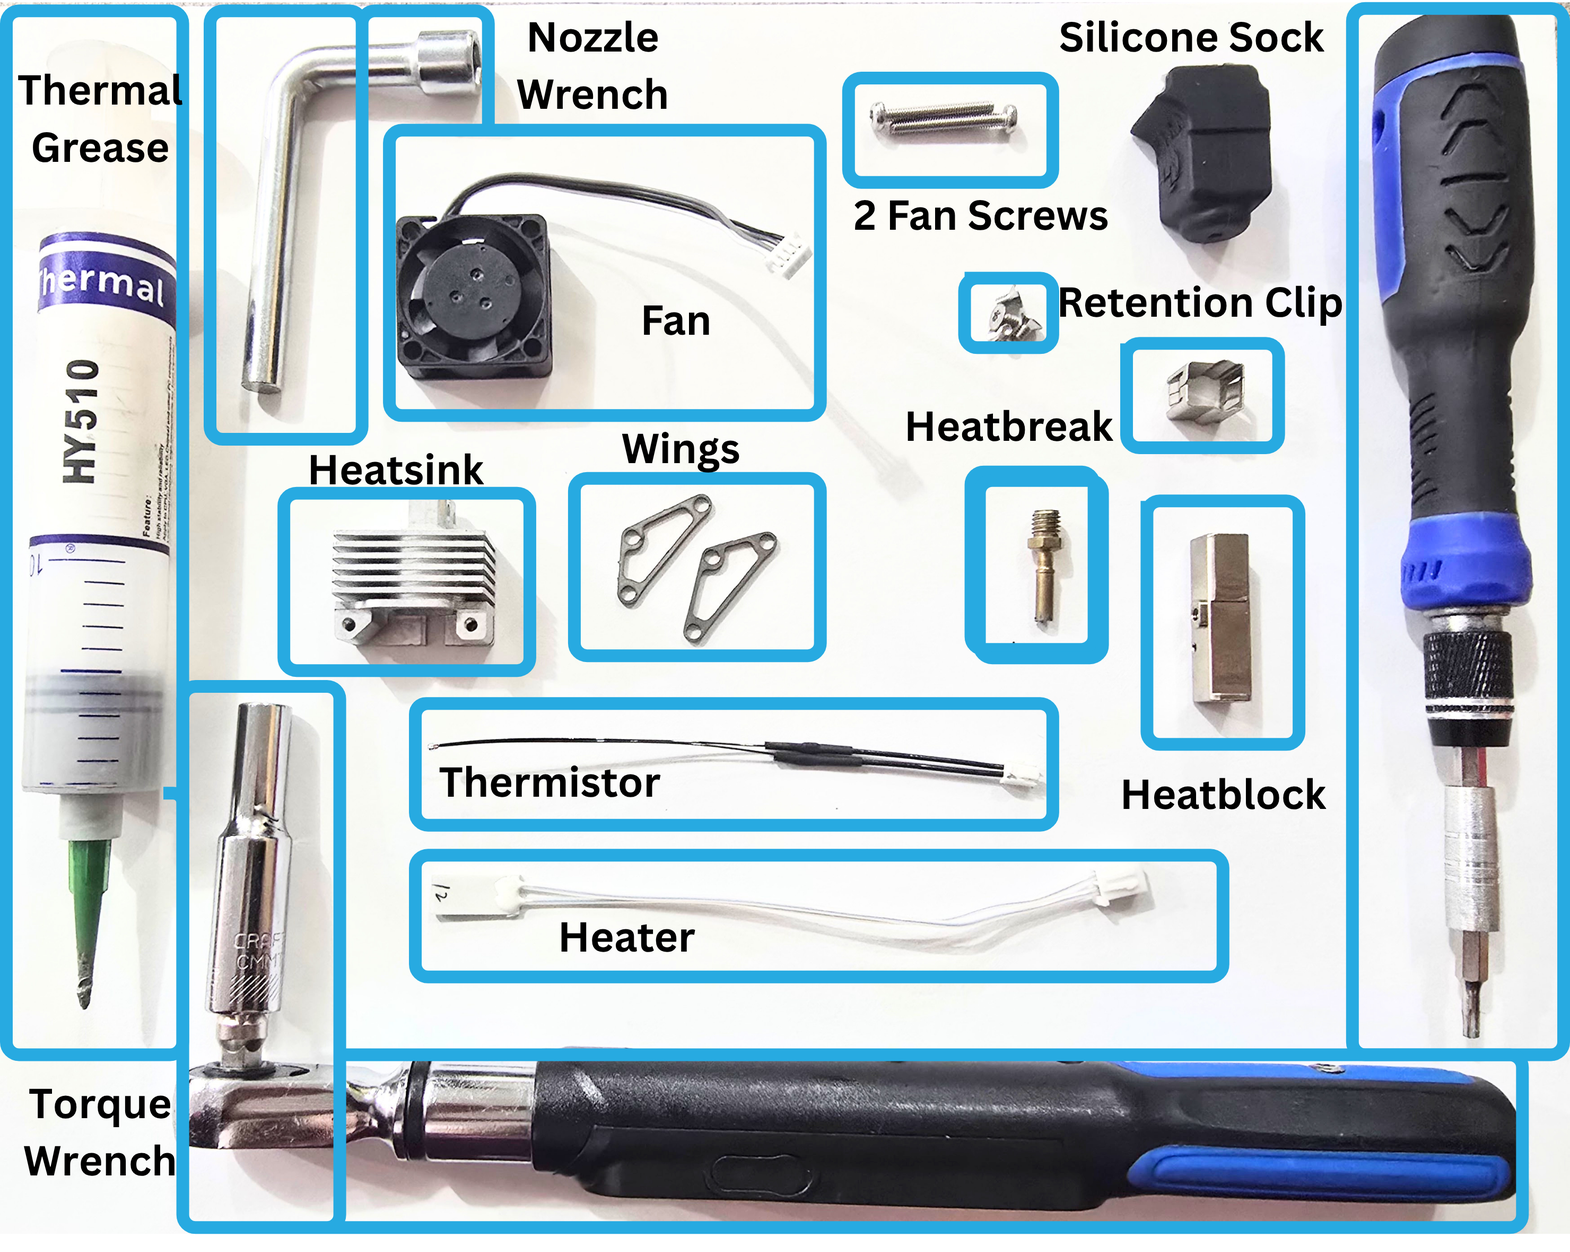
Everything Separate from Pika hotend parts you will need for Pika Hotend Assembly:
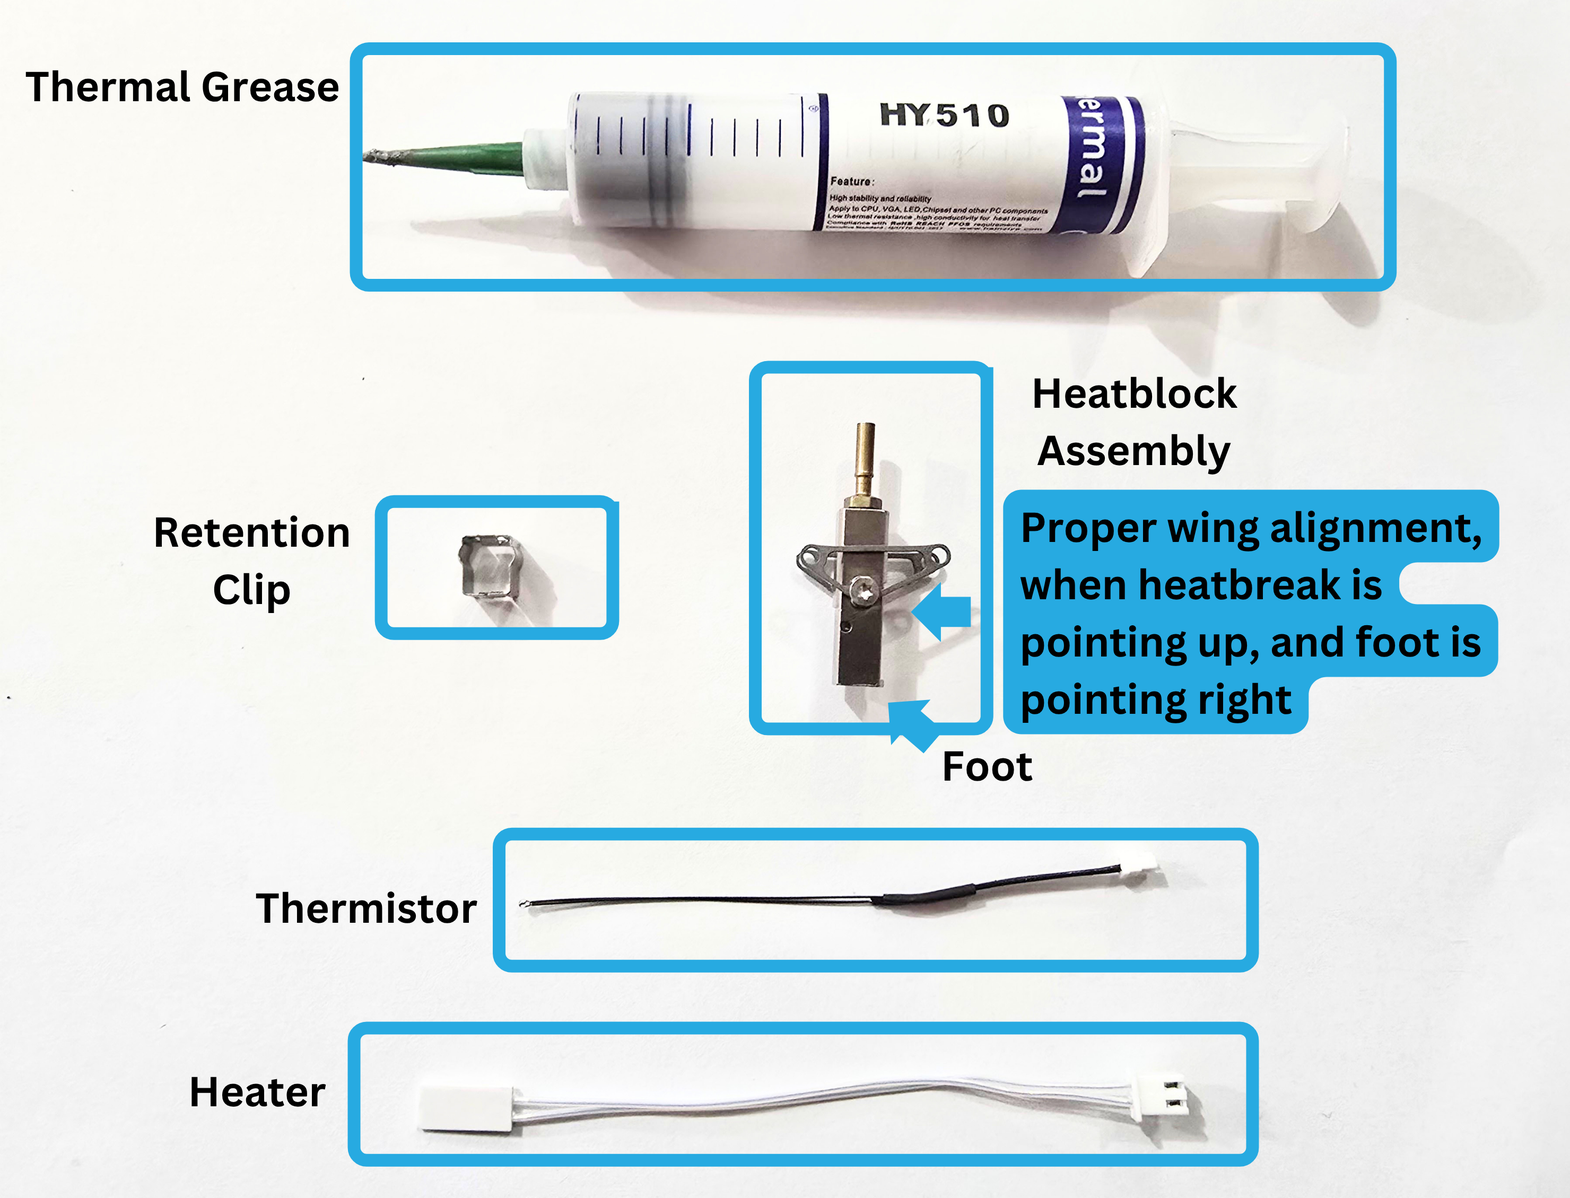
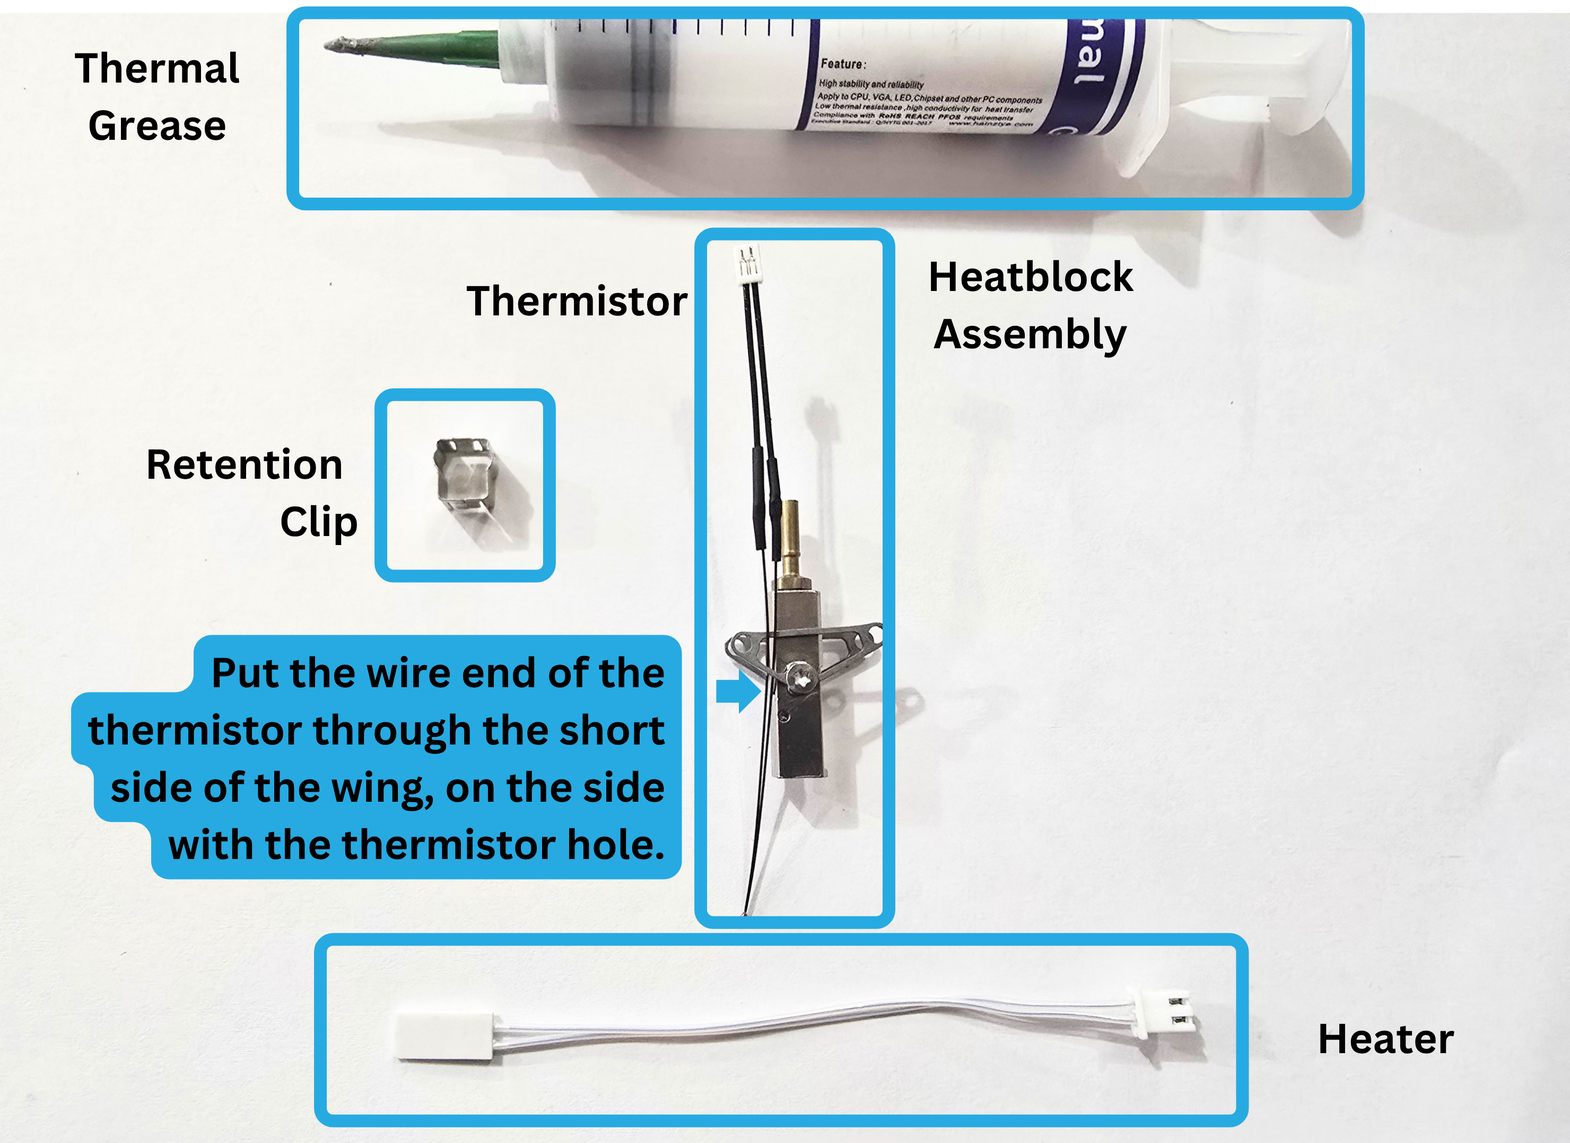
- Thermal Grease
- Thermal Grease Applicator
- 6mm Hex Nozzle Wrench
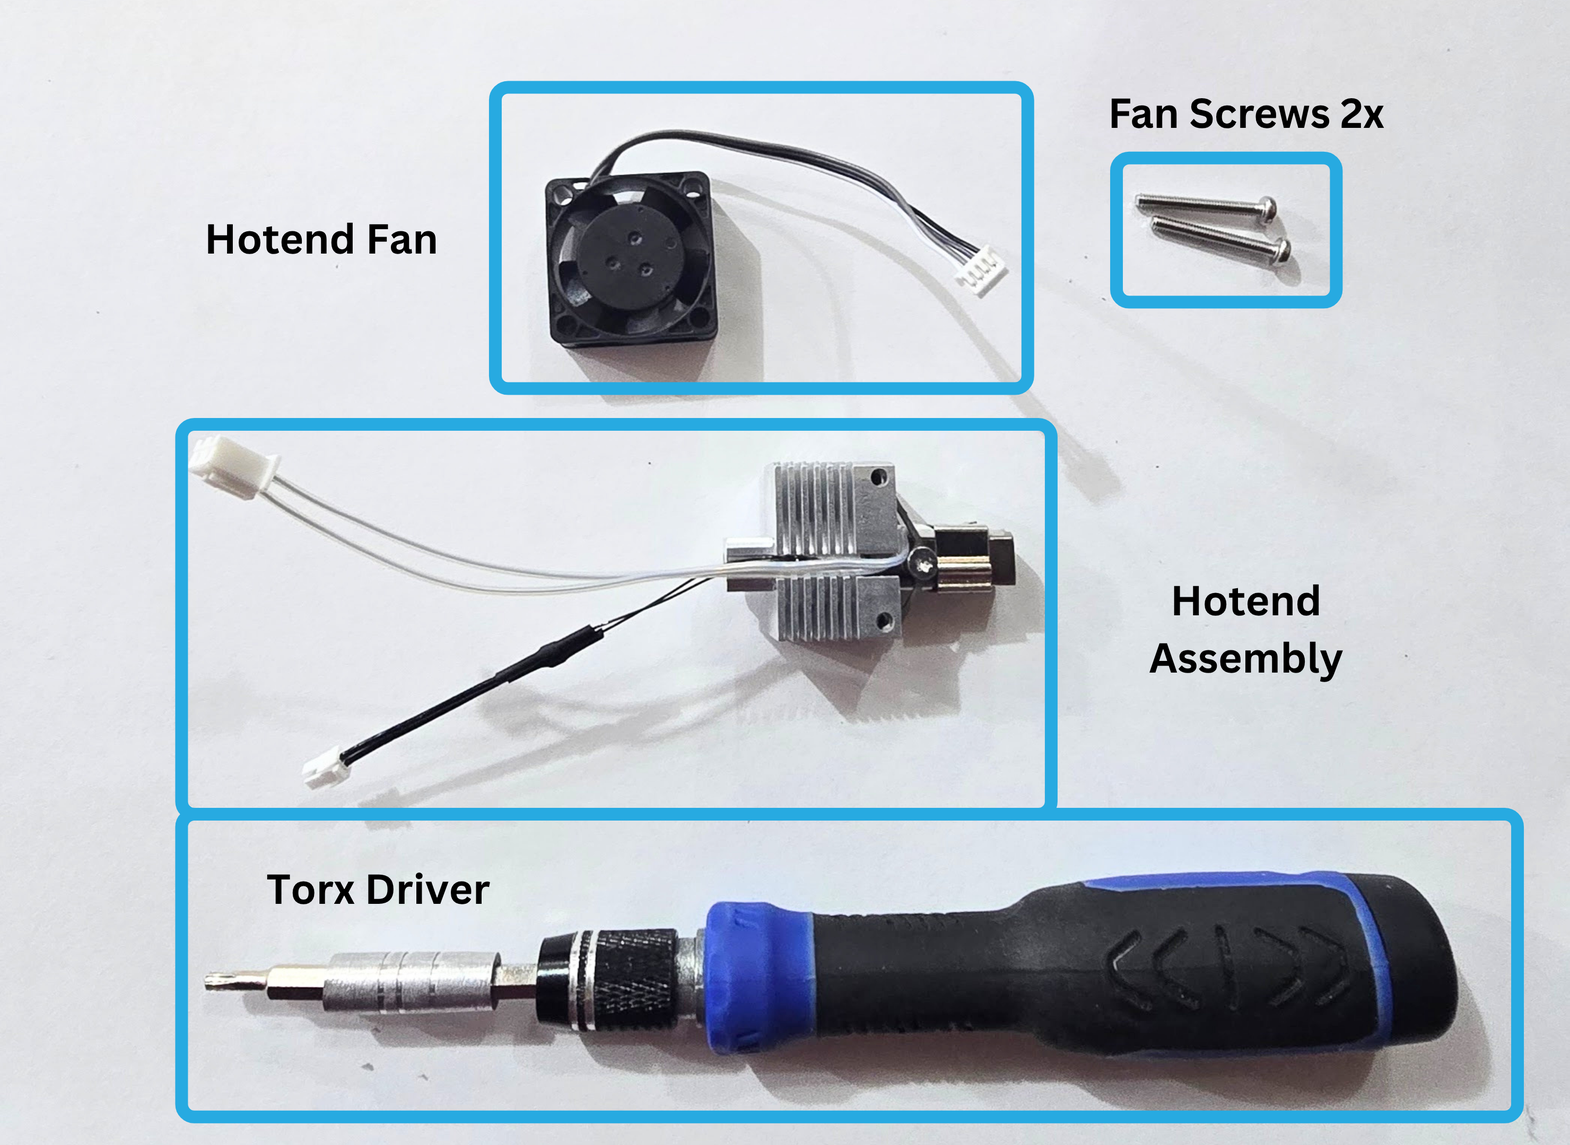
- Hotend Fan
- T8 Torx Driver
- Clamp
- Torque Wrench
Pika Hotend parts you will need for assembly:
- Pika Heatsink
- 2x Pika Wings
- 2x T8 Fan Screws
- Pika Silicone Sock
- Pika Heatbreak
- Pika Silicone Sock
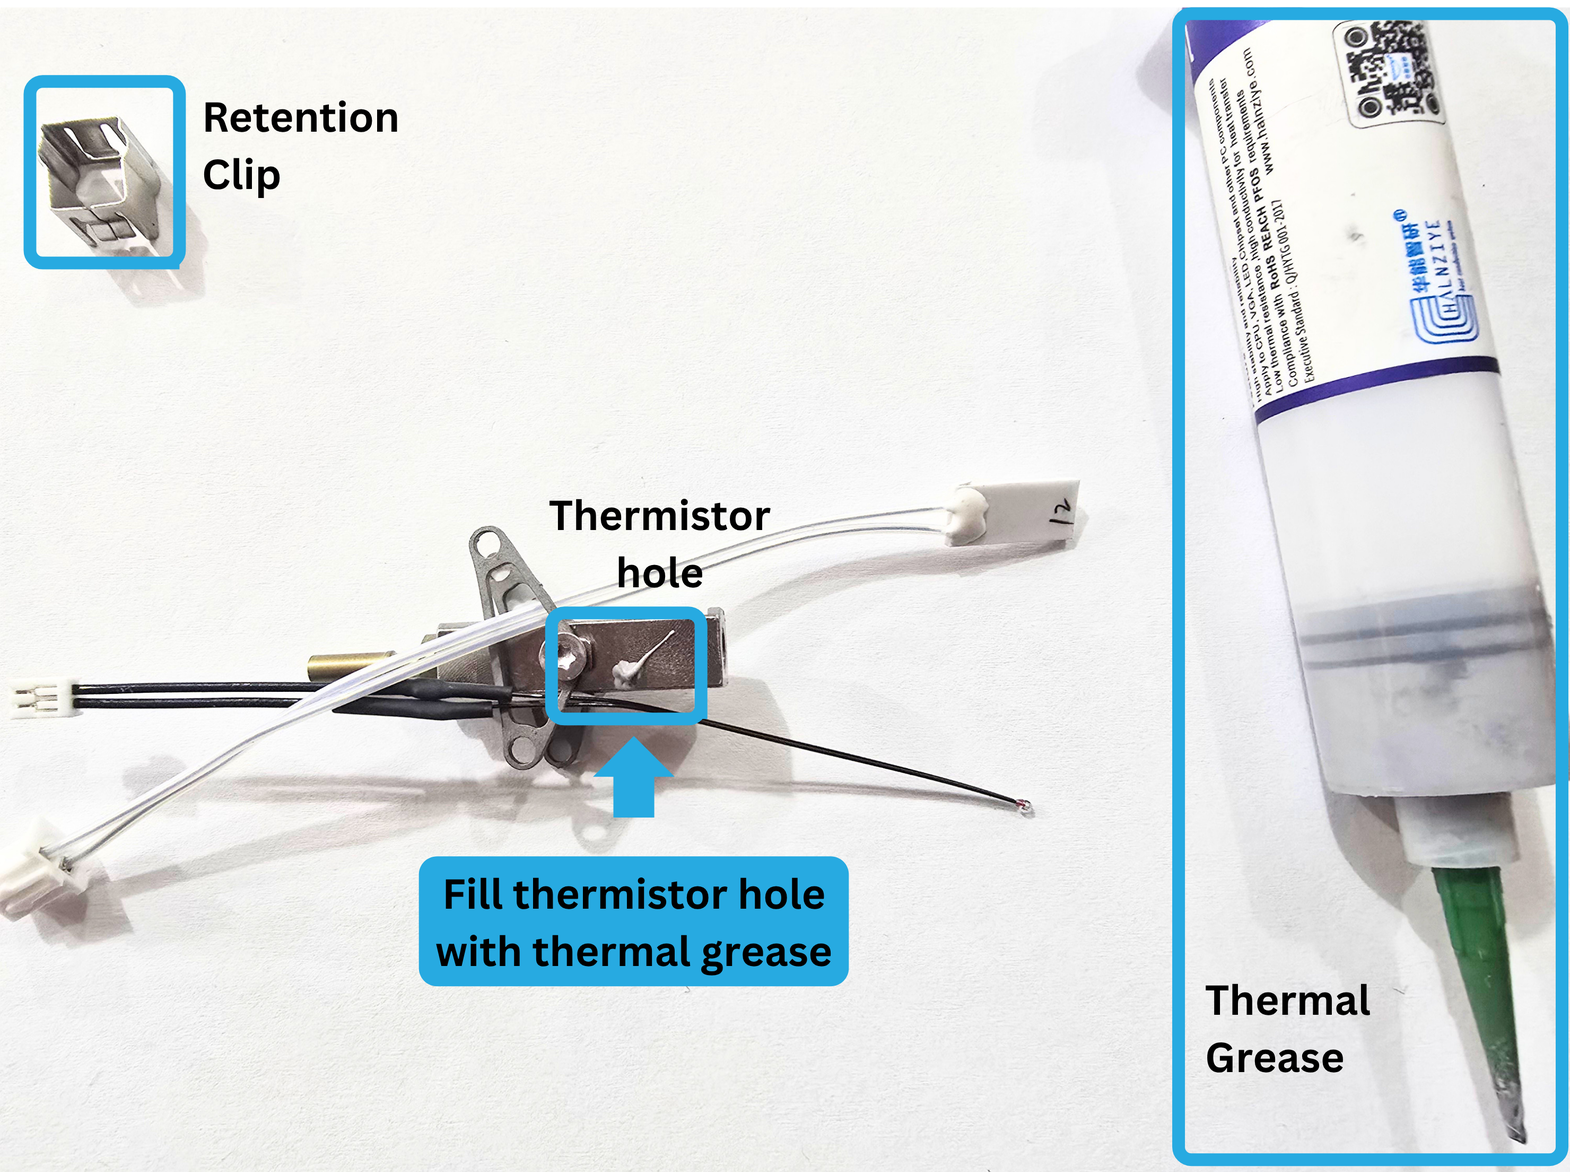
- Retention Clip
- Pika Heatblock
- x4 T8 wing screws
- Heater
- Thermistor
- FIN Nozzle
Step 1:
You will need:
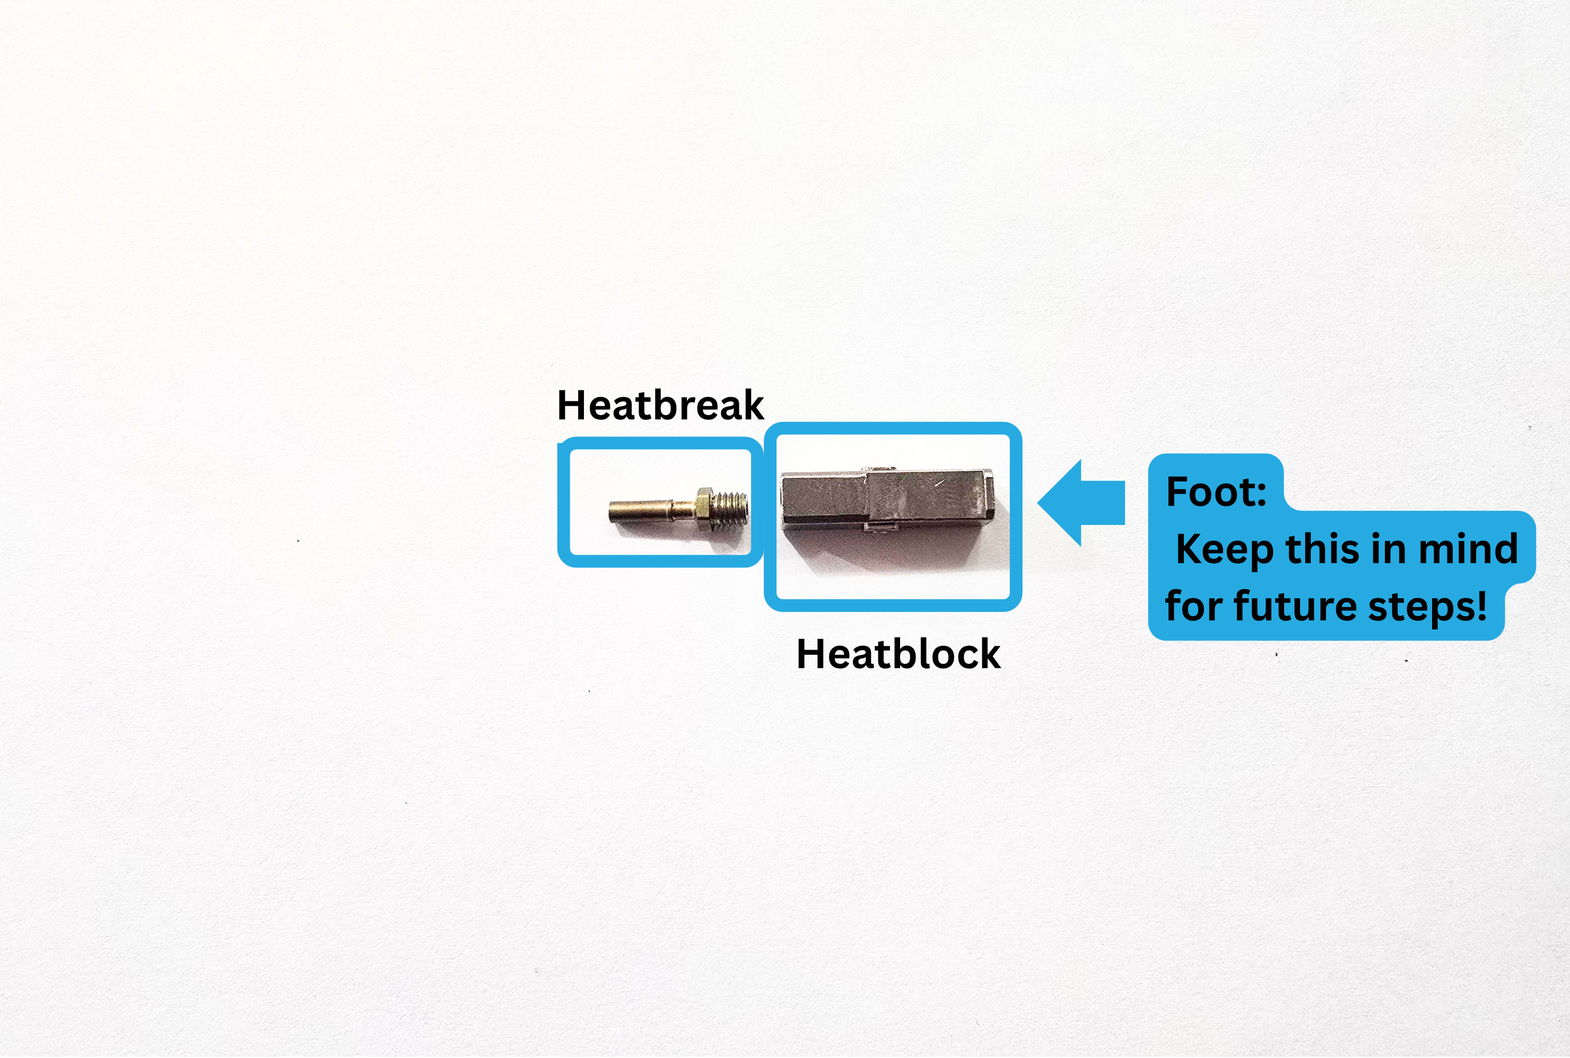
- Heatbreak
- Heatblock
- Torque Wrench
- Clamp/tool for holding block in place while torquing.
 1a:
1a:
Take your Heatbreak, and insert it into the side of the Heatblock that does not have the foot.
1b:
Begin turning the Heatbreak into the threads. Keep turning until you can't.
*If it is not easy to turn with your fingers, that is okay. The torque wrench will take care of it later!
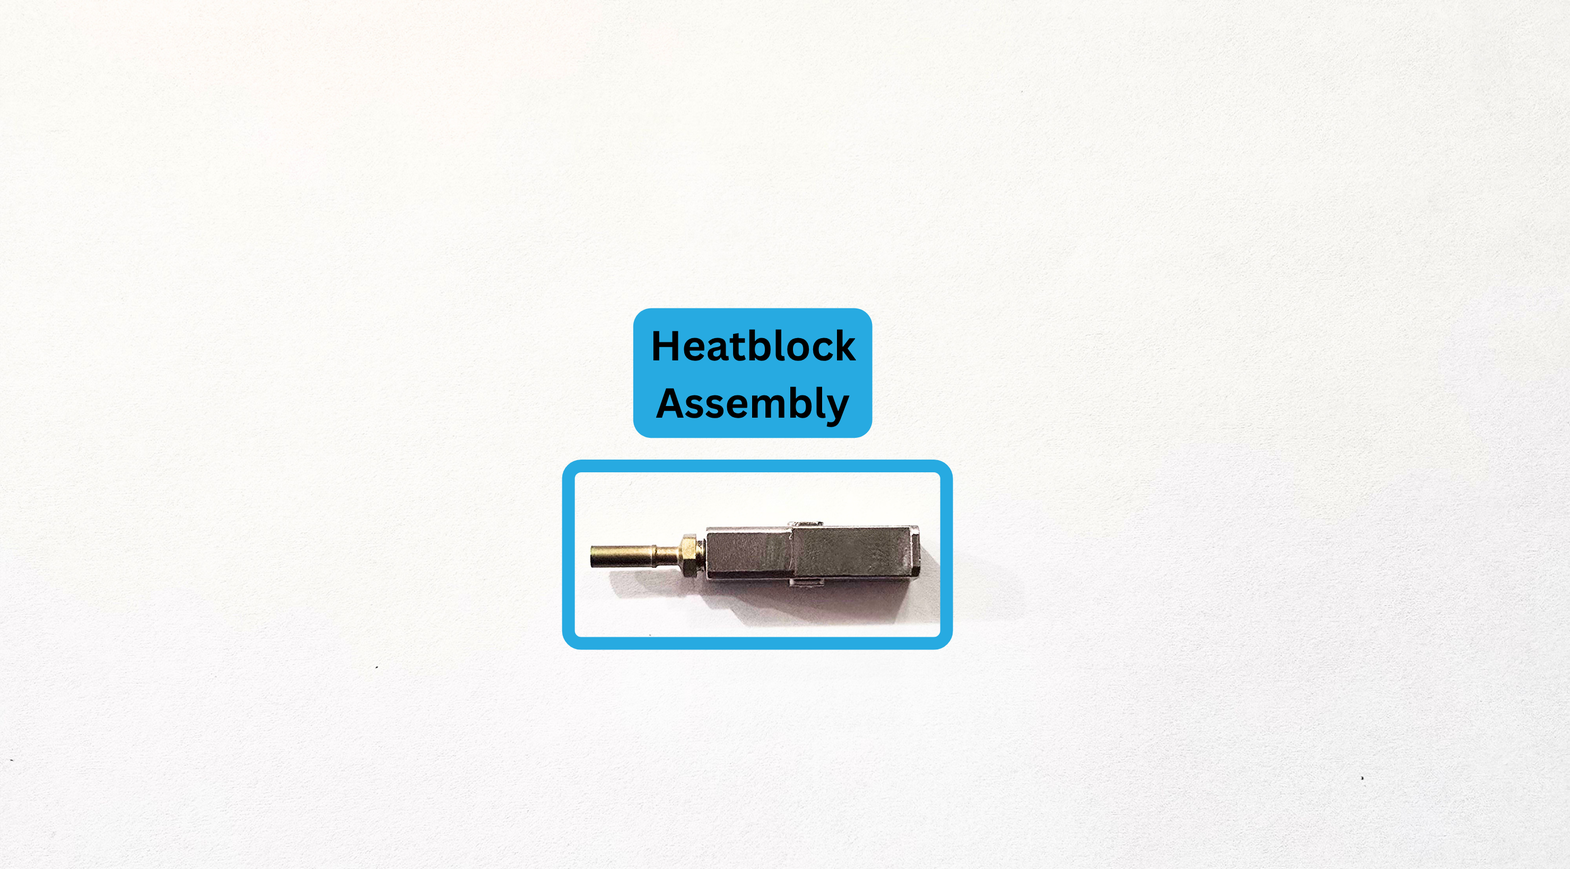
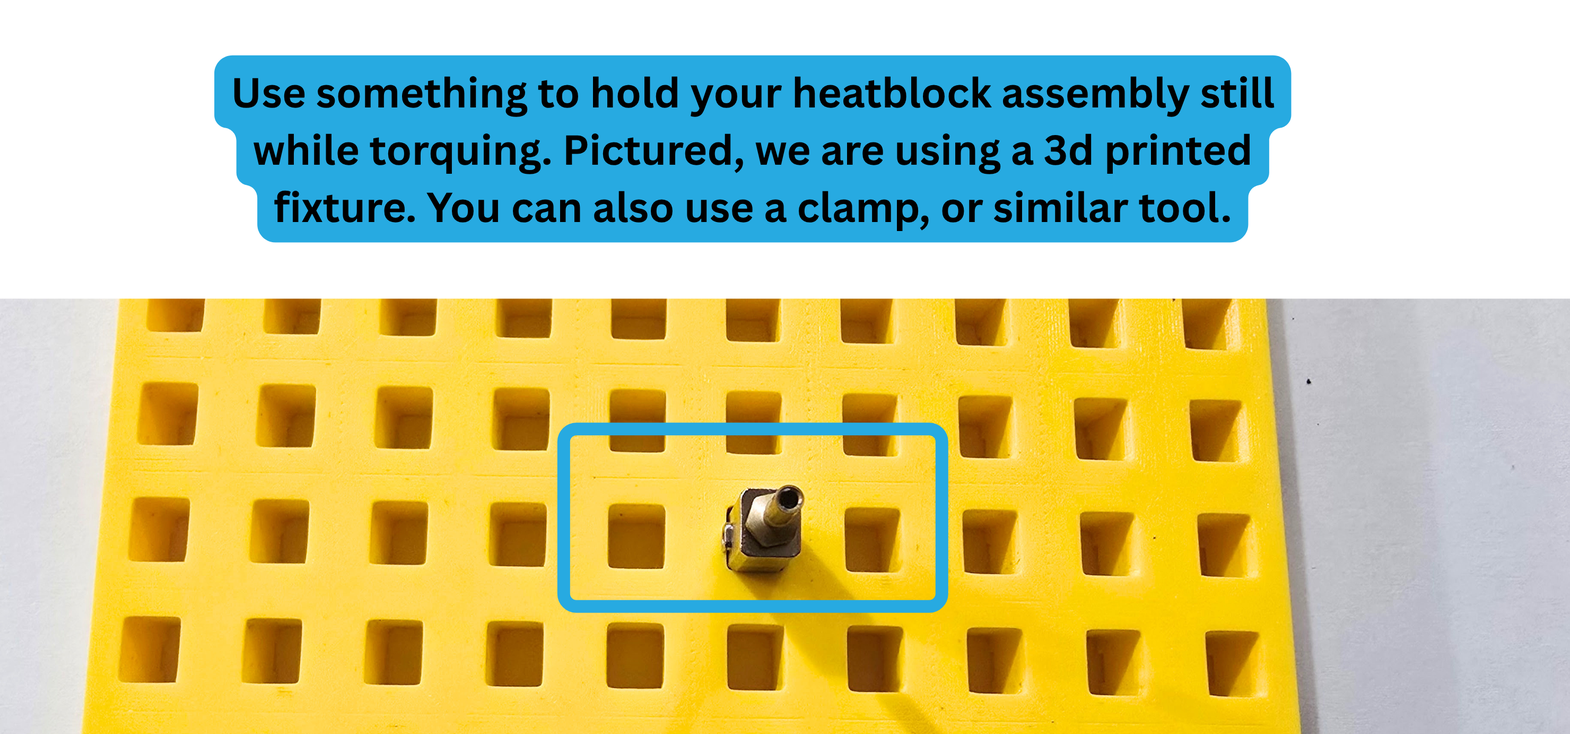
The image above is how your assembly should look before torquing.
1c:
Use a clamp to hold your block assembly in place. We use 3d printed fixturing.
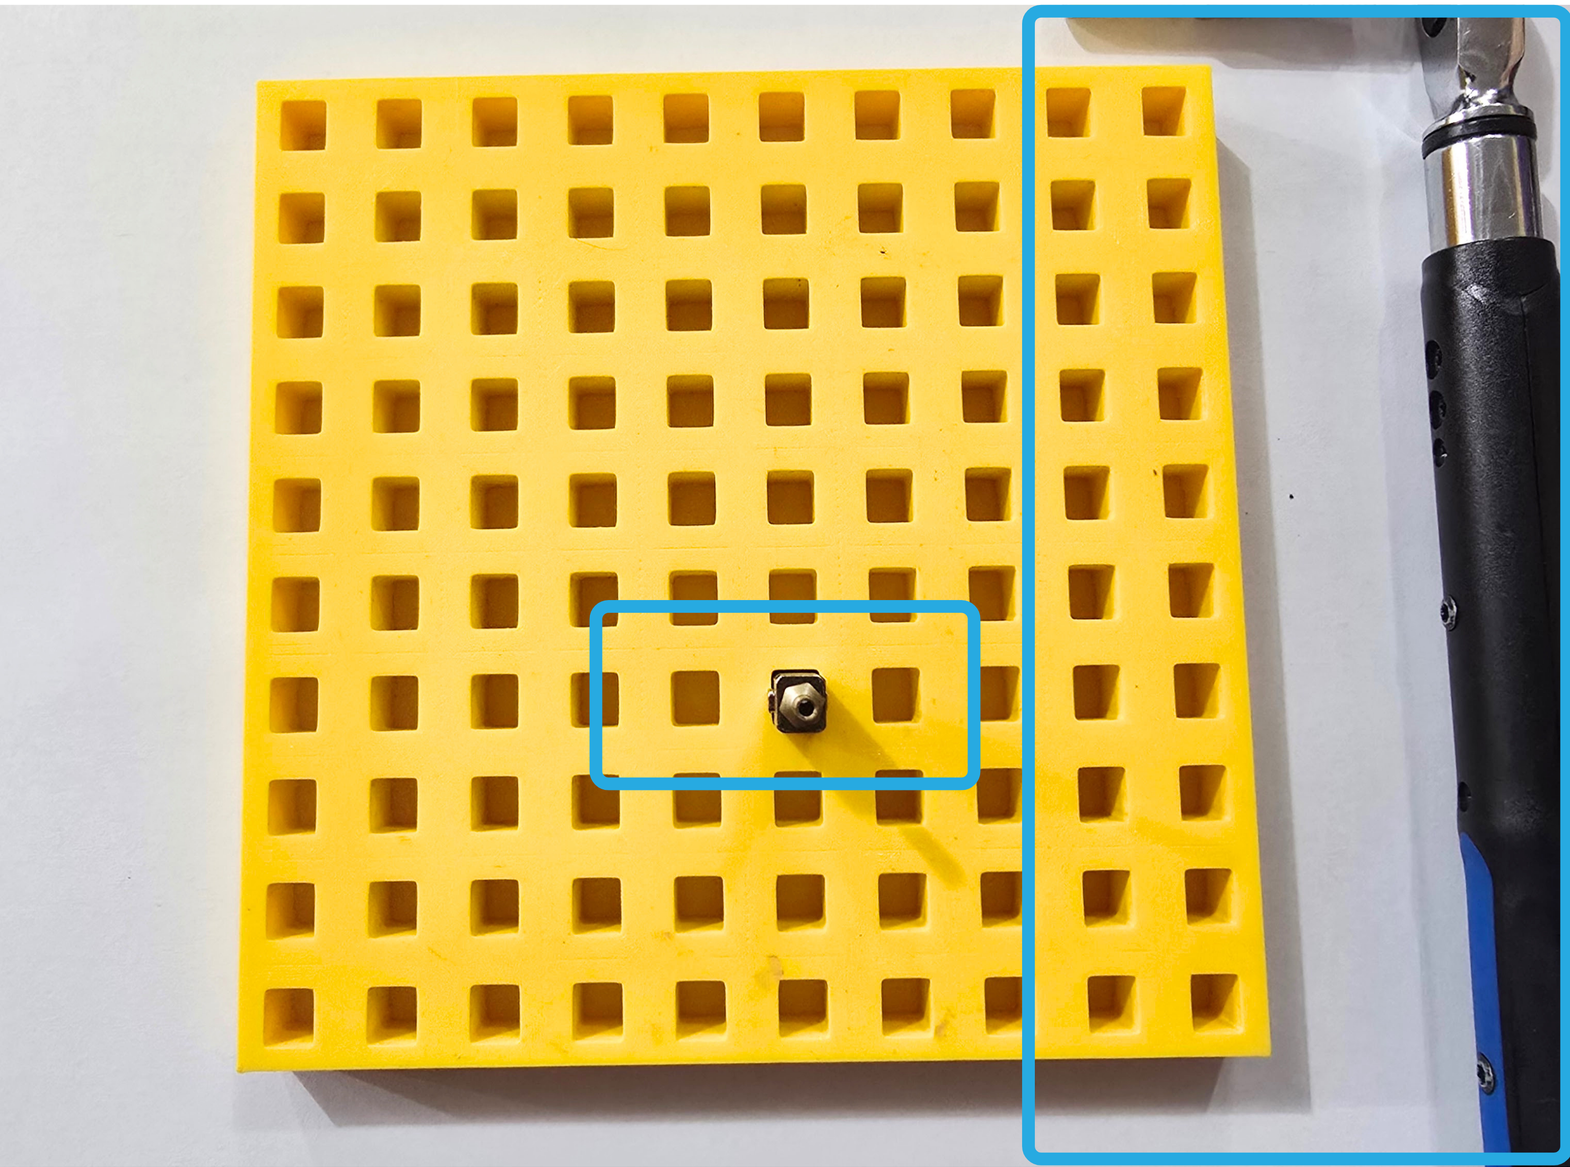
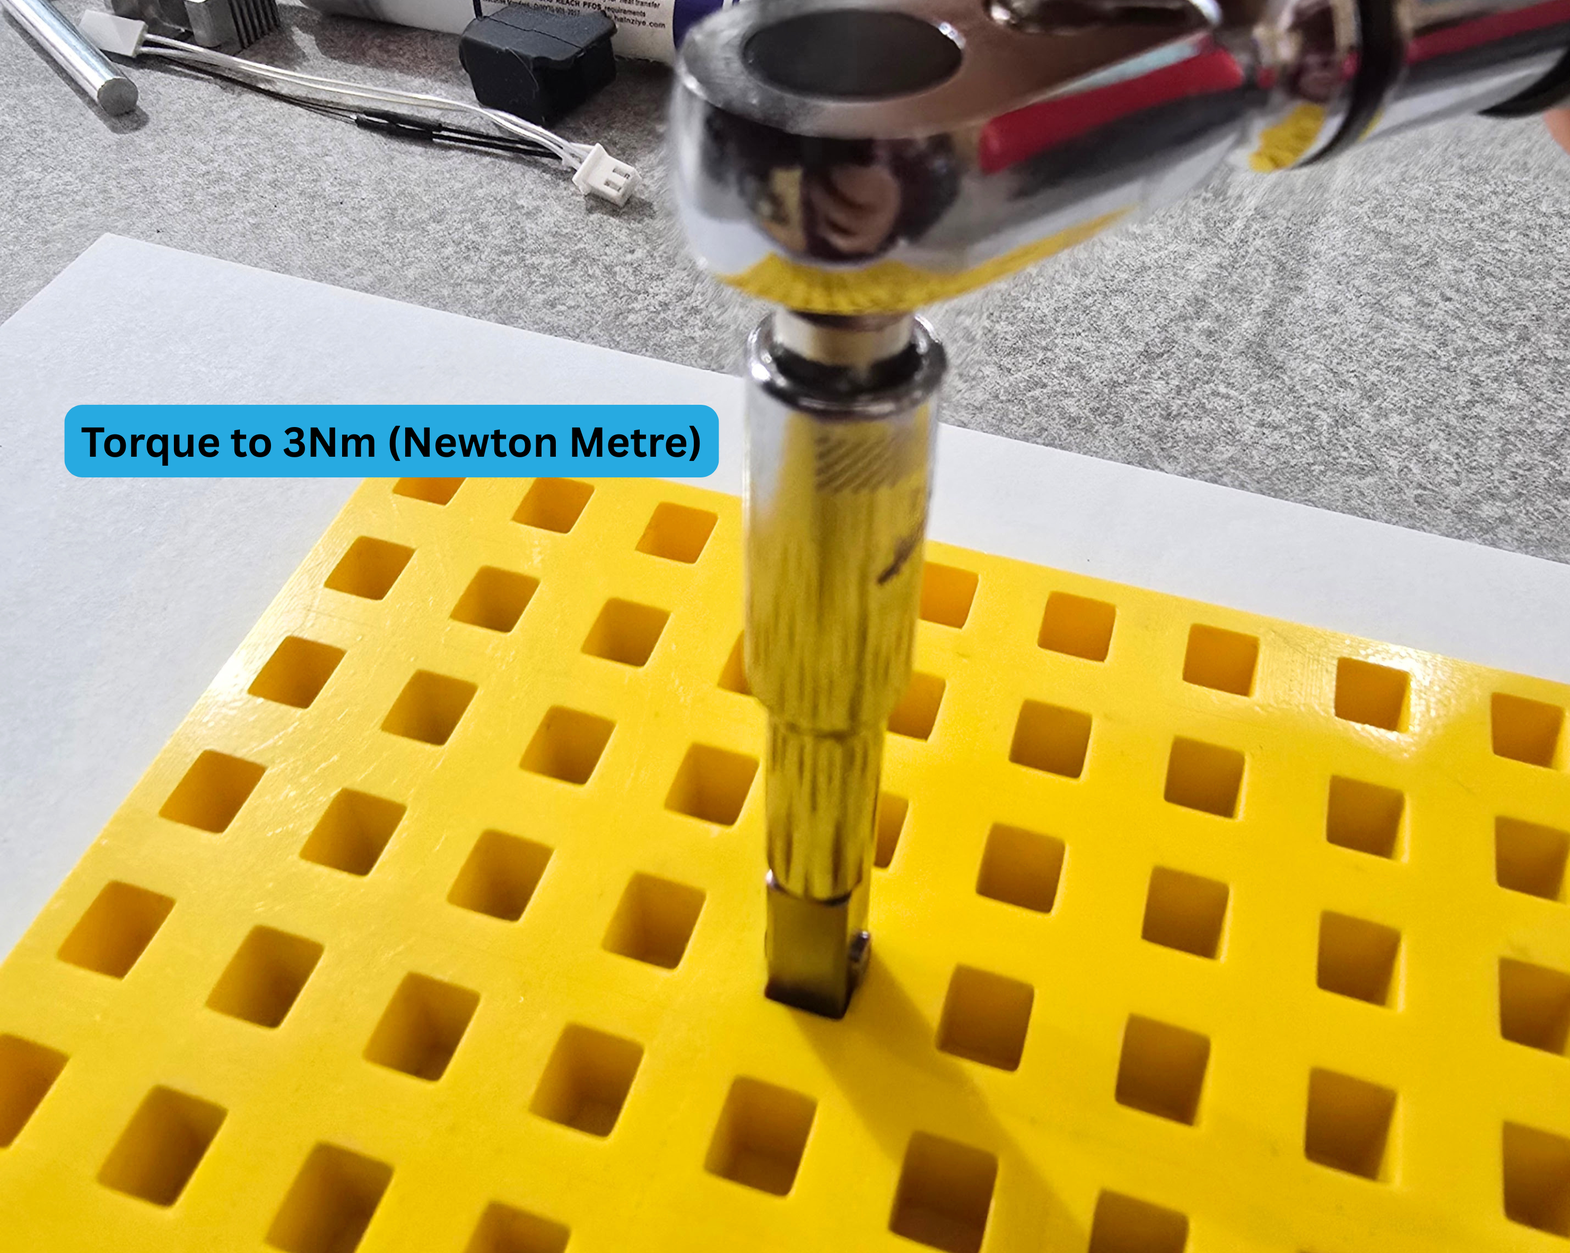
Use your torque wrench to tighten the heatbreak to 3Nm. If your heatbreak was not easy to finger tighten, you will need to use the torque wrench to turn the break a few times before the numbers start reading correctly.
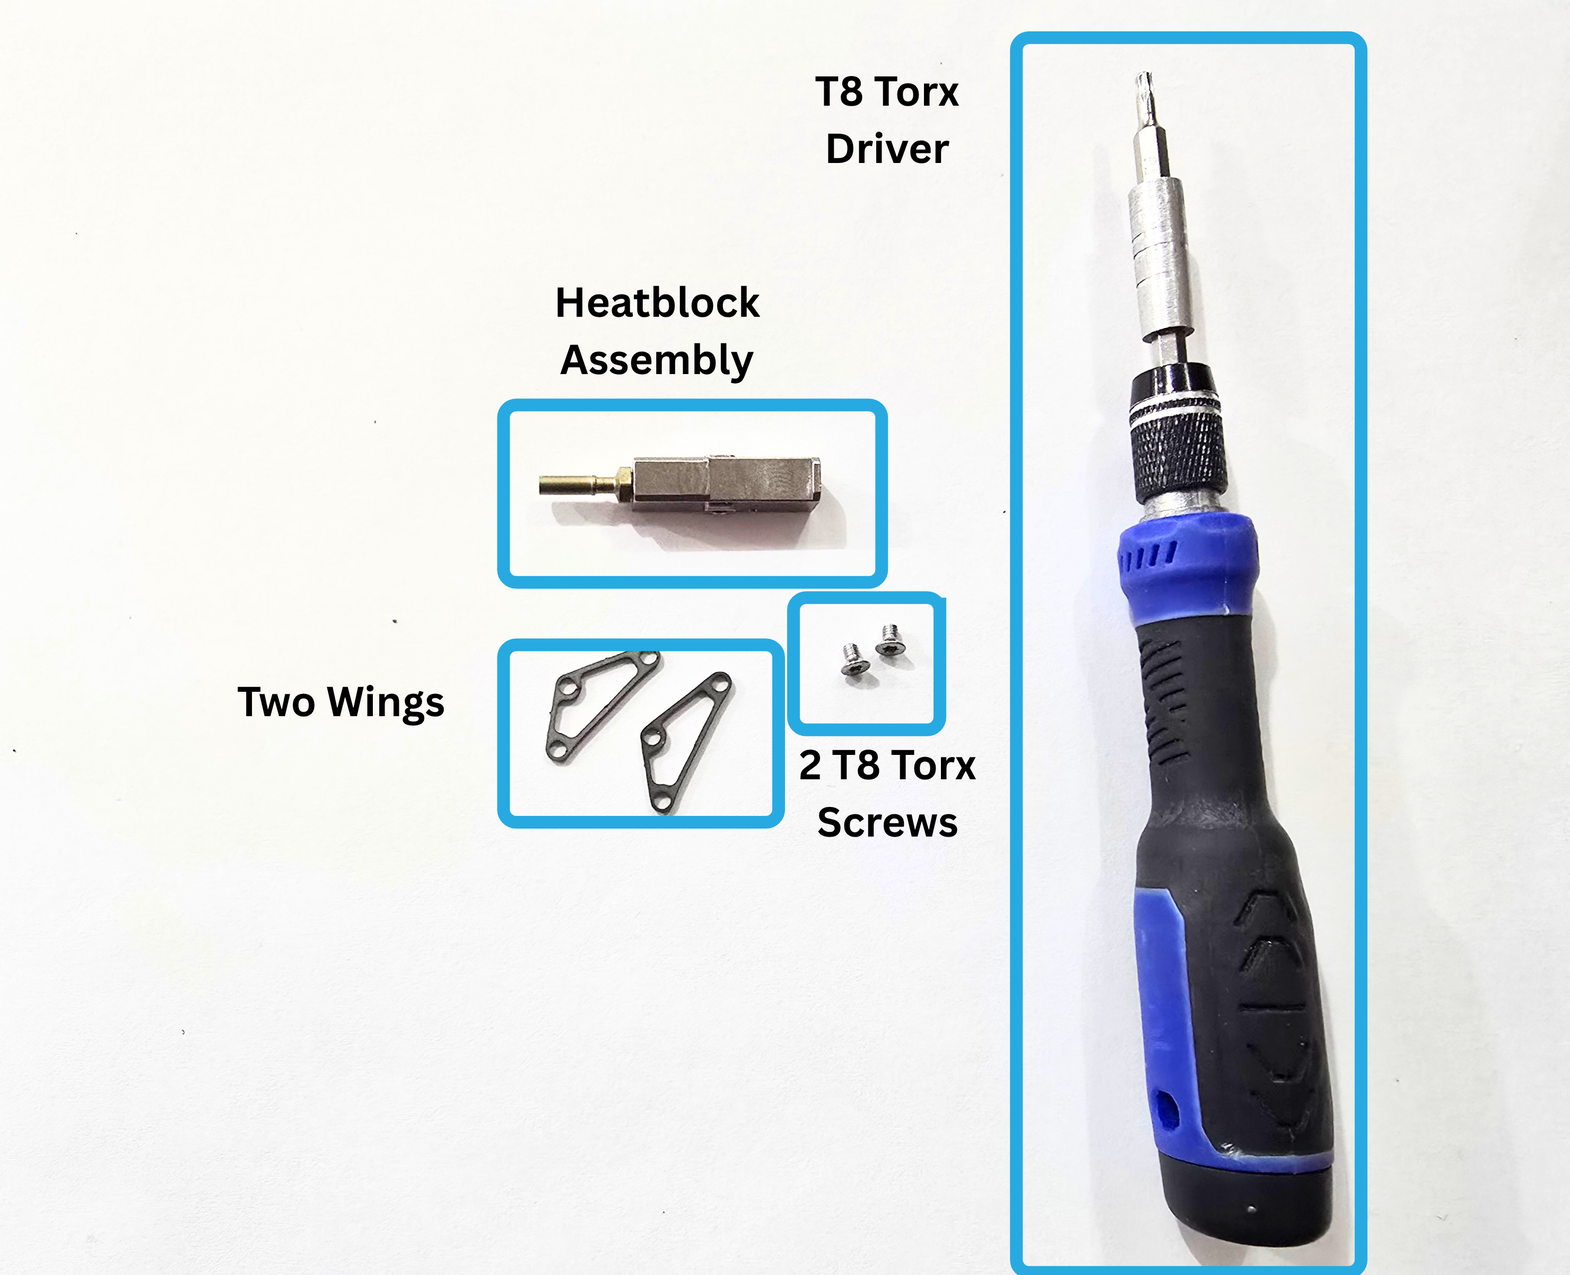
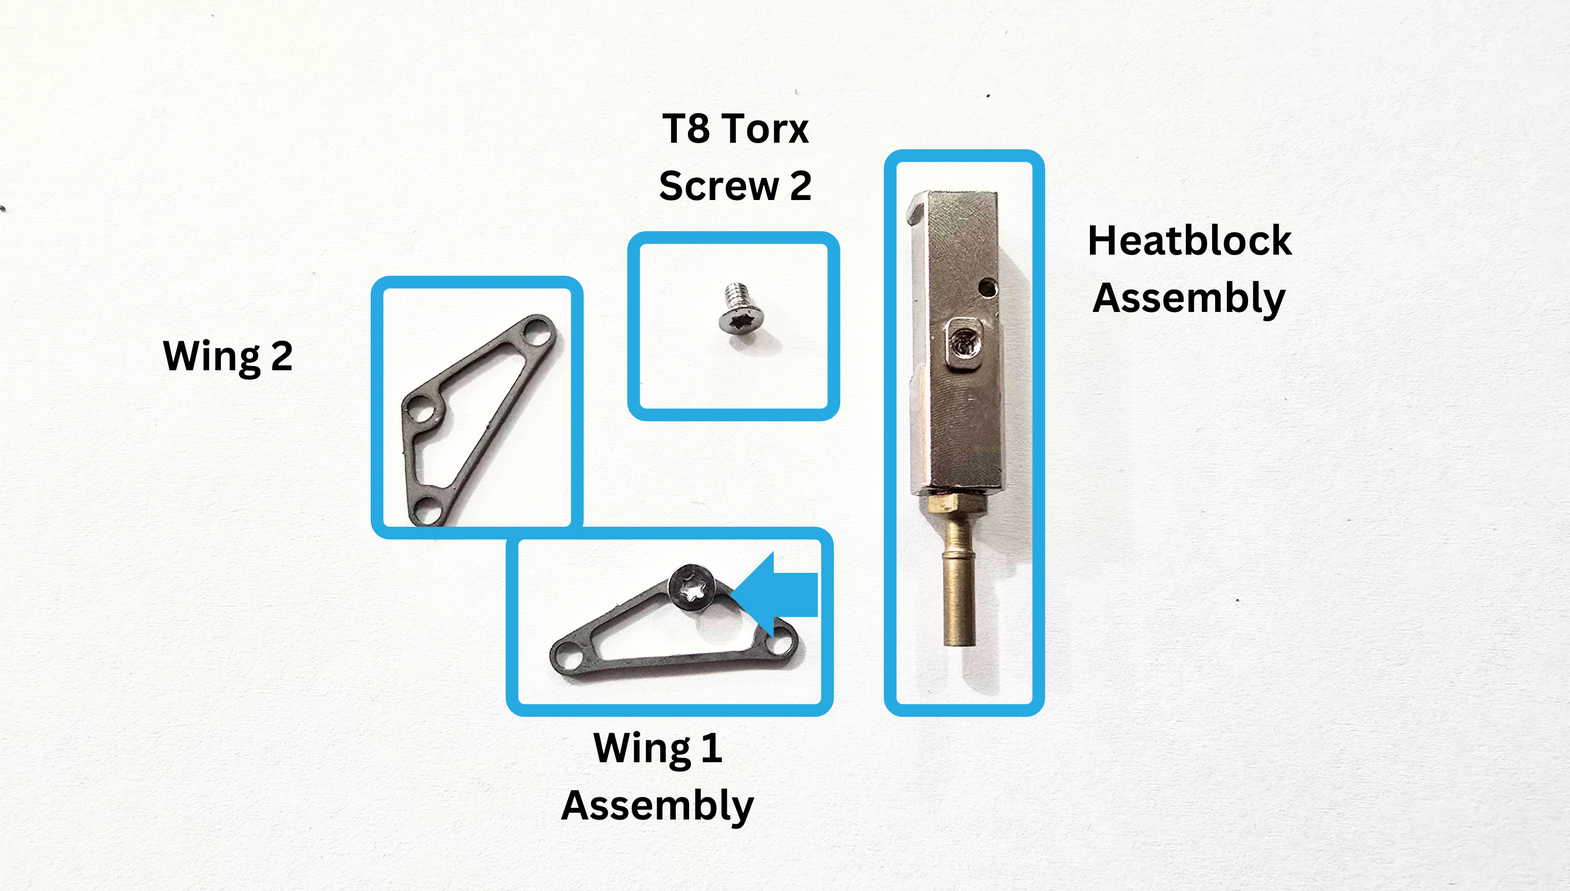
Step 2:
You will need:
- T8 Torx Driver
- Heatblock Assembly
- Two Pika Wings
- 2x T8 Torx Screws
2a:
Take one of the T8 Torx screws shown above.
Insert it through one of the wing holes, as shown below.
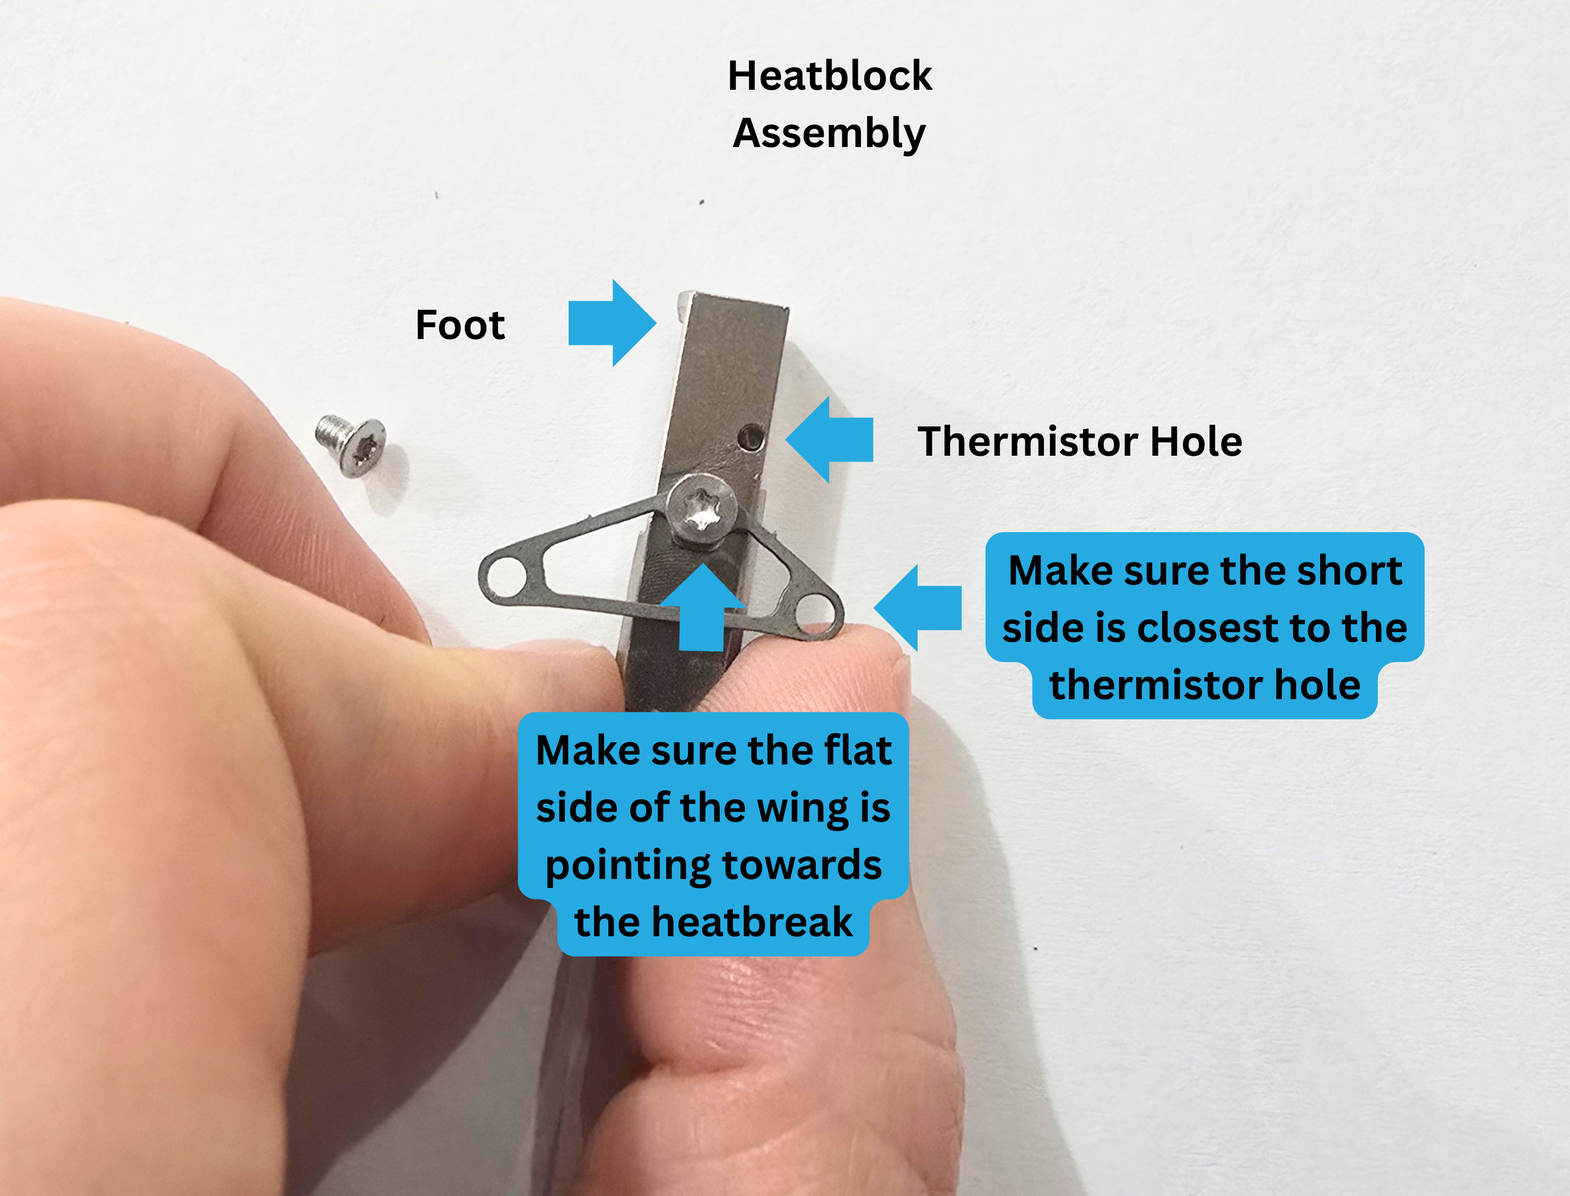
2b:
Affix the wing to the side of the heatblock that has the Thermistor Hole.
Make sure that the shortest side of the wing is on the side with the Thermistor Hole.
The flat side of the wing needs to be pointing towards the heatbreak.
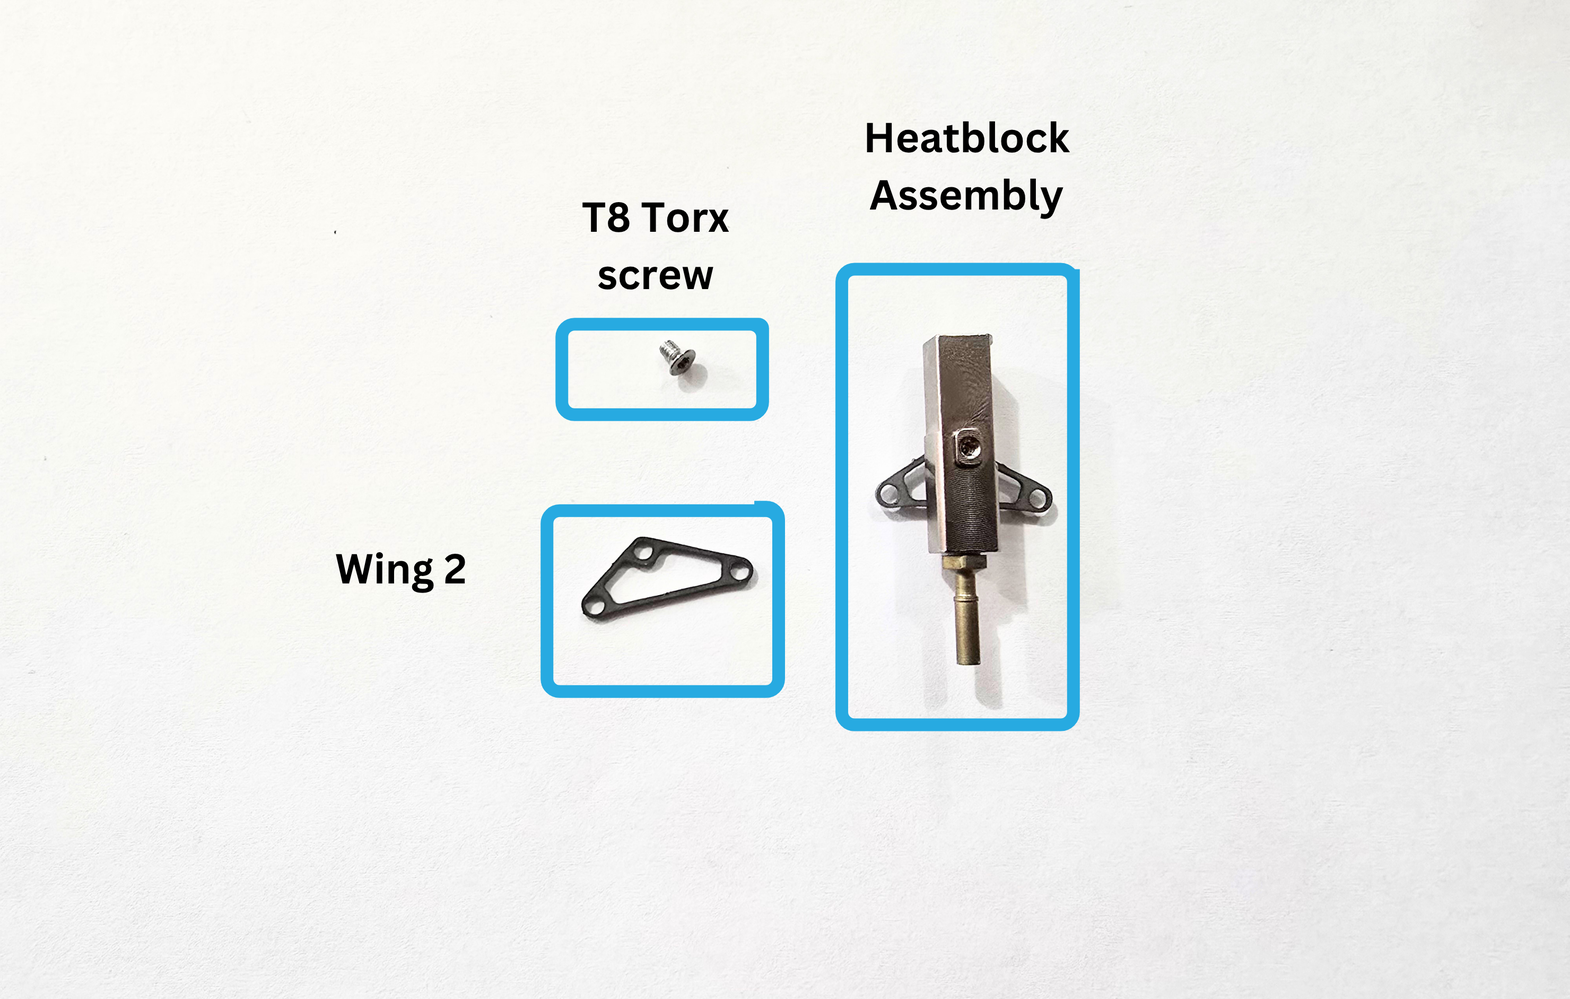
2c:
Flip the Pika Heatblock Assembly over, and affix the second wing using the T8 Torx screw.
It is easiest to insert the screw through the wing hole, and then set both on top of the Heatblock hole.
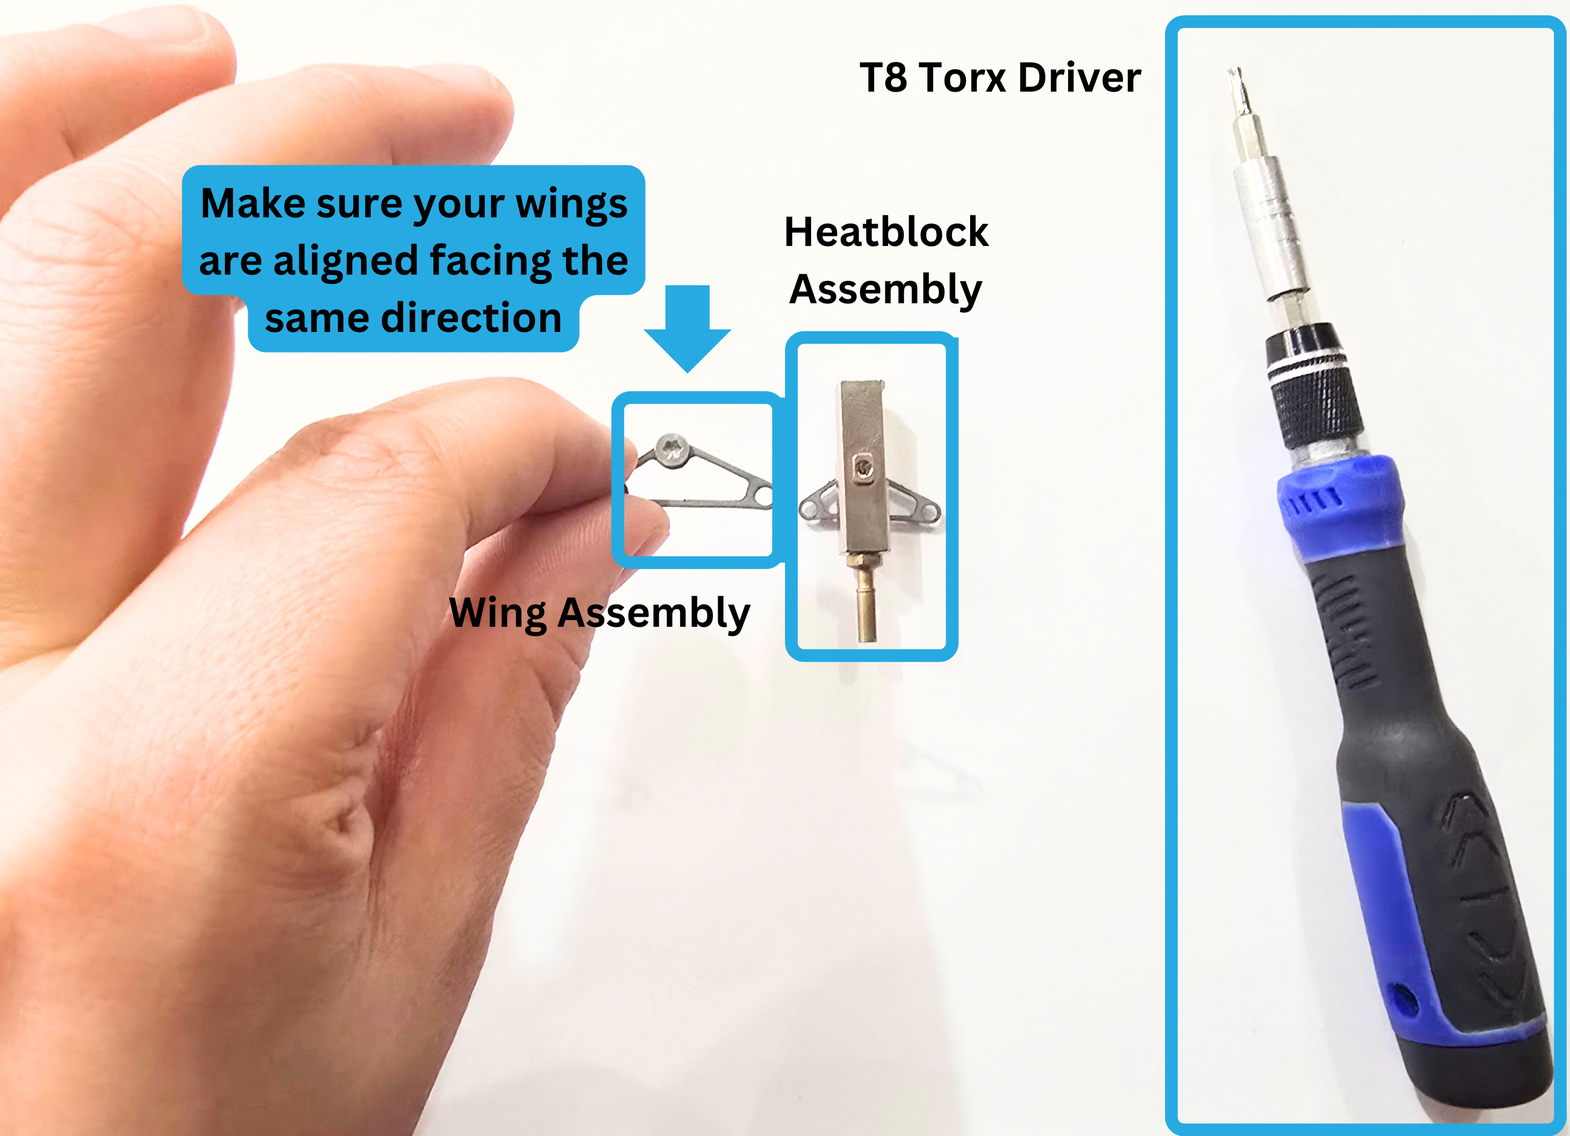
Make sure your wings are aligned facing the same direction.
Step 3:
For this step, you will need the following:
- Heatblock Assembly
- Thermal Grease
- Retention Clip
- Heater
- Thermistor
- T8 Torx Driver
3a:
Thread the thermistor wire through the wing on the Thermistor Hole side.
3b:
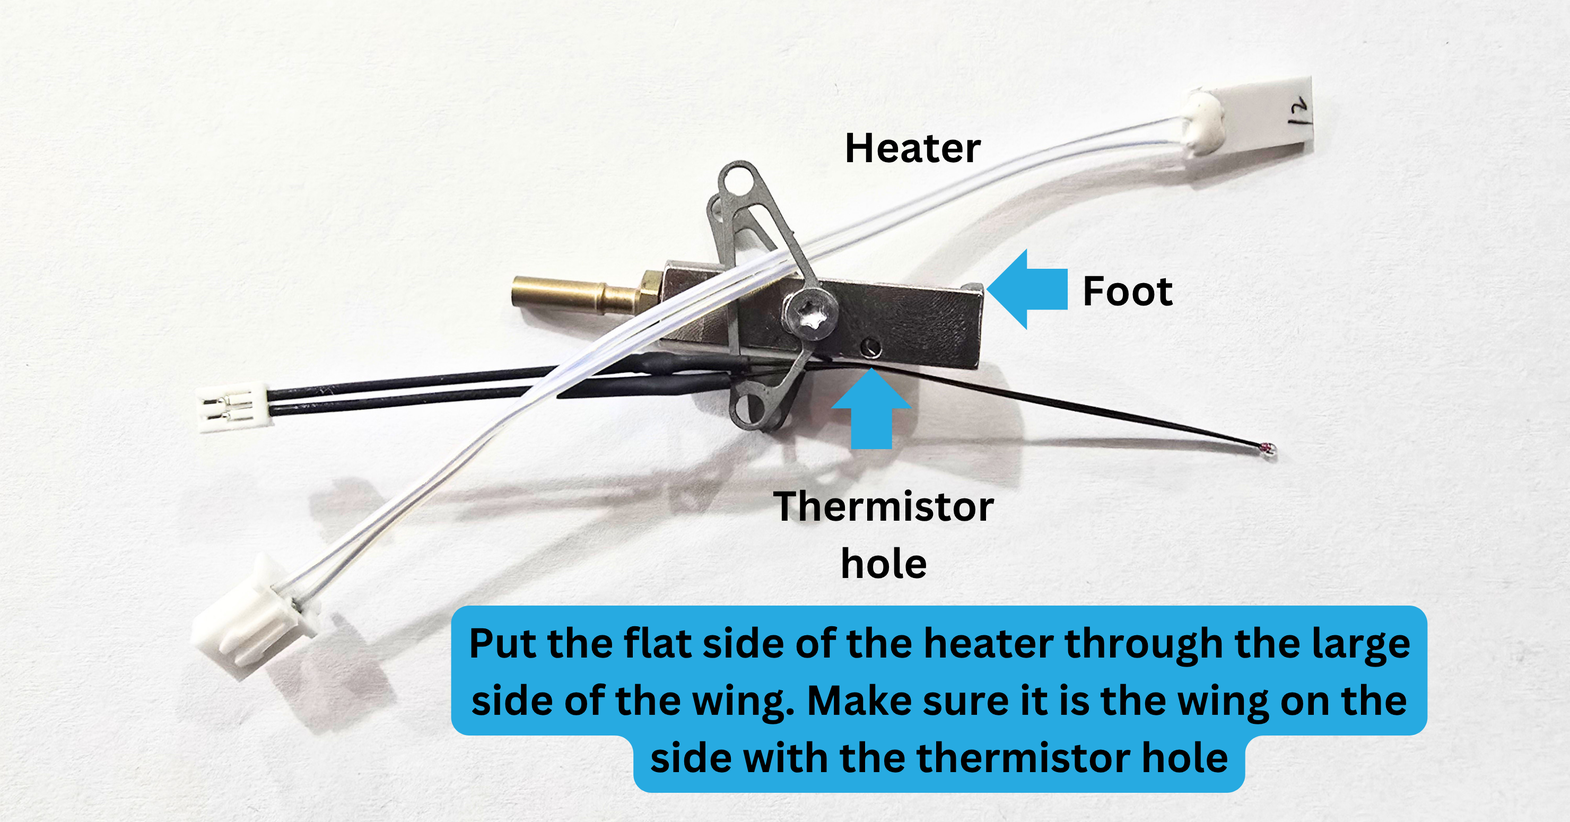
Loosen the wing on the Thermistor Hole side of the heatblock, so you can tip the wing down towards the Foot.
Now that there is enough space, you can thread the heating element side of the heater through the widest part of the wing.
Realign the wing, and tighten the torx screw enough that the wing isn't wiggly for the next steps.
3c:
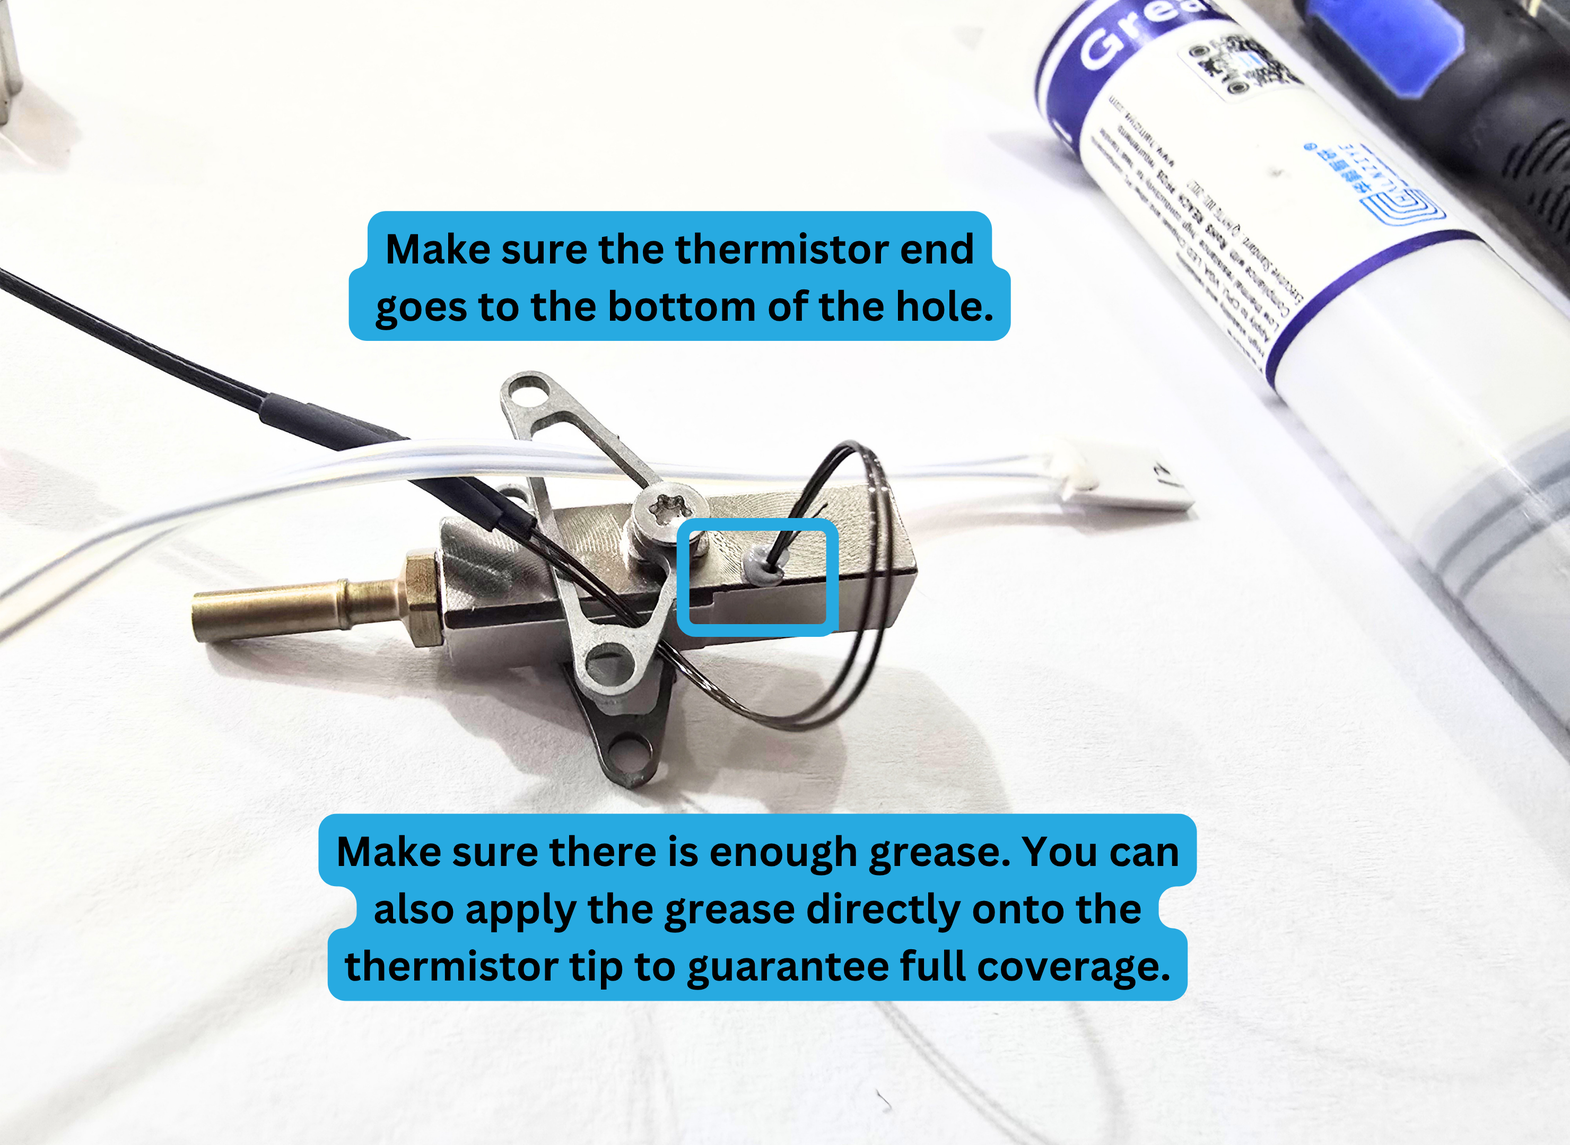
Take your Thermal Grease. If your thermal grease is in a tube, you may be able to squirt it directly into the Thermistor Hole.
If not, you can apply it directly to the tip of your thermistor. Make sure the grease is covering the entire "bead" at the end of your thermistor.
3d:
Next, insert the bead of your thermistor into the Thermistor Hole. Make sure to fully insert the thermistor, or your hotend temperature readings will not be accurate.
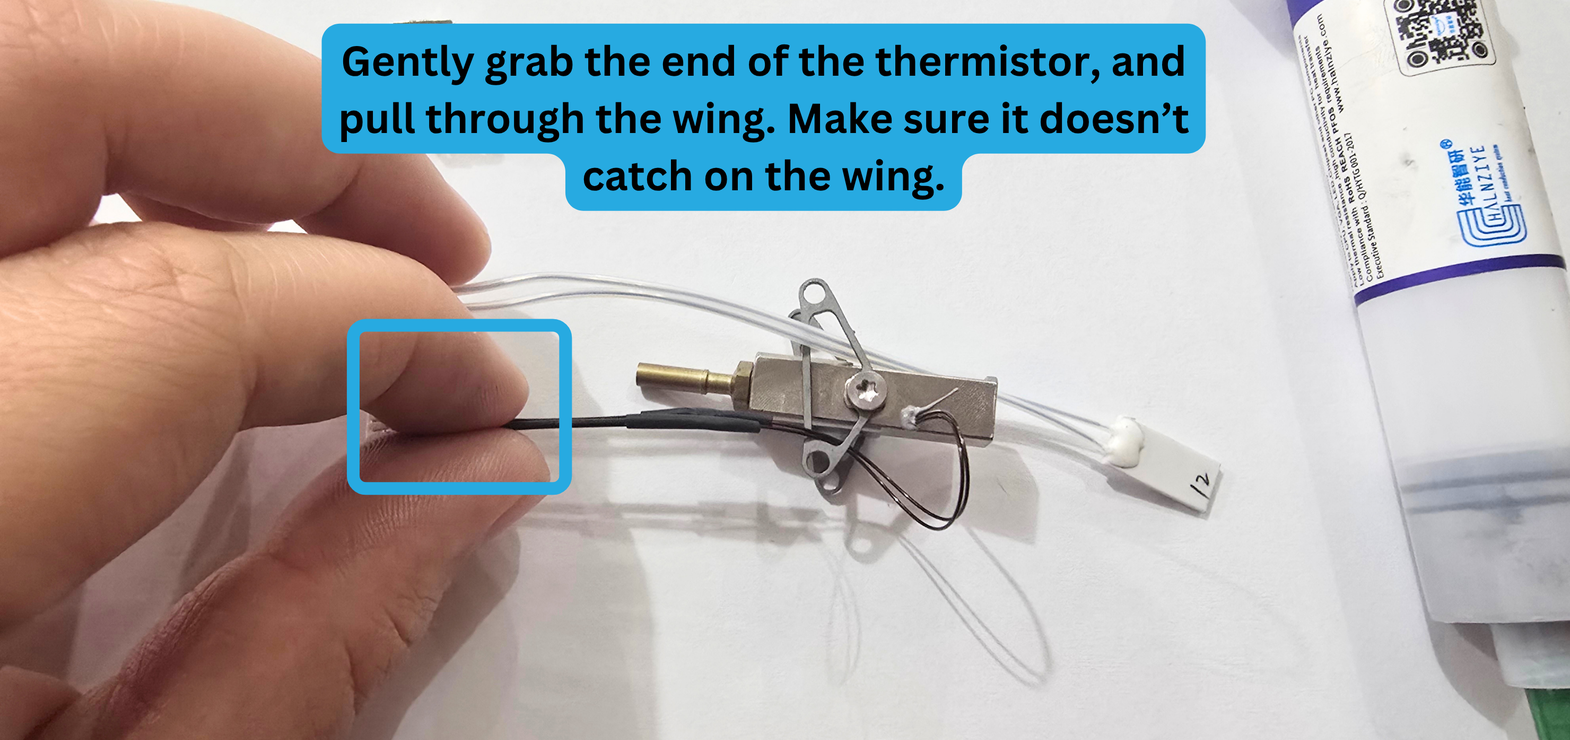
3e:
Gently grab the connector end of the thermistor, and pull the thermistor through the short side of the wing.
Make sure not to allow the wires to snag on the wing while you are pulling.
Take care not to remove the thermistor from the hole.
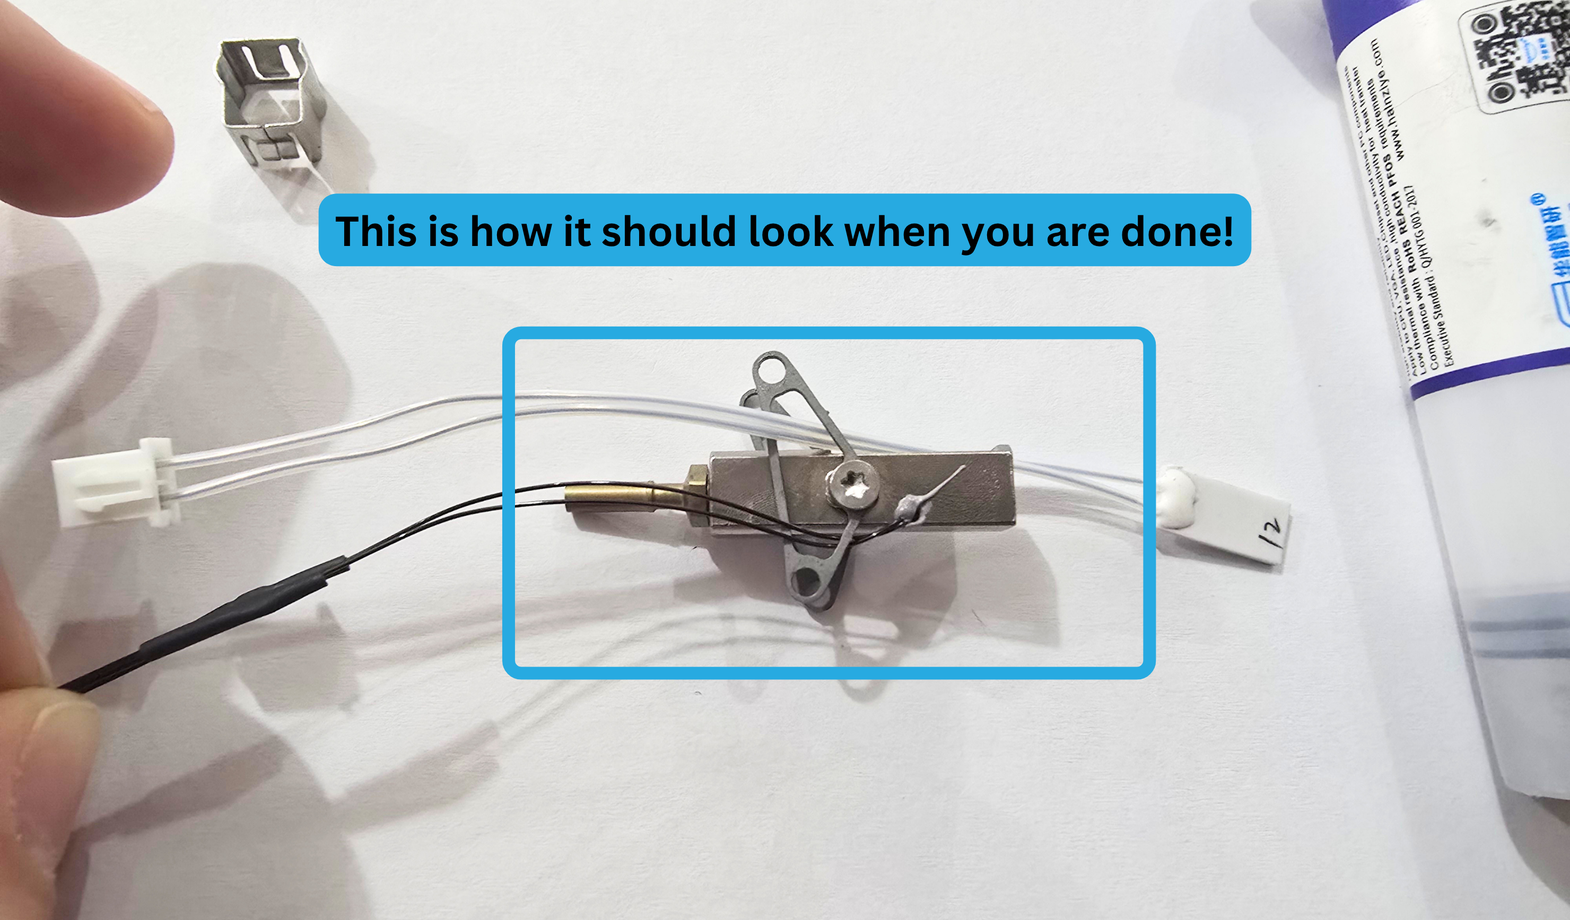
Your Pika Hotend Assembly should now look like this:
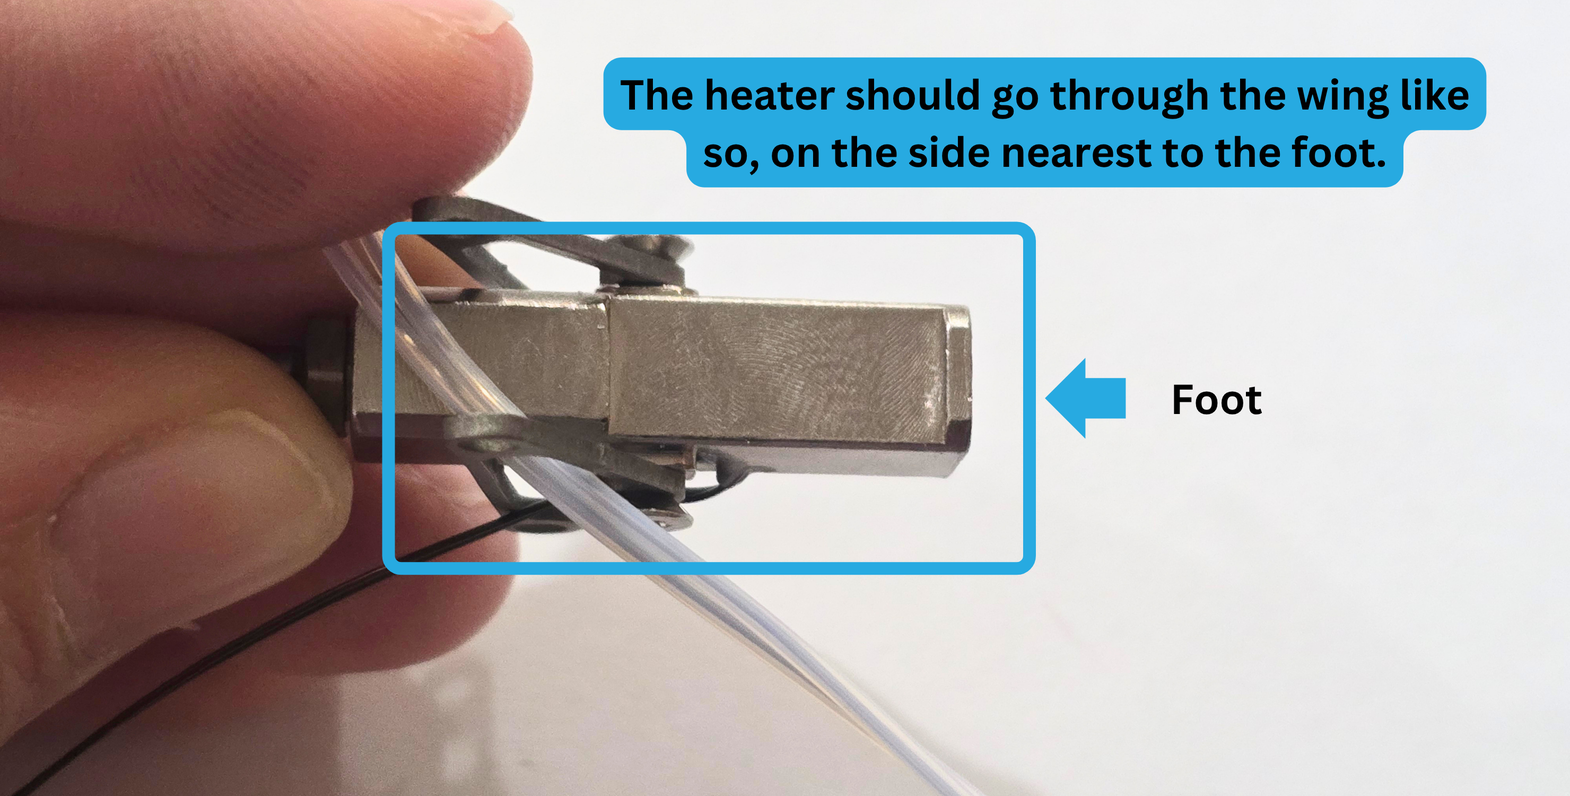
3f:
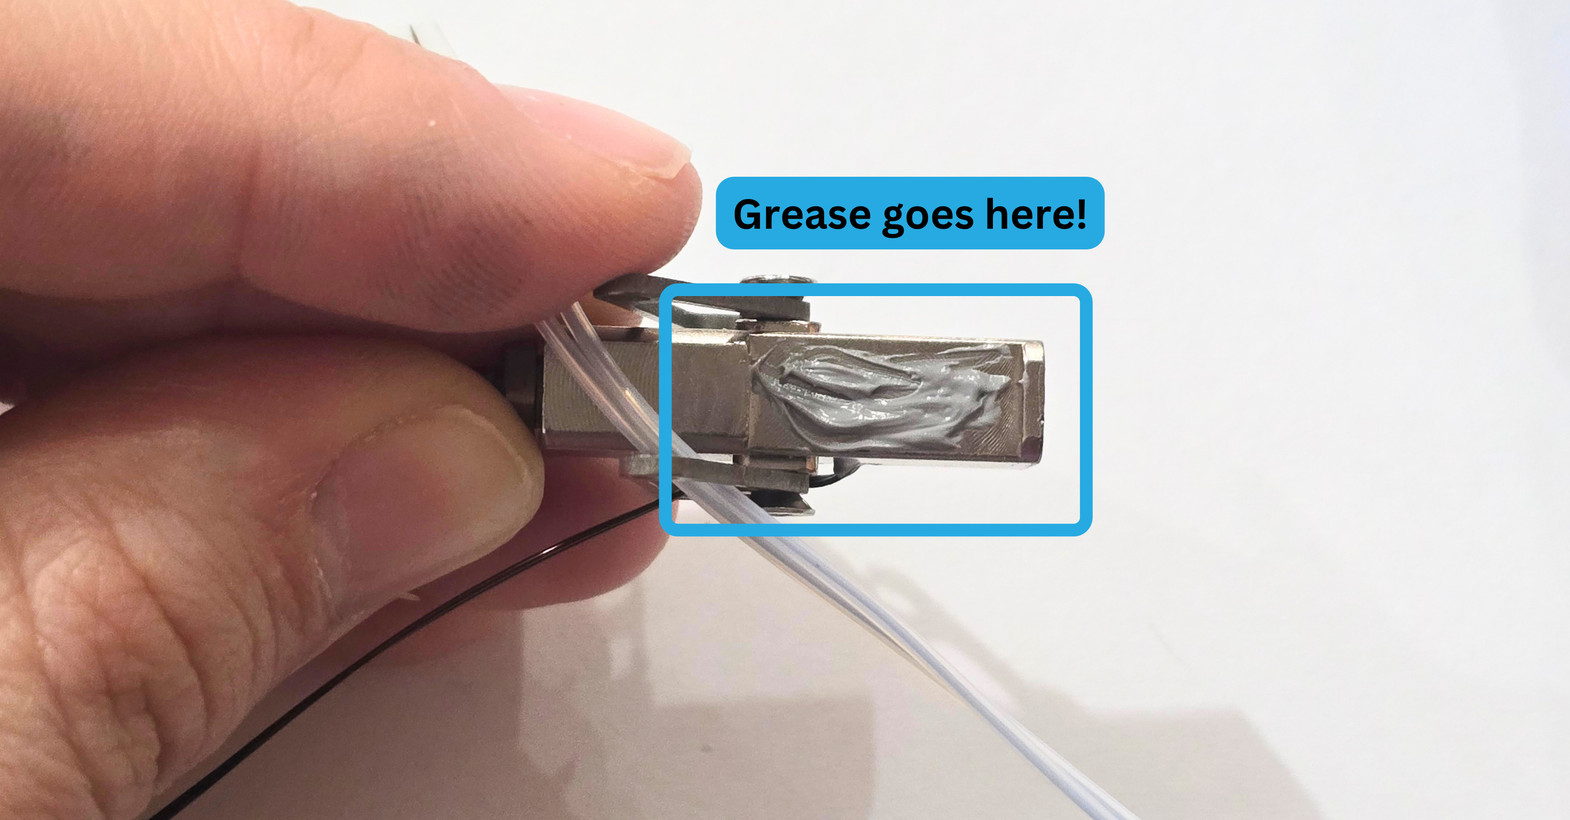
For the next part of the step, we will be installing the heater. Make sure the heater is going through the wing properly before continuing.
Once you are sure, apply the Thermal Grease generously to the flat portion of the heatblock on the foot side like so:
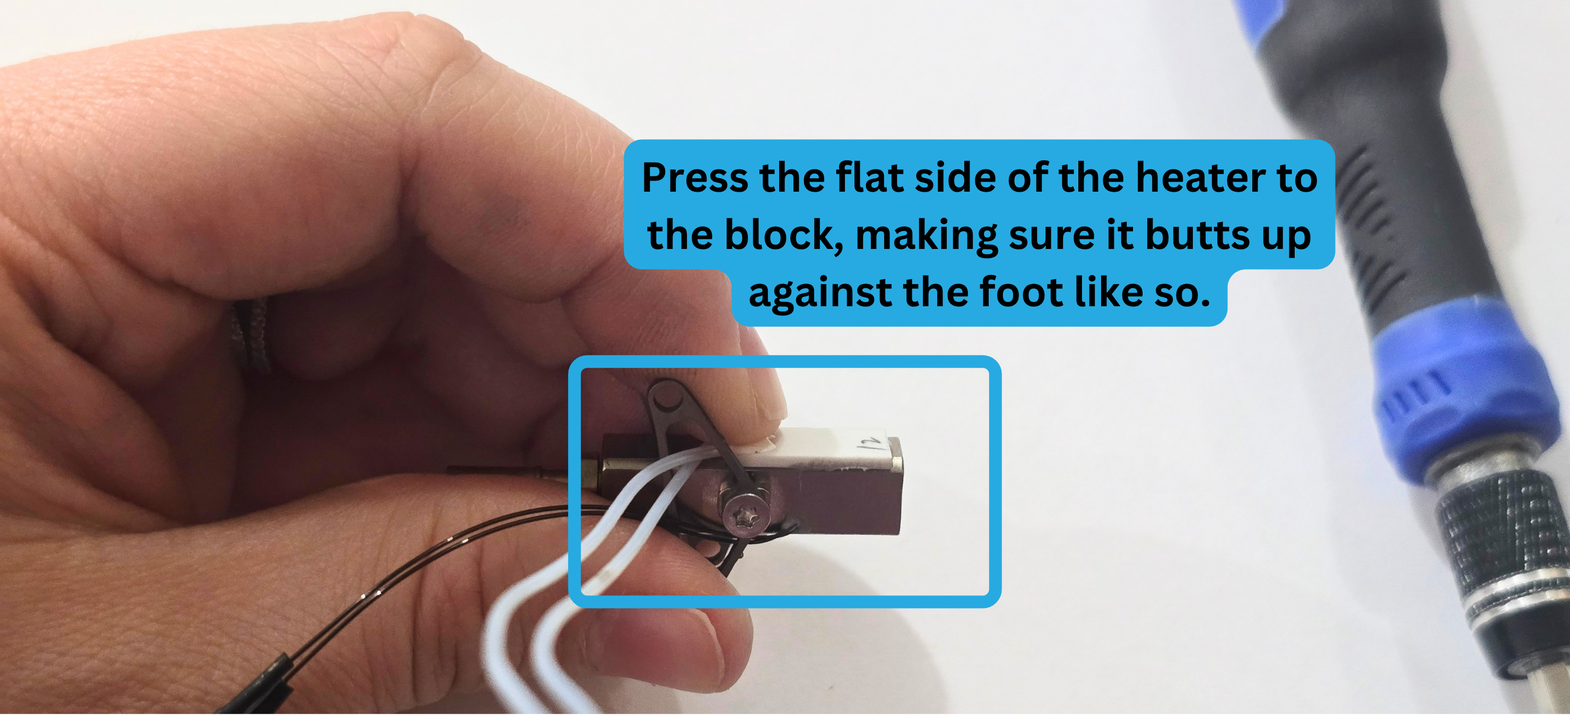
3g:
Shorten the amount of wire on the greased side of the heatblock. Press the flat side of your heater against the heatblock, making sure the heater butts up to the foot.
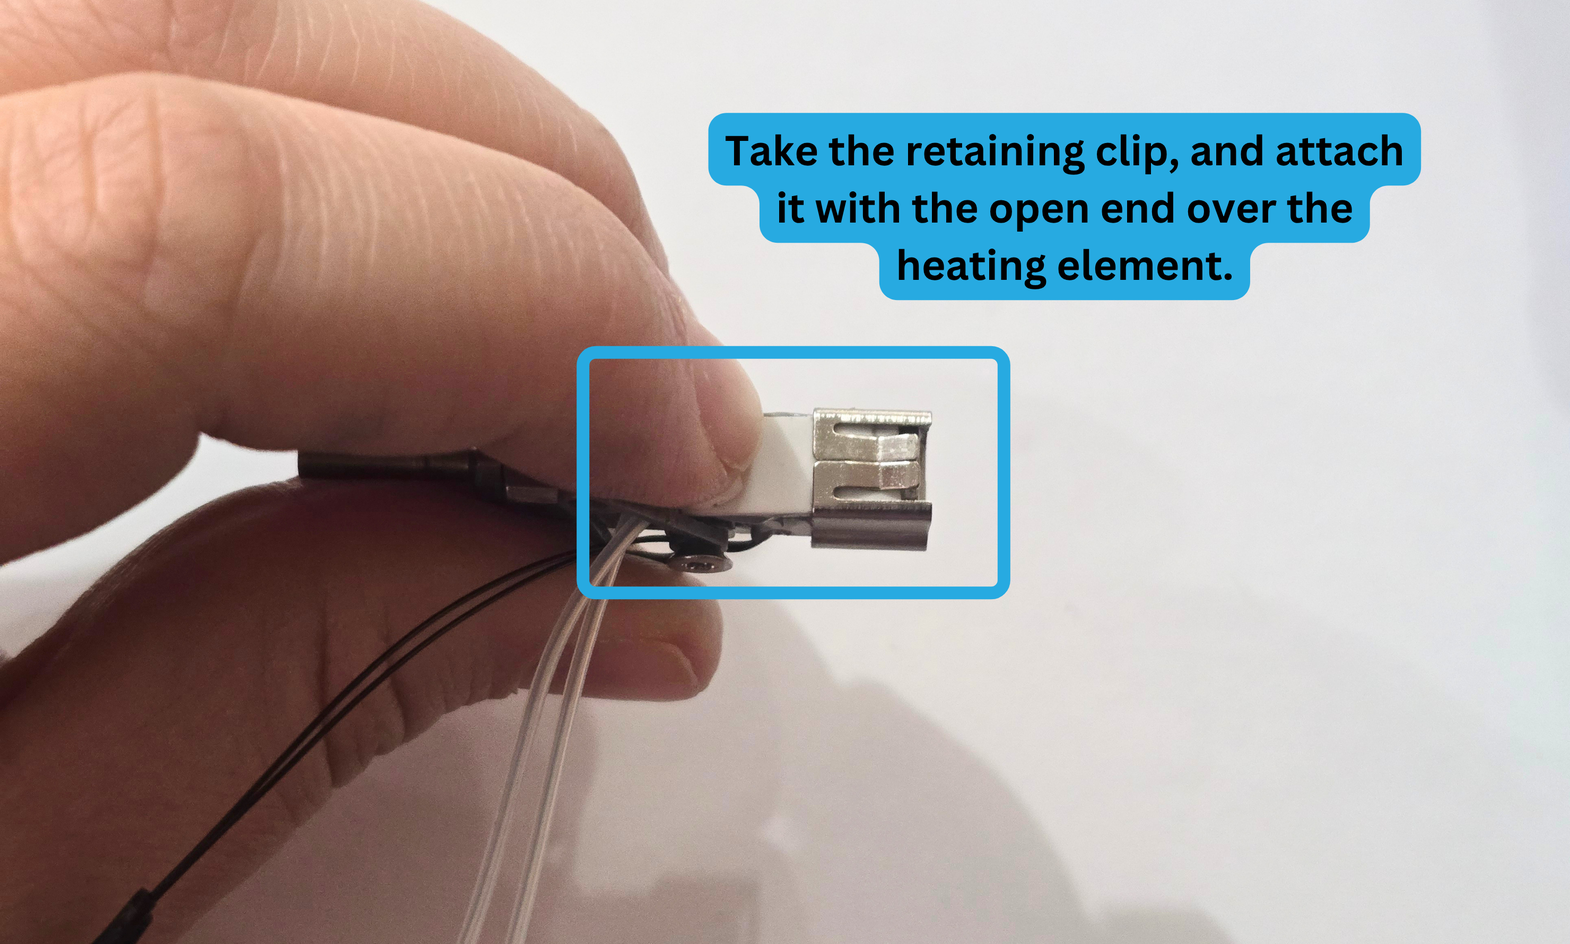
3h:
Take your retaining clip, and slide it over the flat of your heater. Make sure the orientation of the retention clip matches the image below.
If you are having difficulty with sliding the clip, you can use the table to more easily press it onto the heatblock.
When it is in the proper position, your Pika Hotend assembly will look like this:

Step 4:
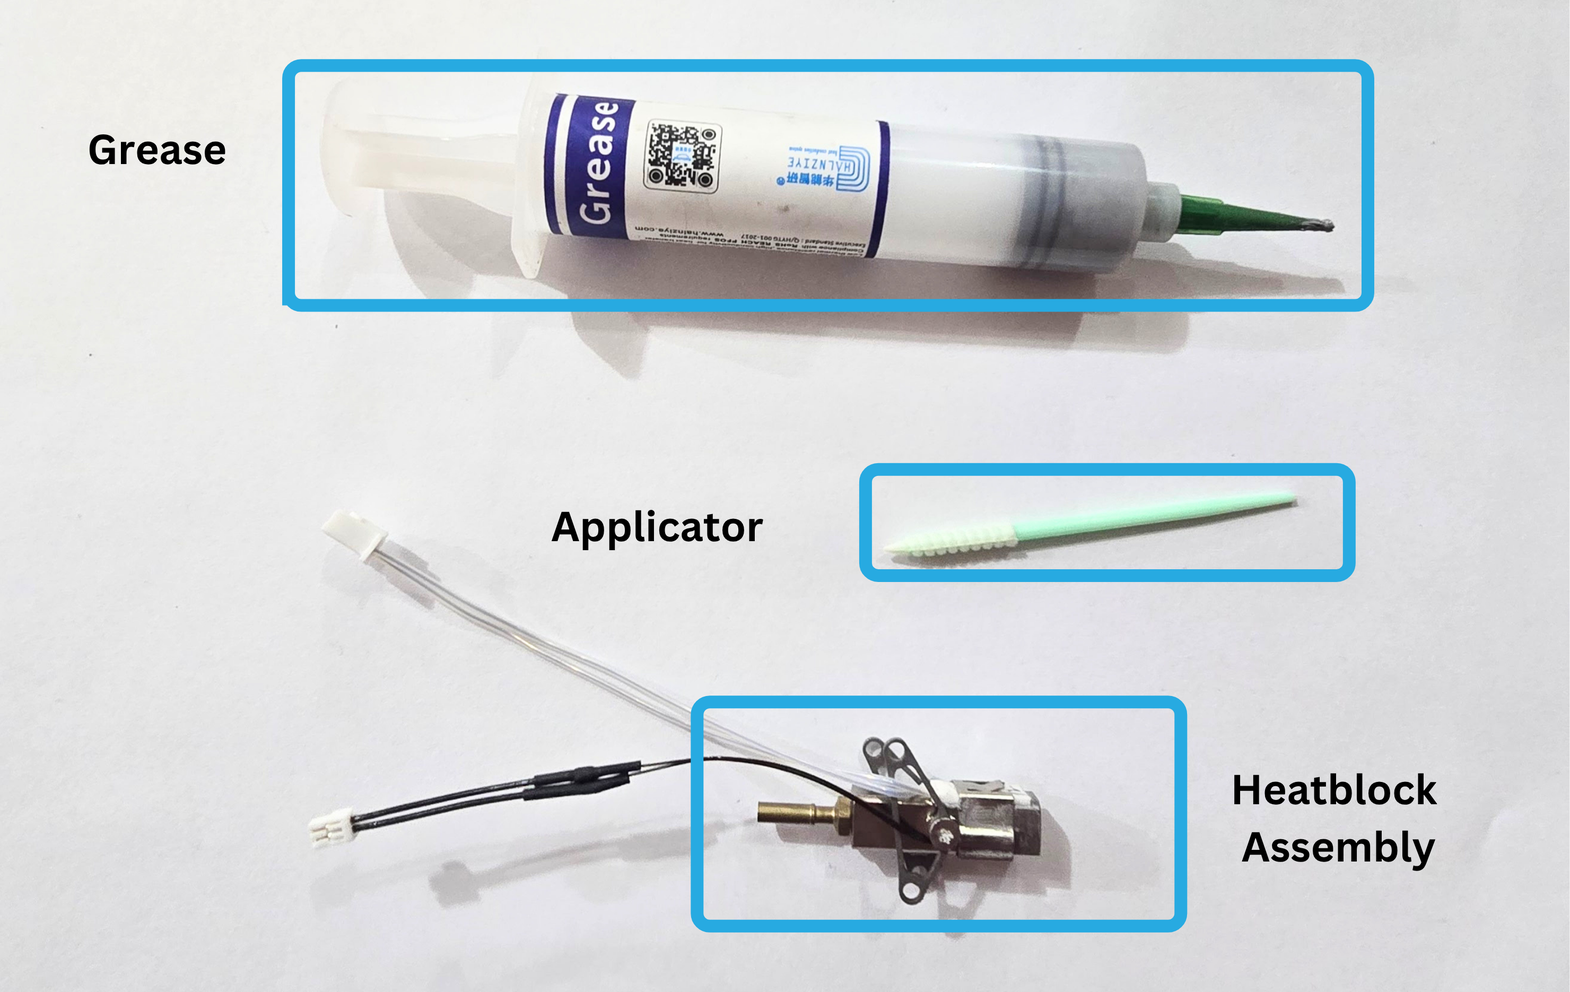
For this step, you will need the following:
- Thermal Grease
- Applicator
- Heatblock Assembly
4a:
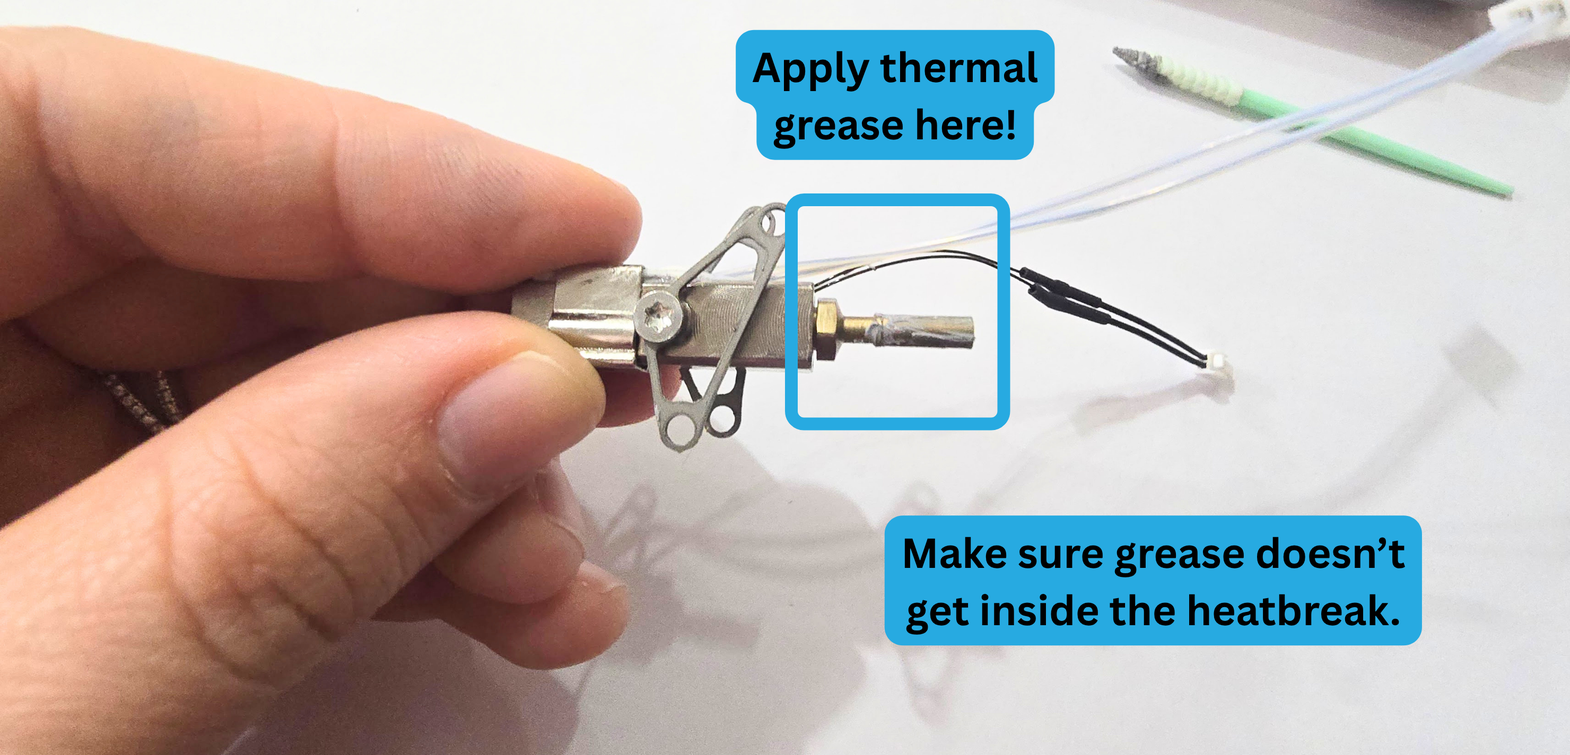
Use your applicator to apply thermal grease to the outside of your heatbreak. See the image below to determine which portion of the heatbreak should receive grease.
Make sure not to get grease inside of your heatbreak. That could cause clogging within your hotend. If you do get grease inside the heatbreak, remove it carefully, to avoid scratching the heat treatment off your heatbreak.
Step 5:
For this step, you will need the following:
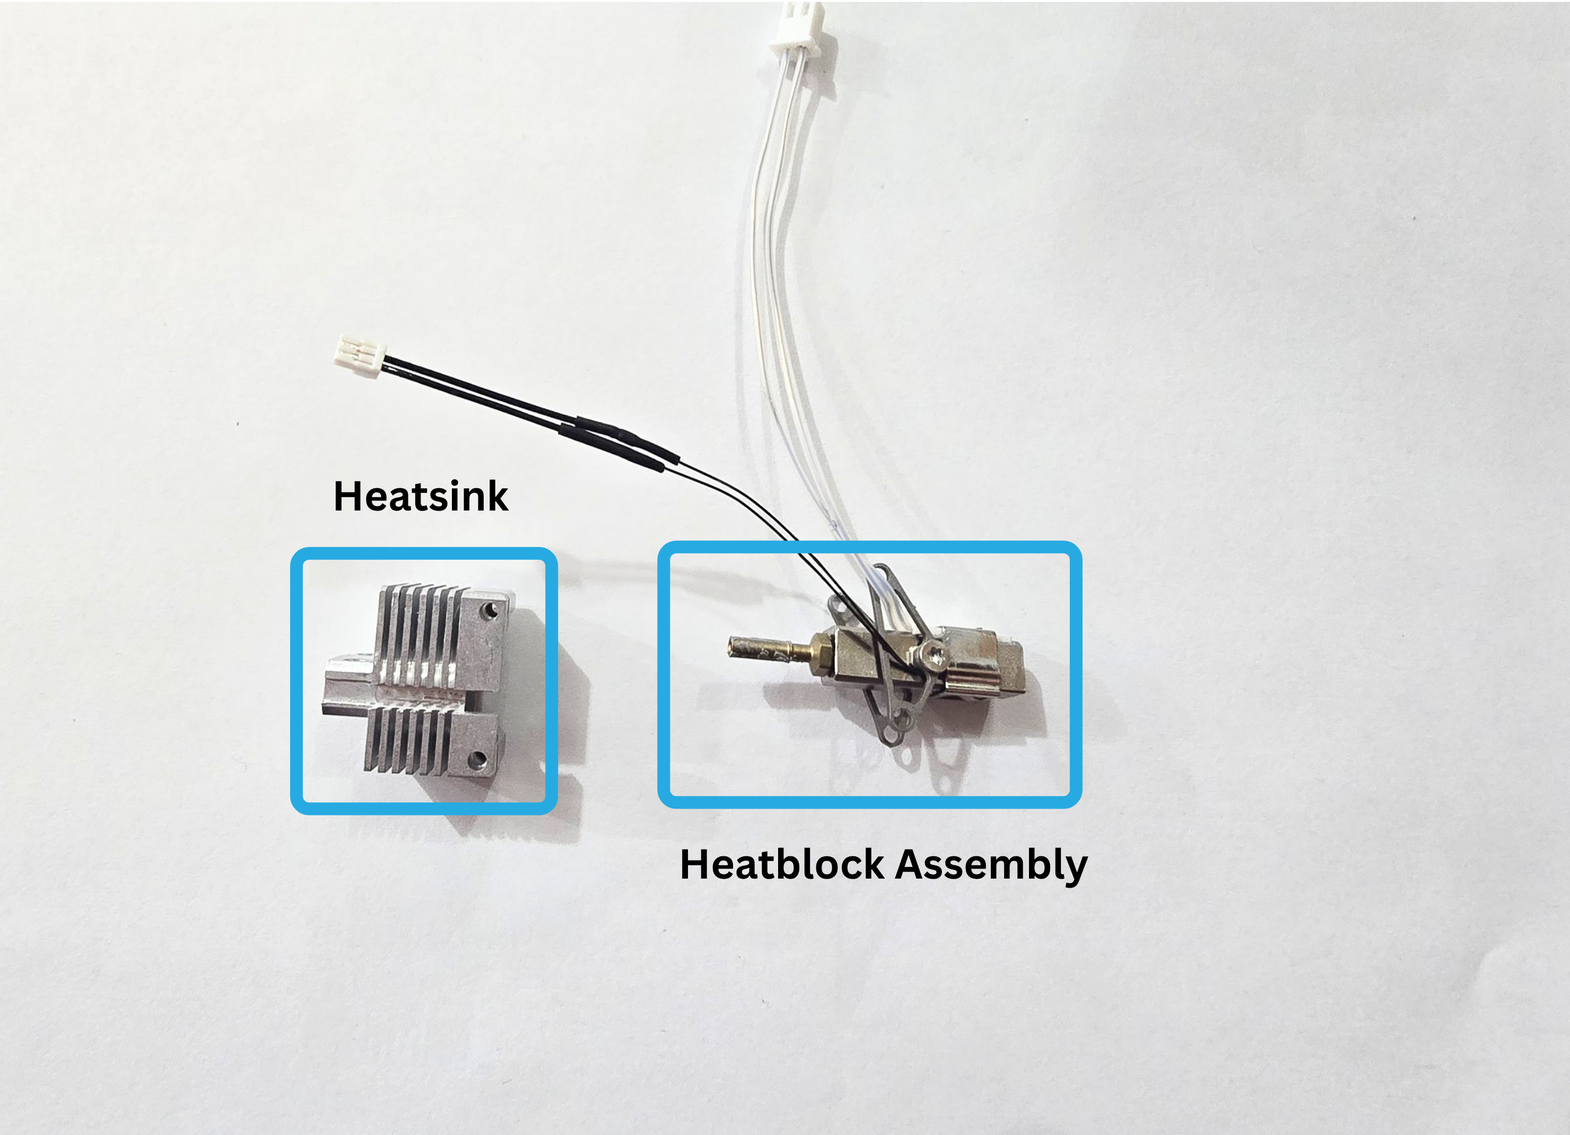
- Pika Heatsink
- Pika Heatblock Assembly
Step 5a:
Insert the heatblock assembly into the heatsink.
Make sure your heater and thermistor are on the side that has a wiring channel.

5b:
Once the wing is lined up with the heatsink slot, loosen the screw on the heater side of the block.
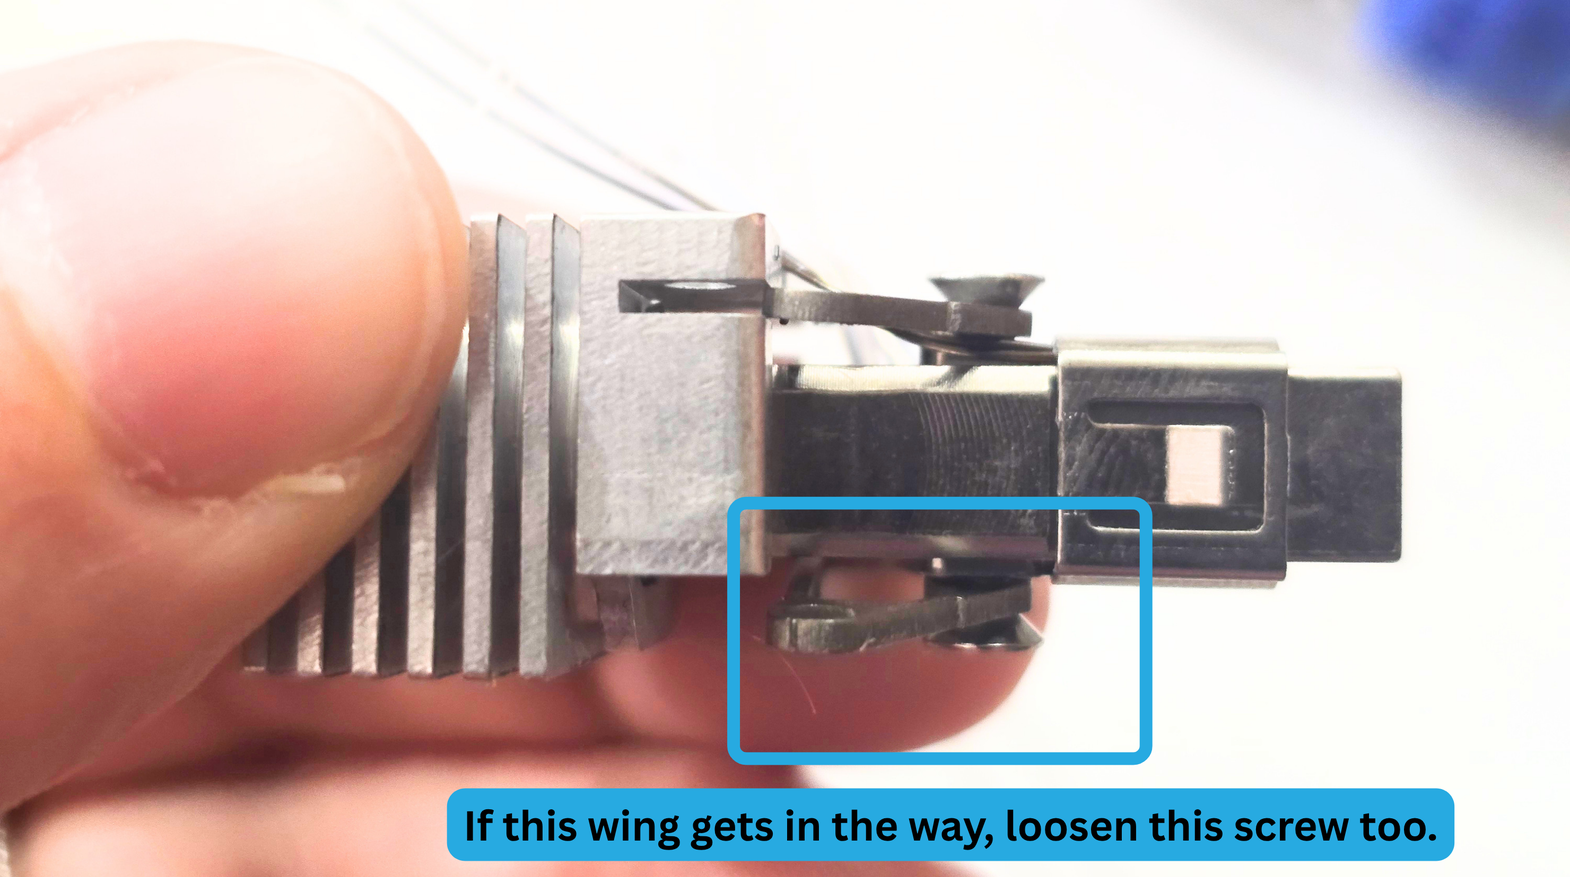
If the wing on the other side is preventing you from pushing the heatblock assembly further into the heatsink, you can loosen the screw on that side as well.
Step 5c:
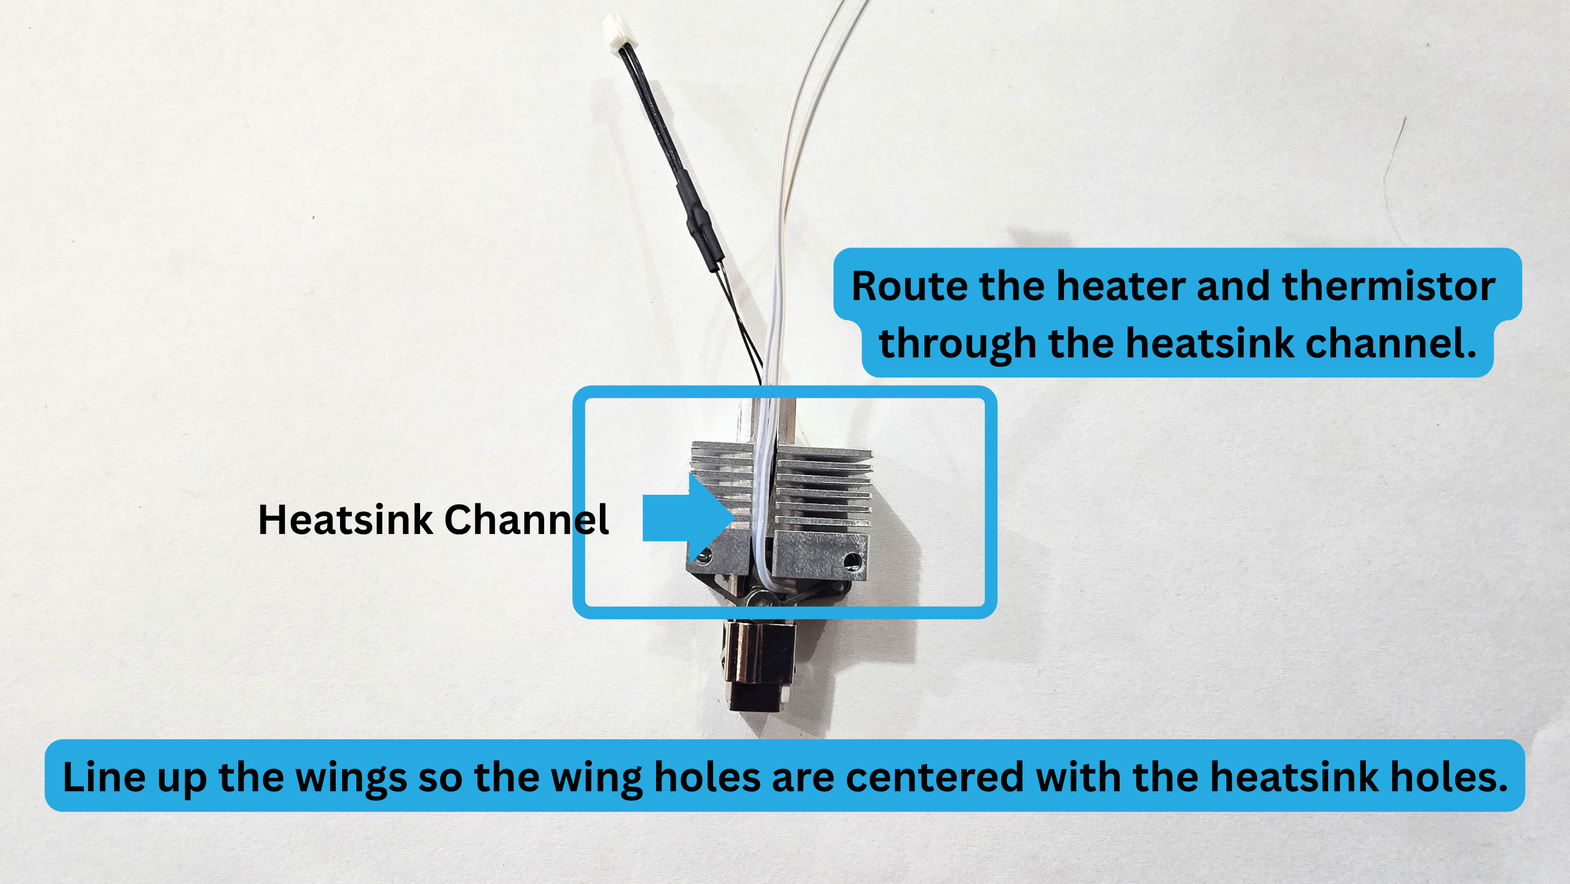
Route the heater and thermistor through the heatsink channel.
Line up the wings so the holes are centered with the heatsink holes.
Please Note: This is meant to be a tight fit, because the heatbreak needs to be under compression.
Step 6:
For this step, you will need the following:
- Pika Heatblock Assembly
- 2x T8 torx screws
- T8 Torx Driver
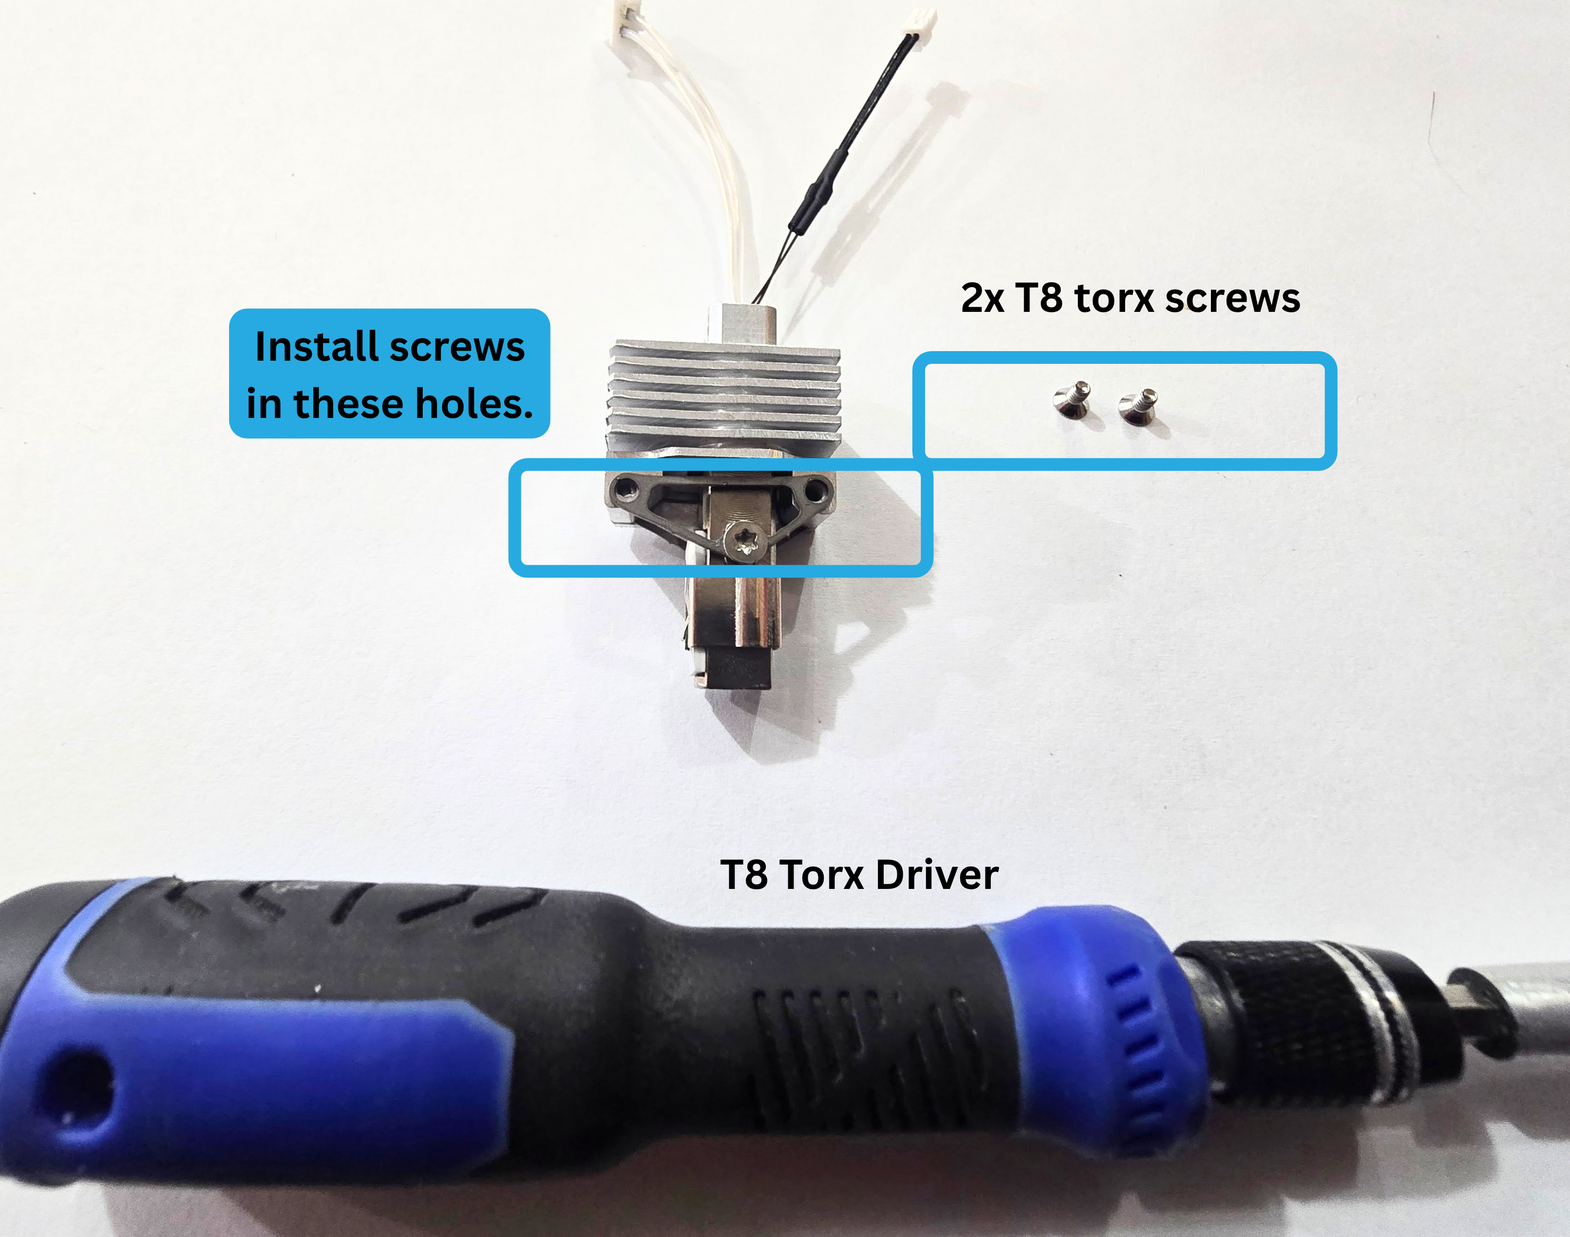
Loosen the screw that is attaching the wing to the heatblock.
Install the first new screw, but do not fully tighten it yet.
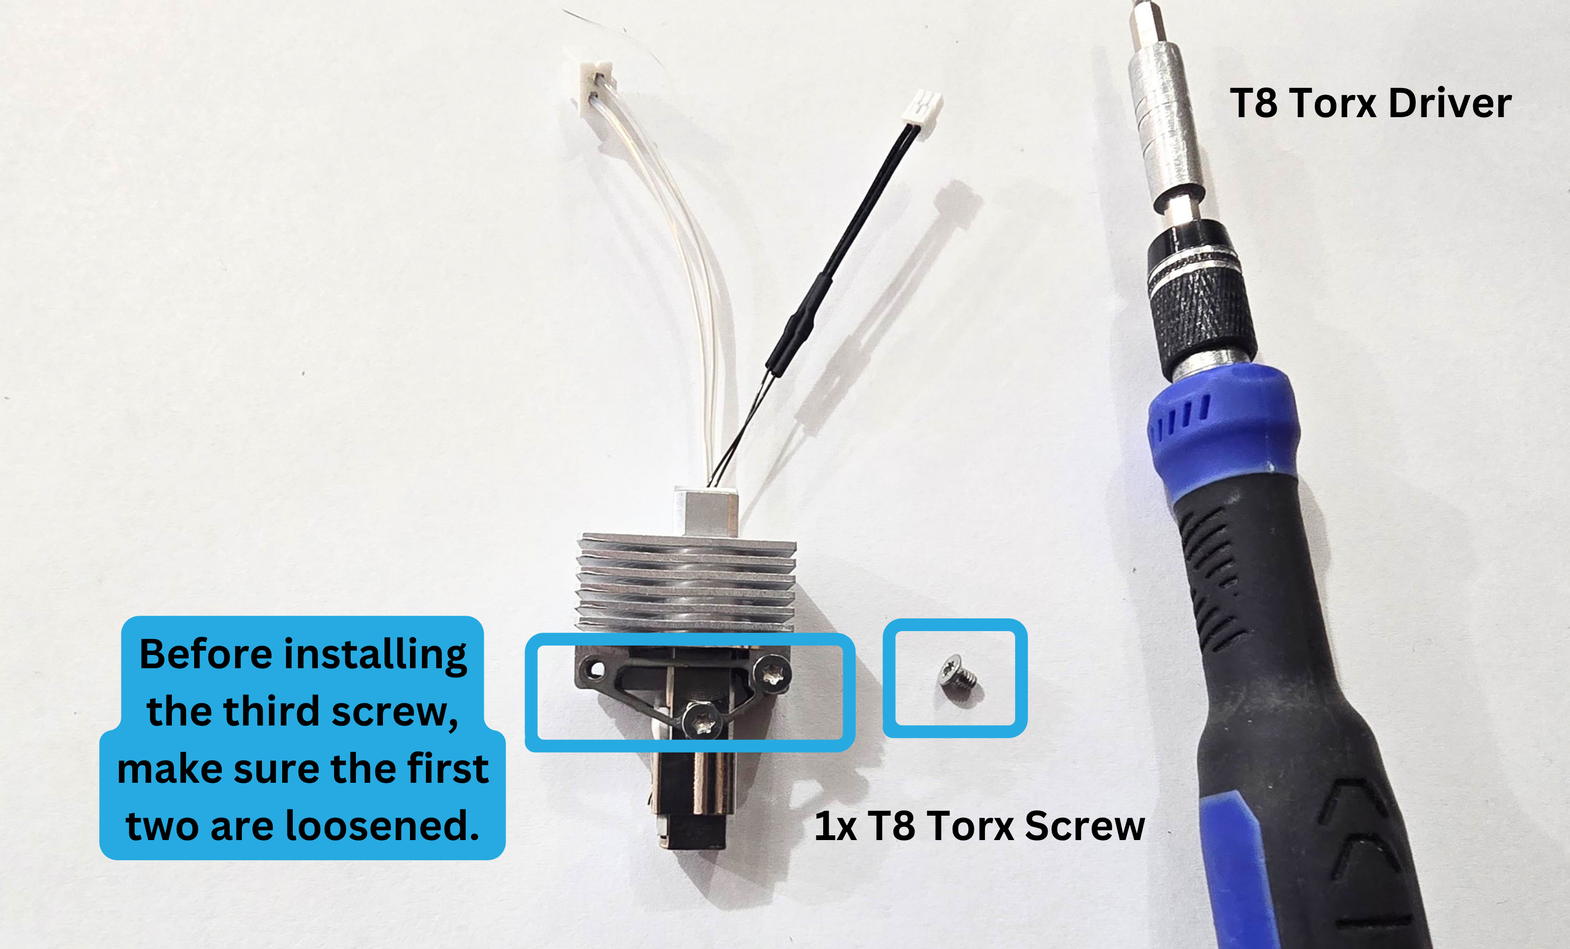
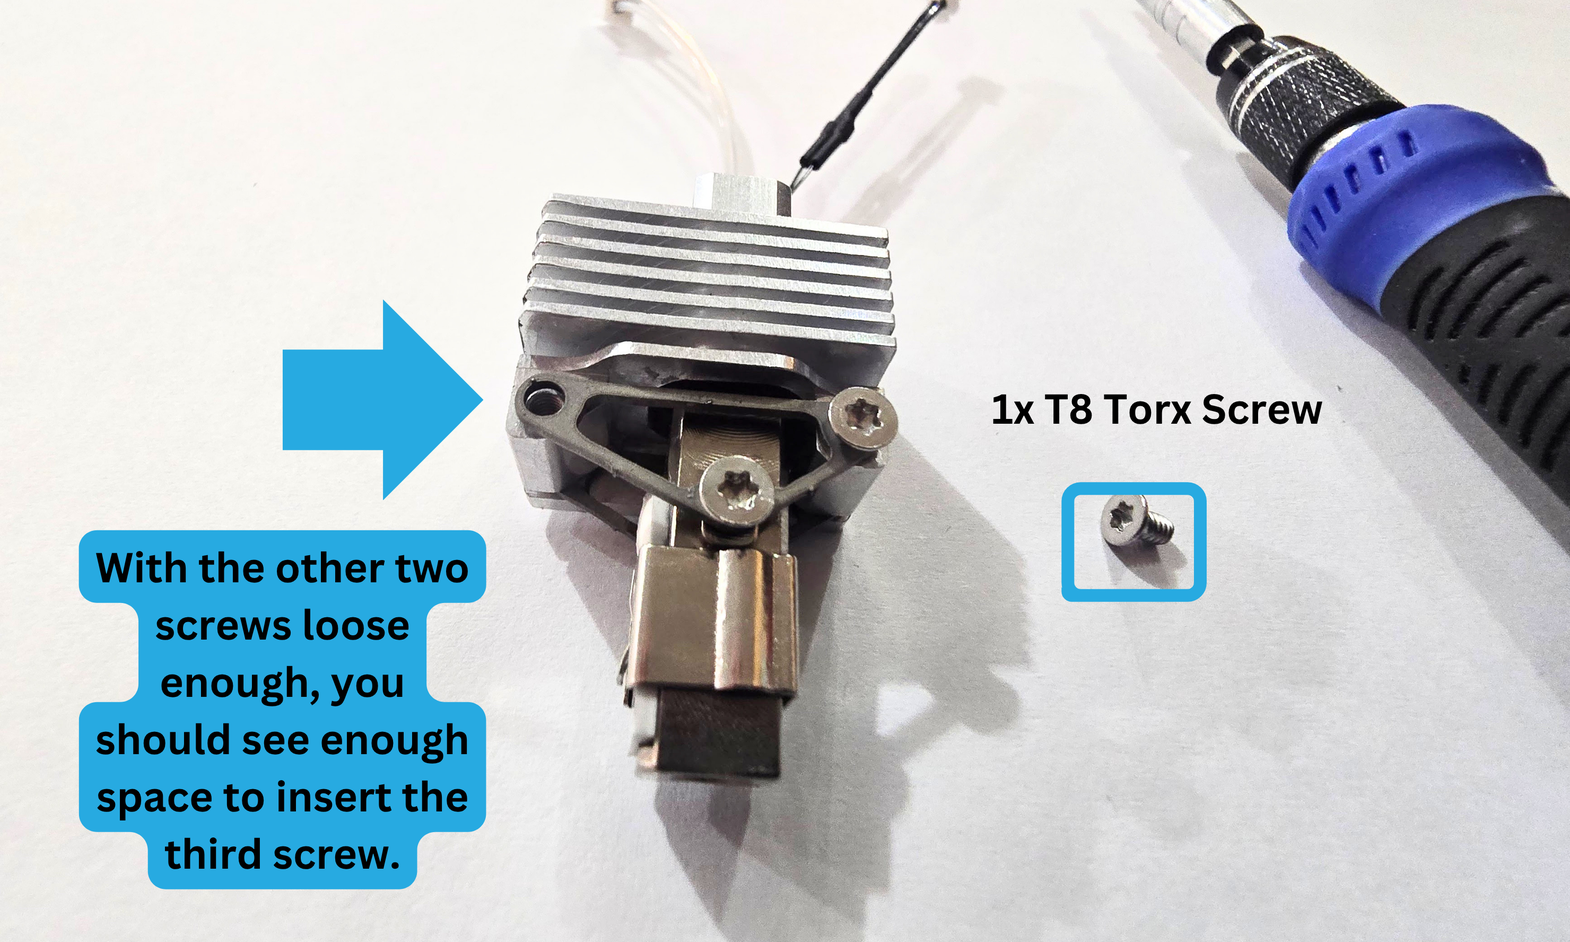
Install the third screw. If you are having trouble getting the last holes aligned, you can try loosening the other two screws more. You can also press that side of the wing in whichever direction is helpful while installing.
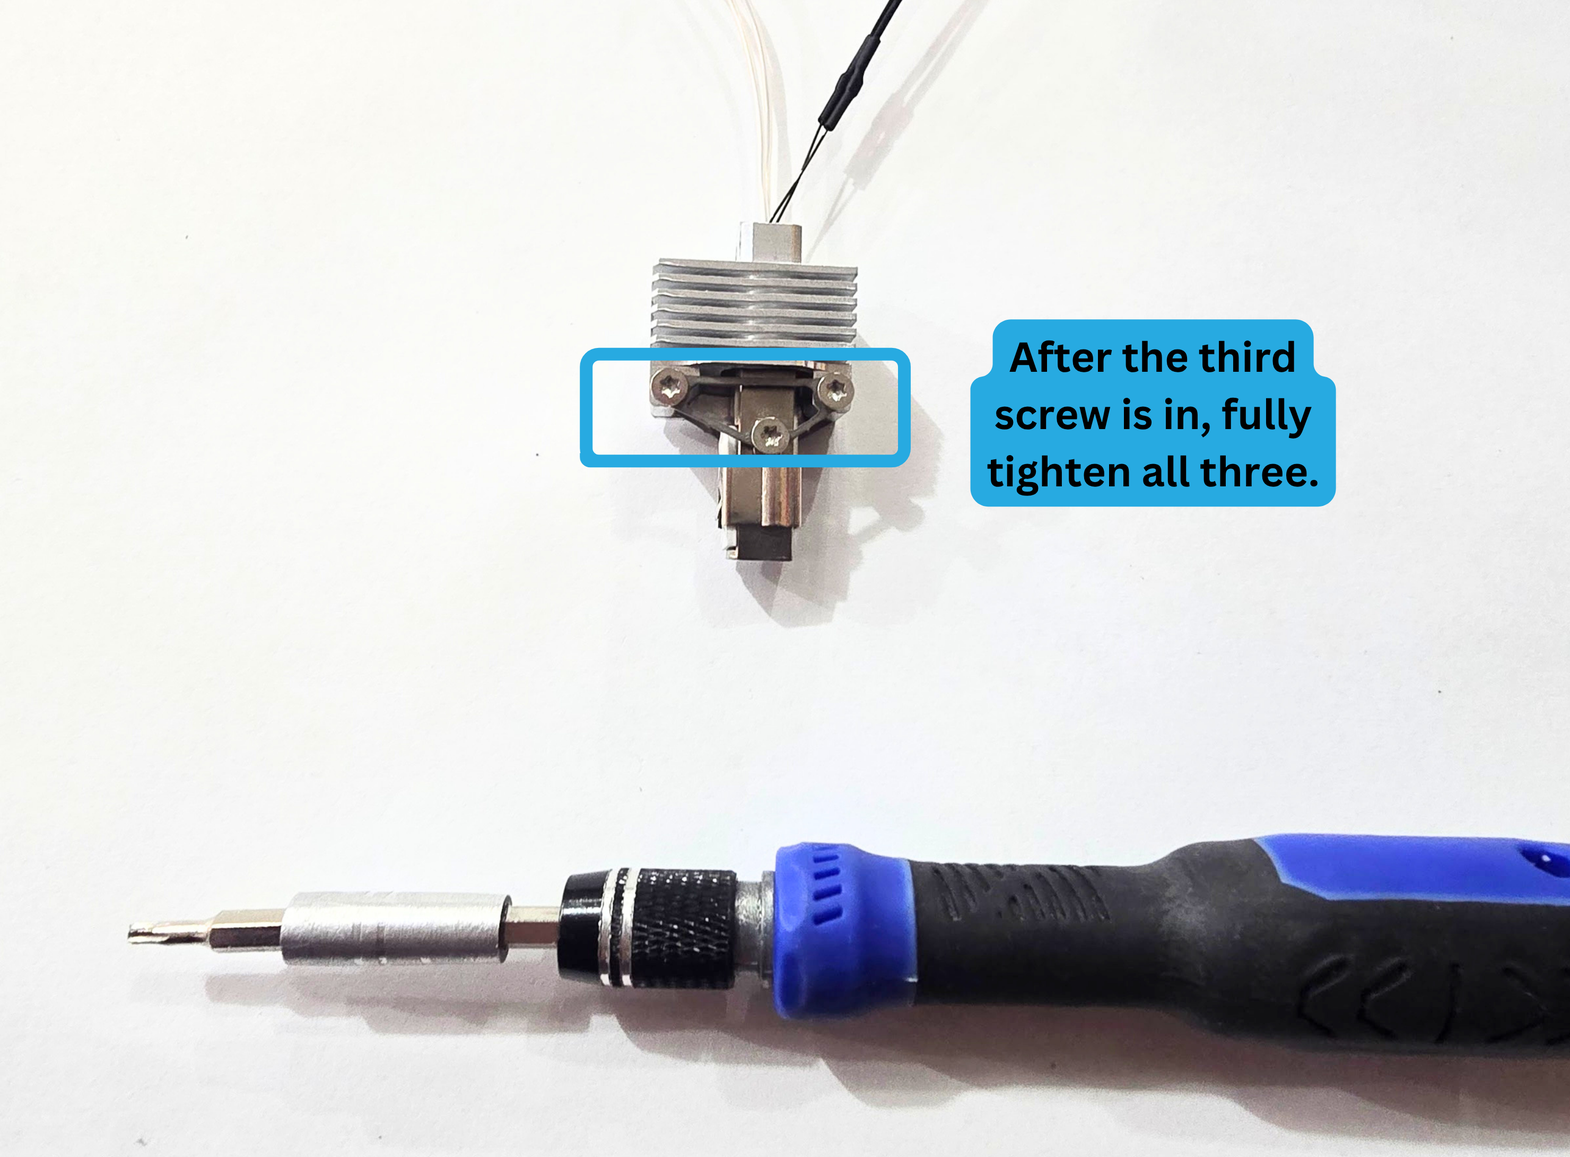
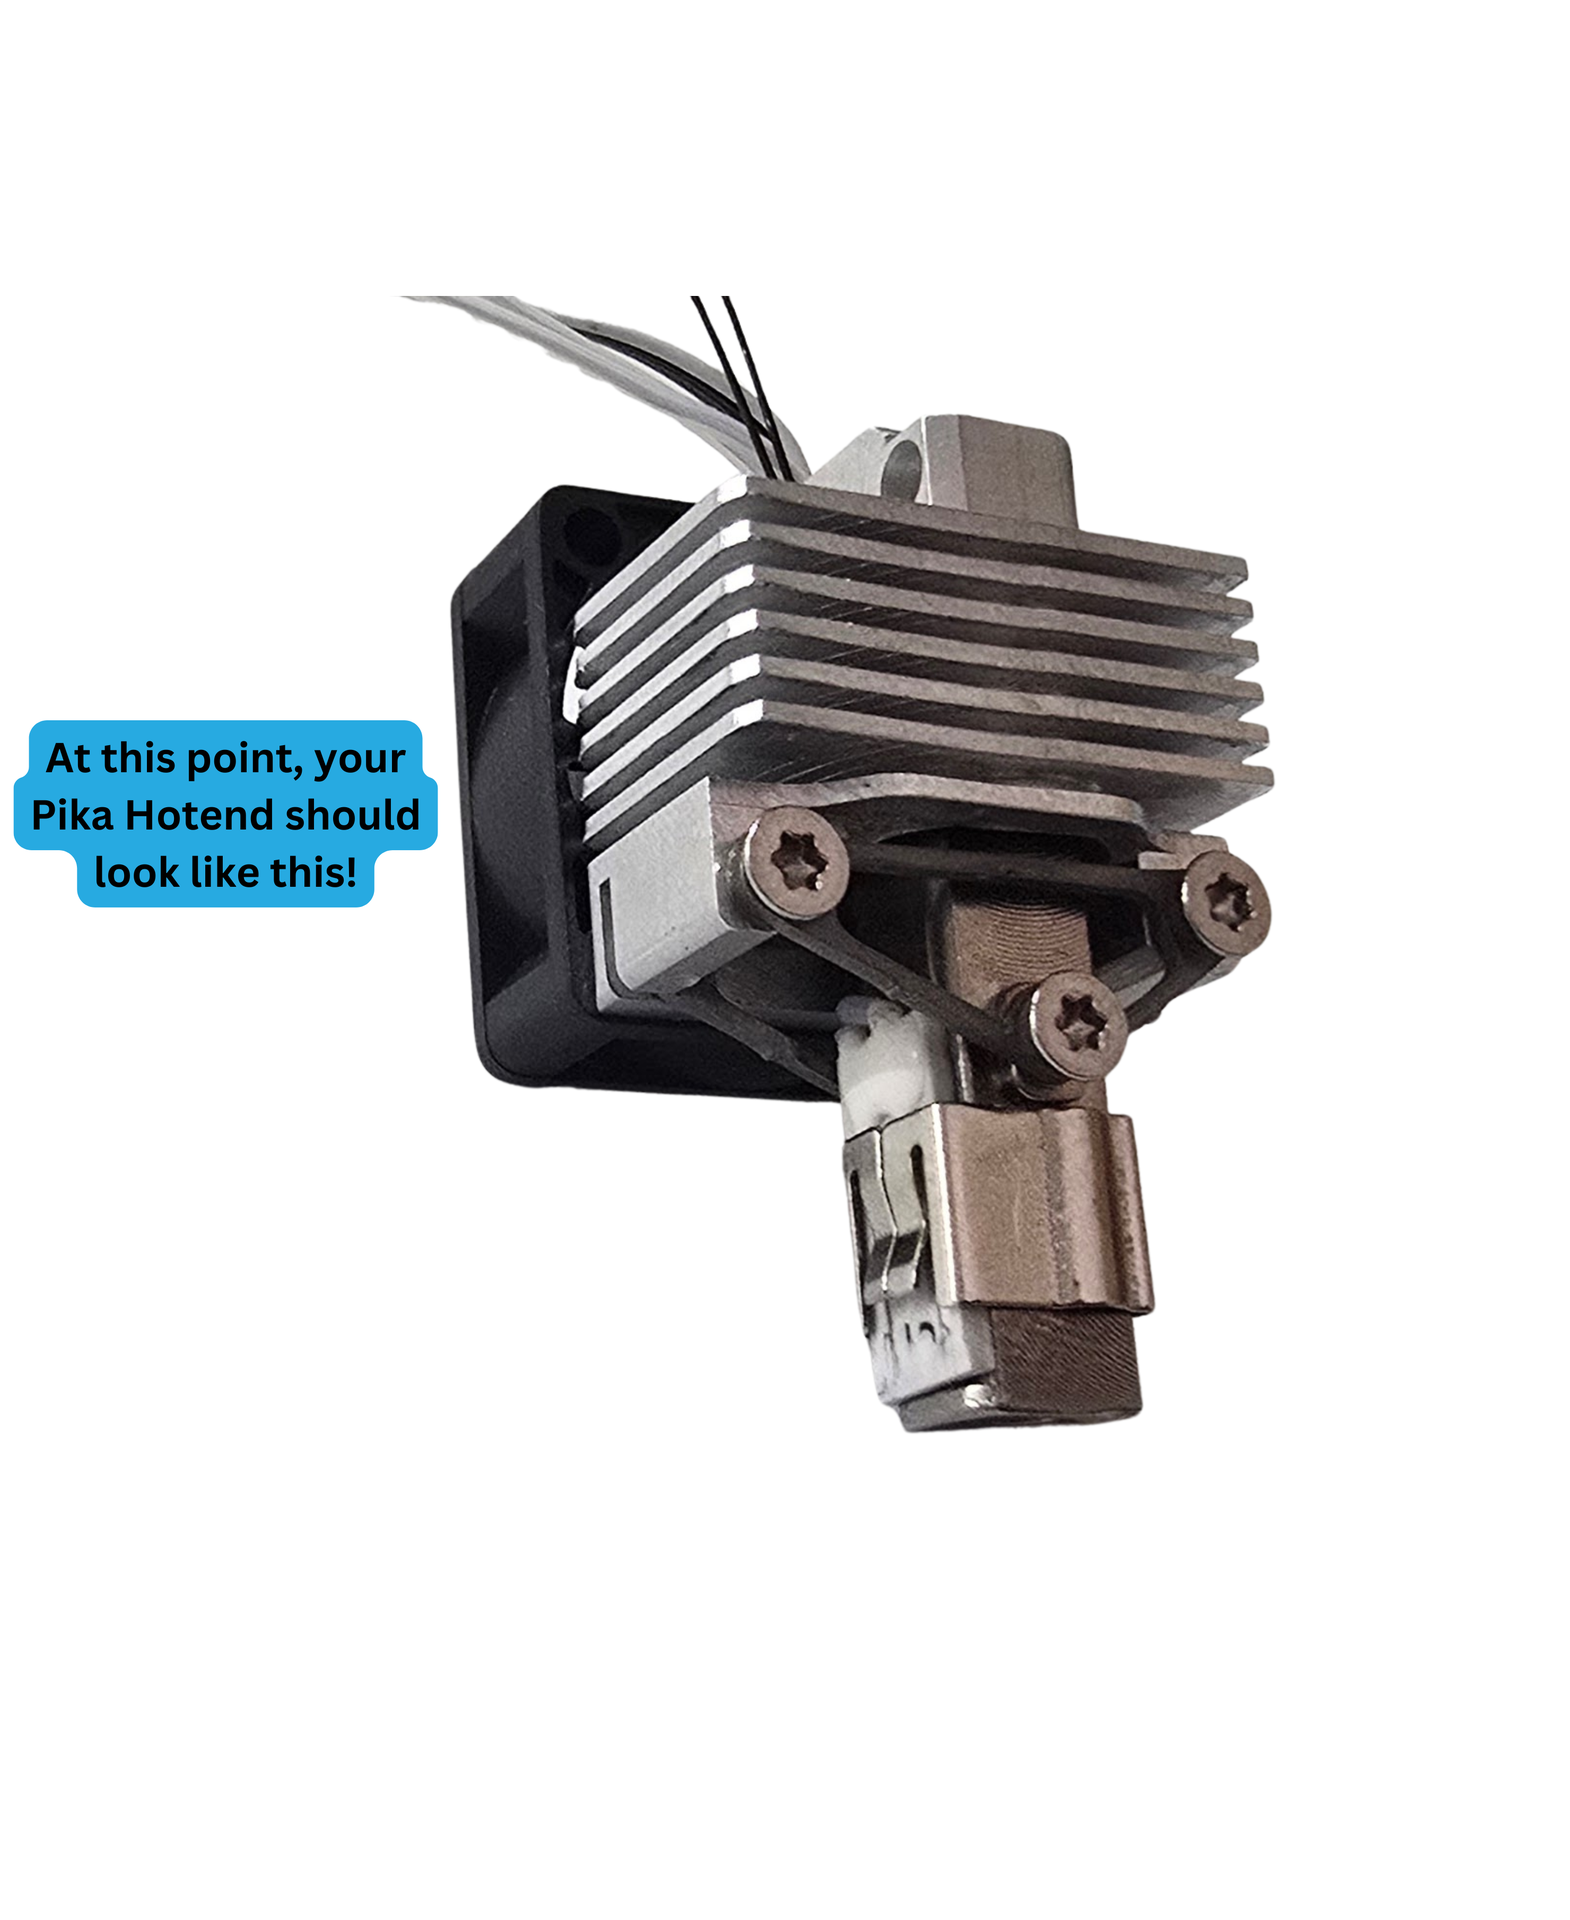
Once all three screws are in, you can fully tighten them!
Step 7: Fan installation
For this step, you will need the following:
- Pika Hotend Assembly
- Hotend Fan
- 2x Fan Screws
- T8 Torx Driver
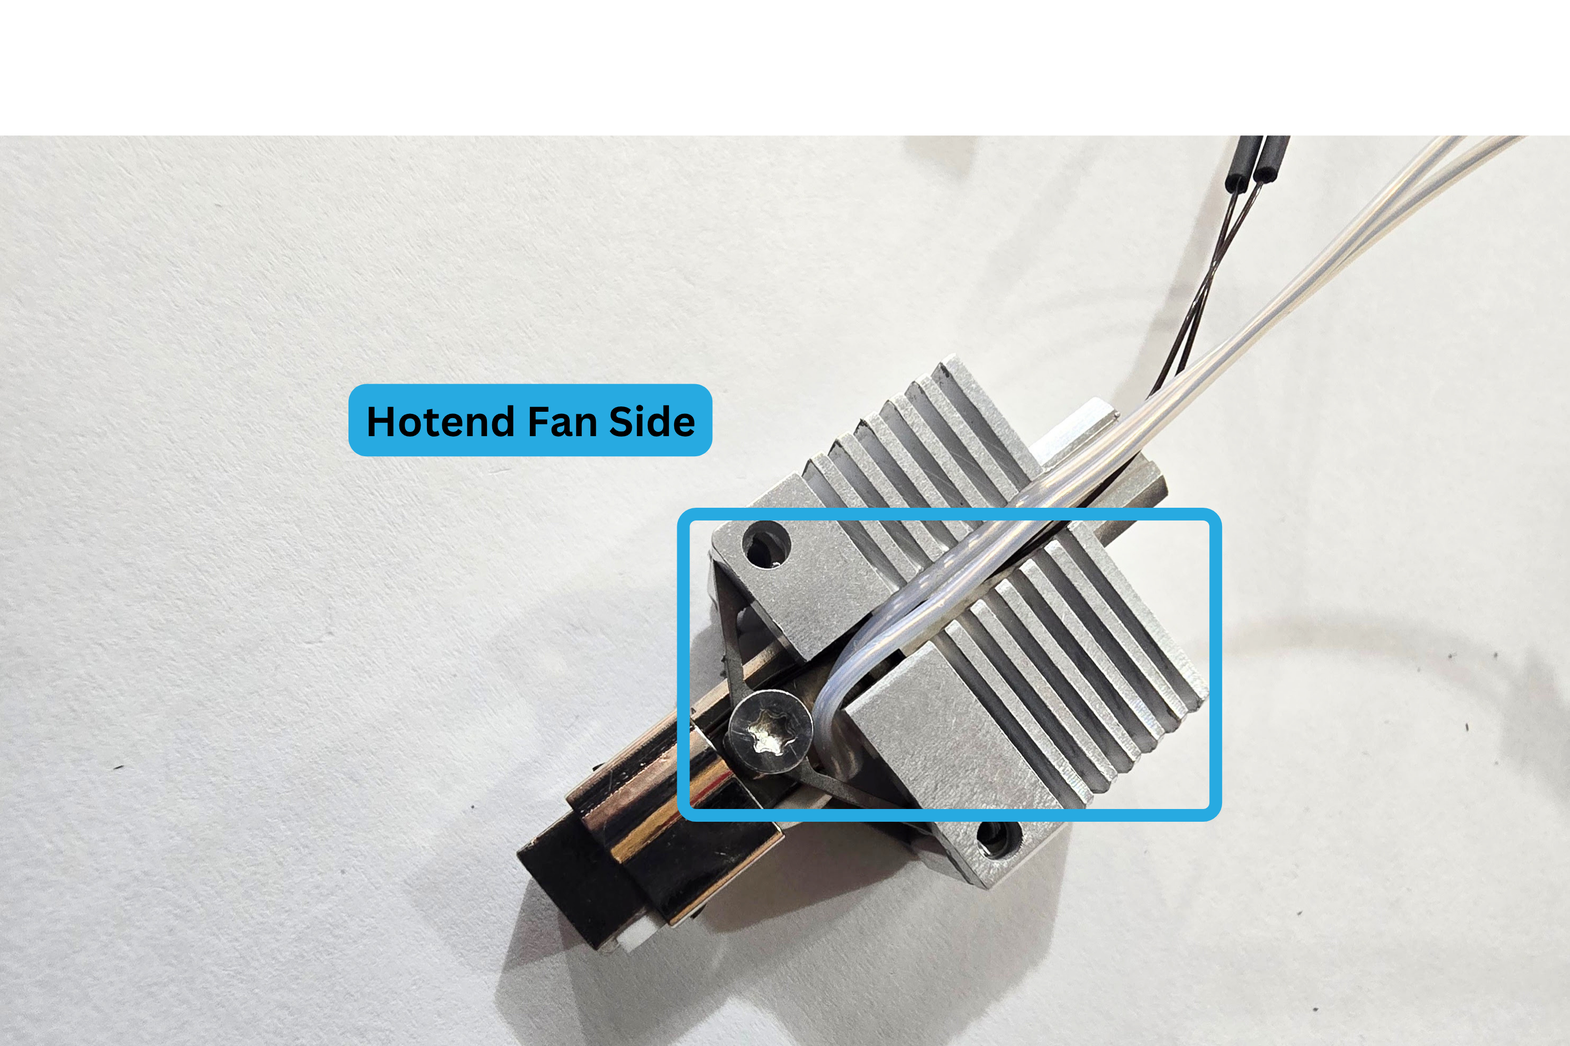
Step 7a: Wing Alignment
Make sure the wing on the fan side is properly aligned. You should loosen the screw on that side if it is tight. Press on the wing until it seems aligned with the heatsink.
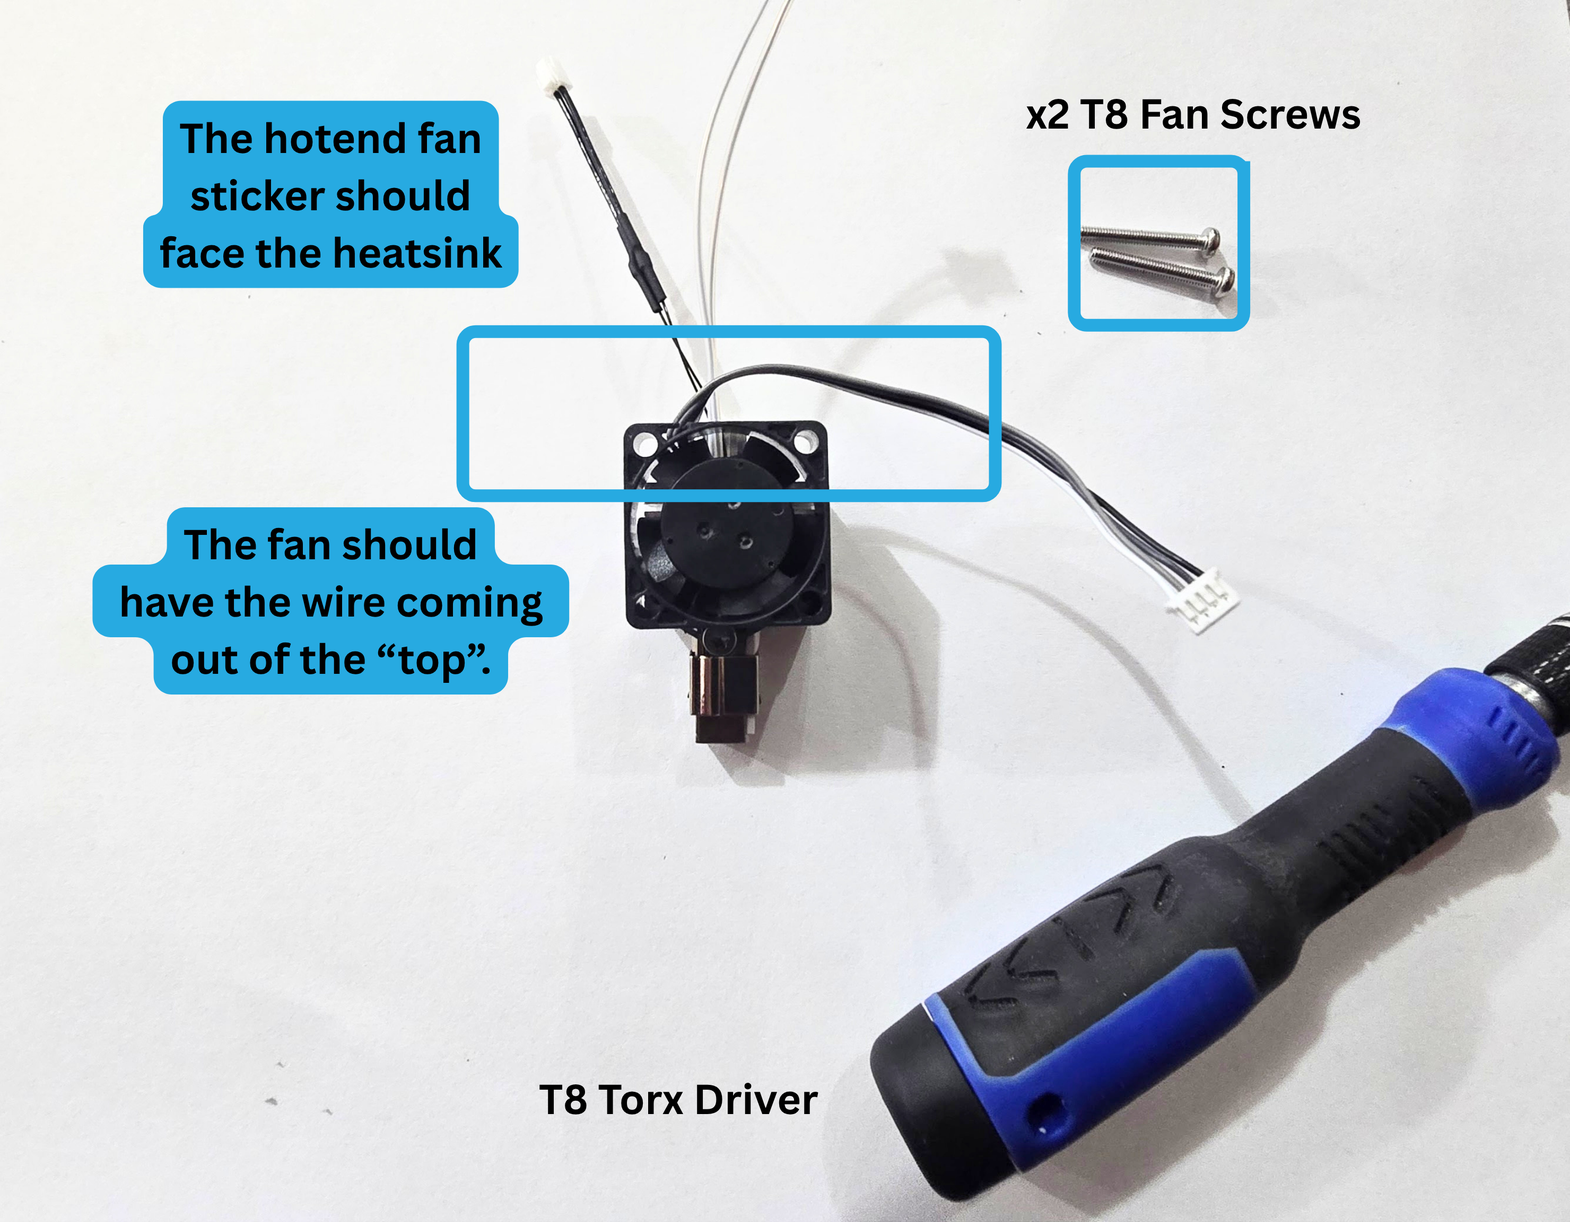
7b: Fan Orientation
The sticker on your fan should face the heatsink.
The wires should be facing the "top" of the hotend.
7c: Screw installation
Insert one of your fan screws through the bottom fan hole, and into the heatsink.
Start turning slowly, making sure not to cross-thread.
Stop if you feel resistance. If you feel resistance, it is possible your wing is not properly aligned.
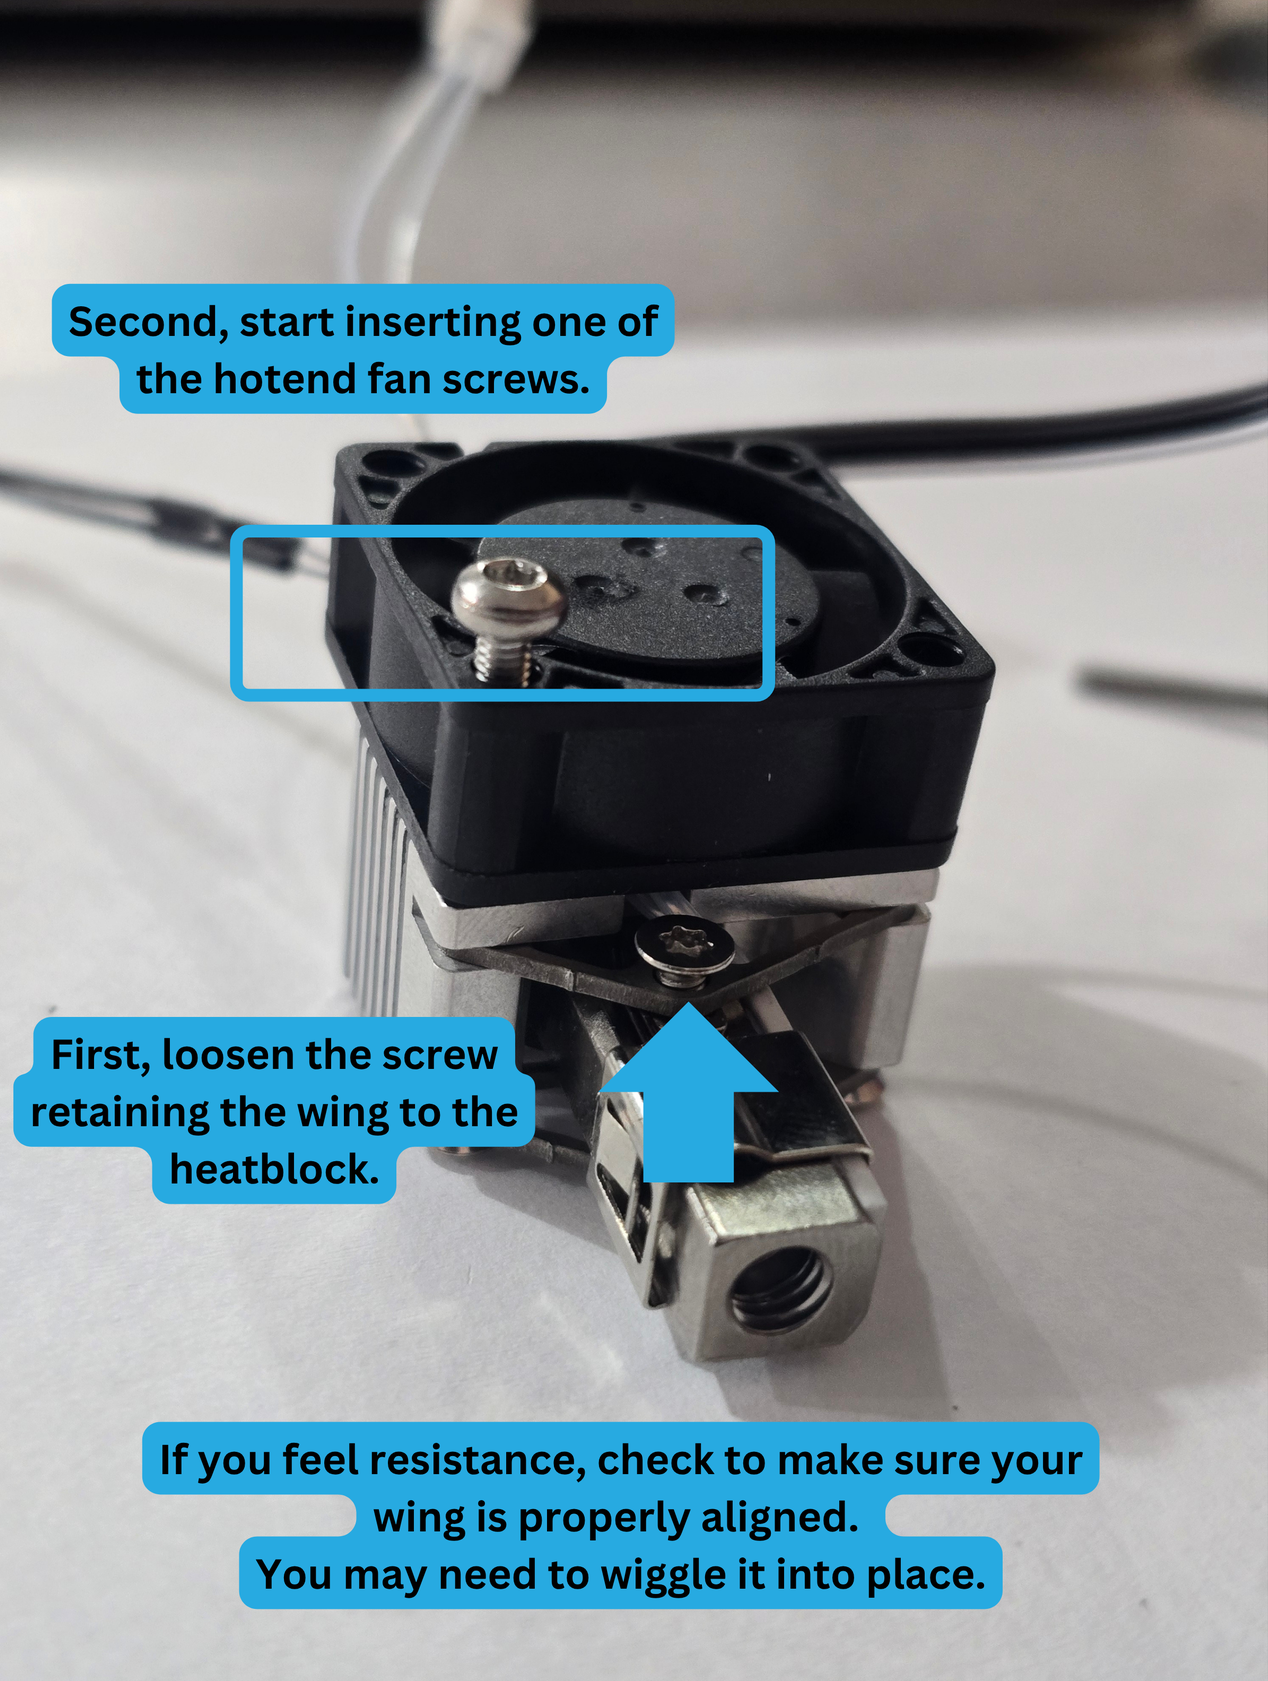
Do not fully install the fan screw just yet.
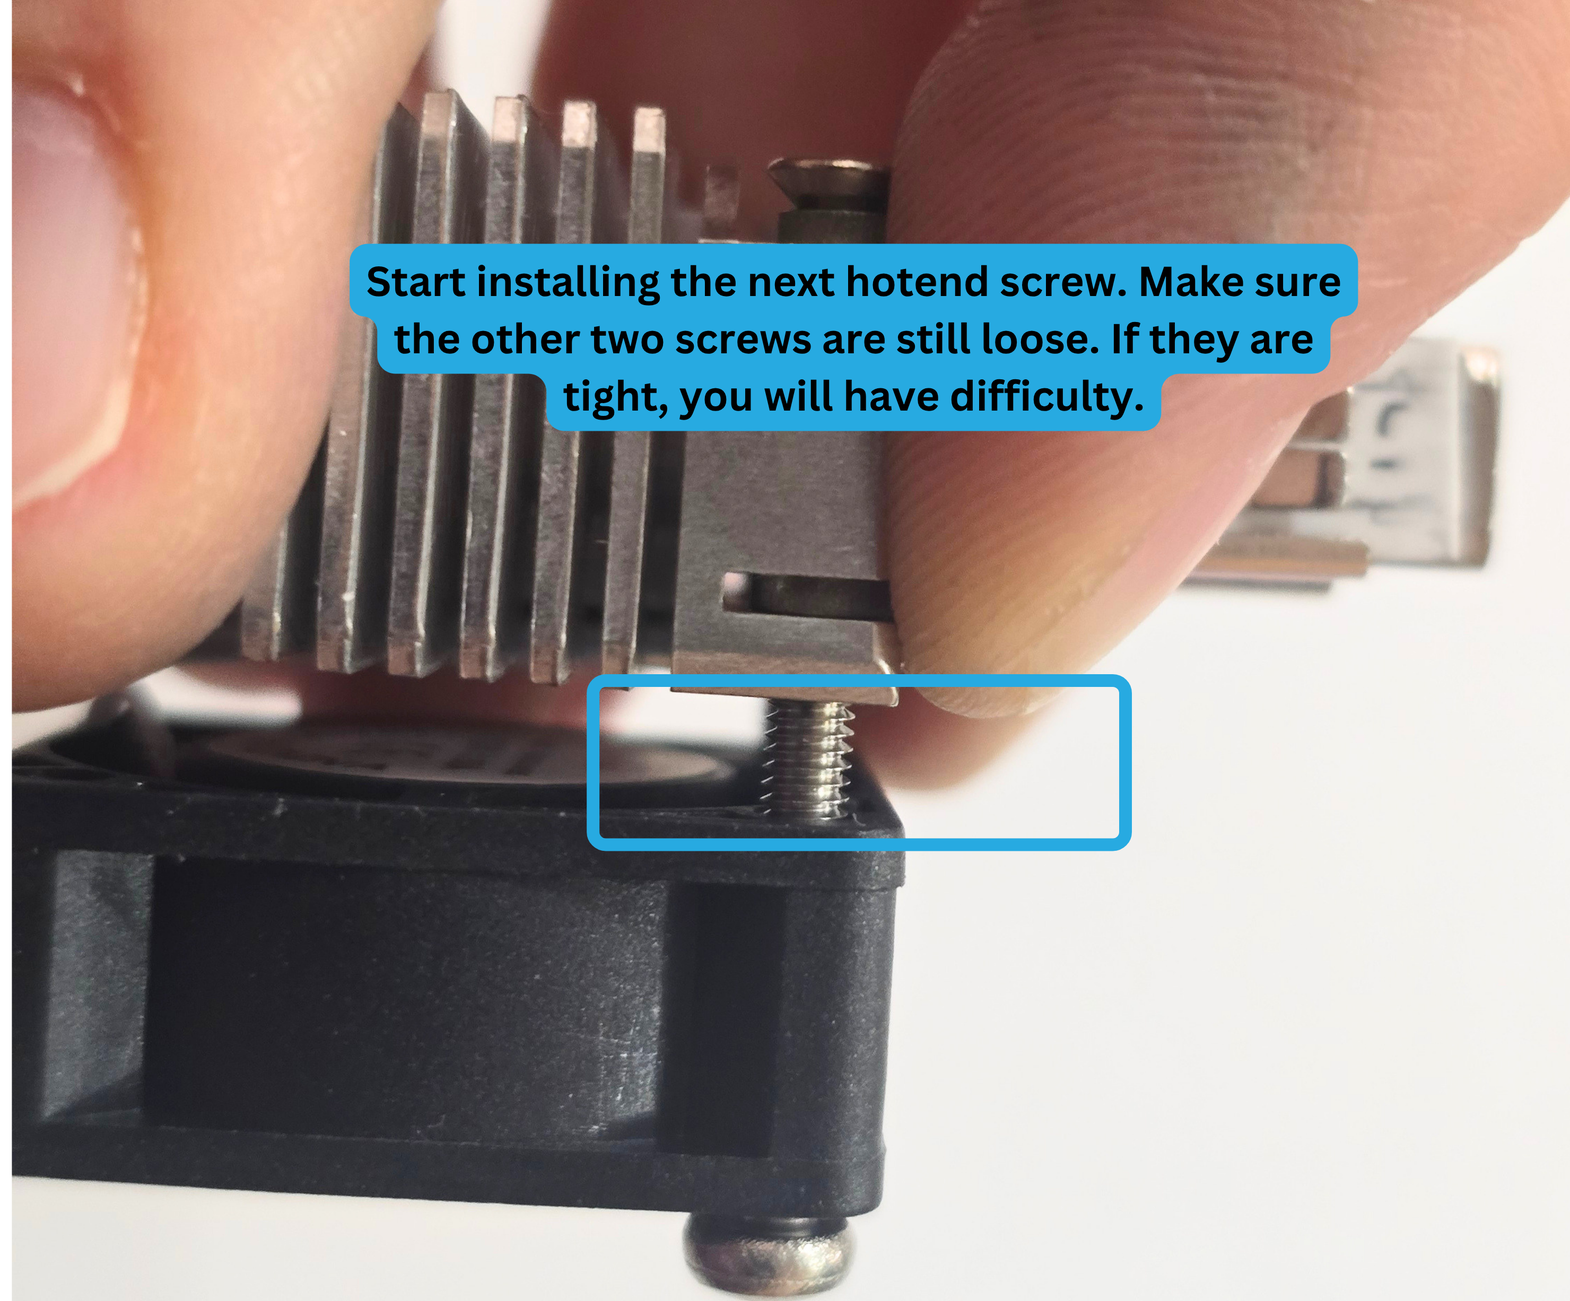
Step 7d: Second fan screw
Start installing the second fan screw. Make sure the other two screws on that side of the Pika Assembly are not fully tightened.
Once the second fan through has successfully passed through the wing, you can fully tighten both fan screws.
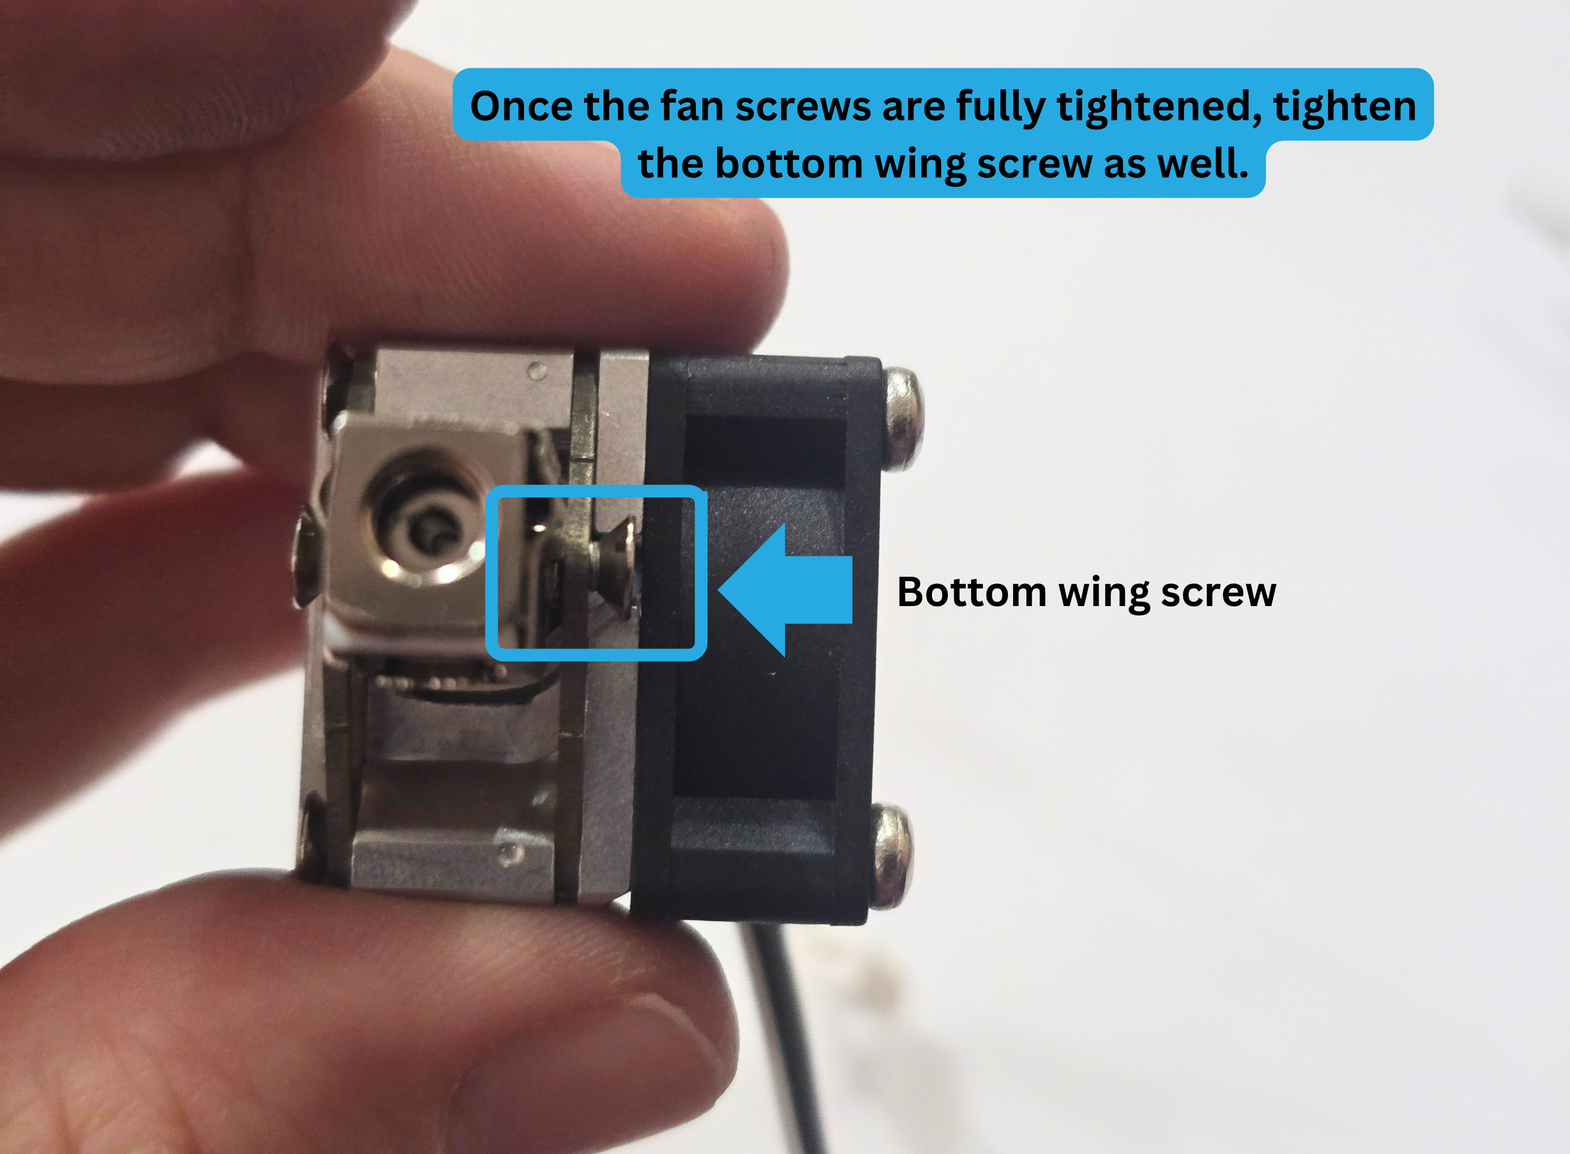
Next, tighten the bottom wing screw.
Step 8: Nozzle Installation
For this step, you will need the following:
- Pika Hotend Assembly
- 6mm Hex Nozzle Wrench
- FIN Nozzle

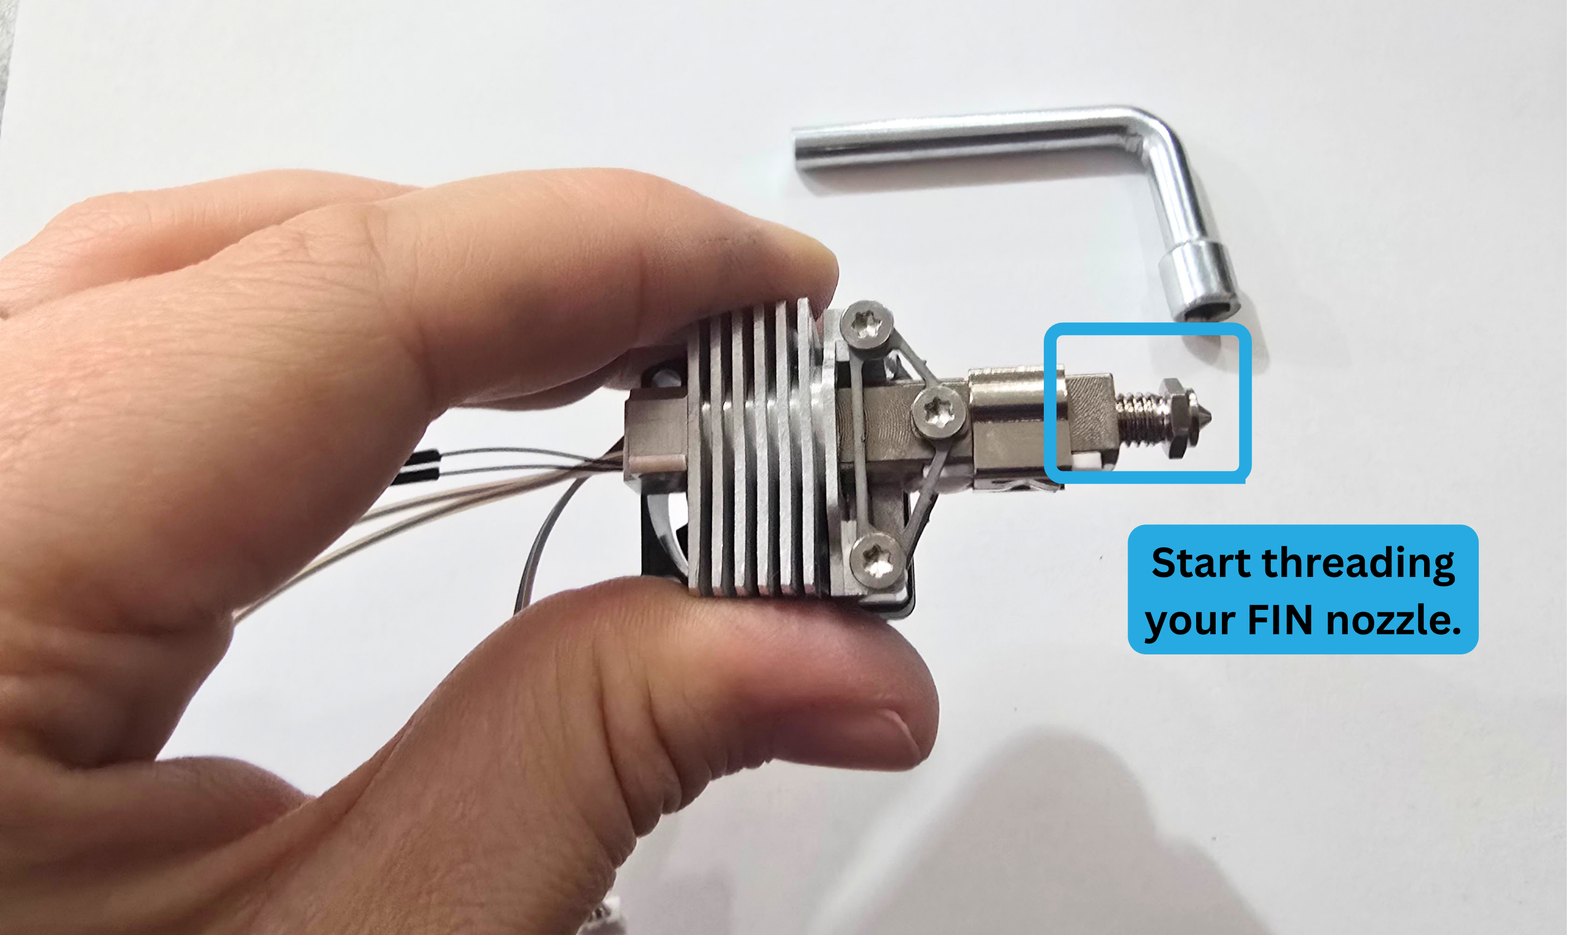
Step 8a:
Begin finger threading your FIN nozzle into the Heatblock Assembly.
Make sure not to cross-thread.
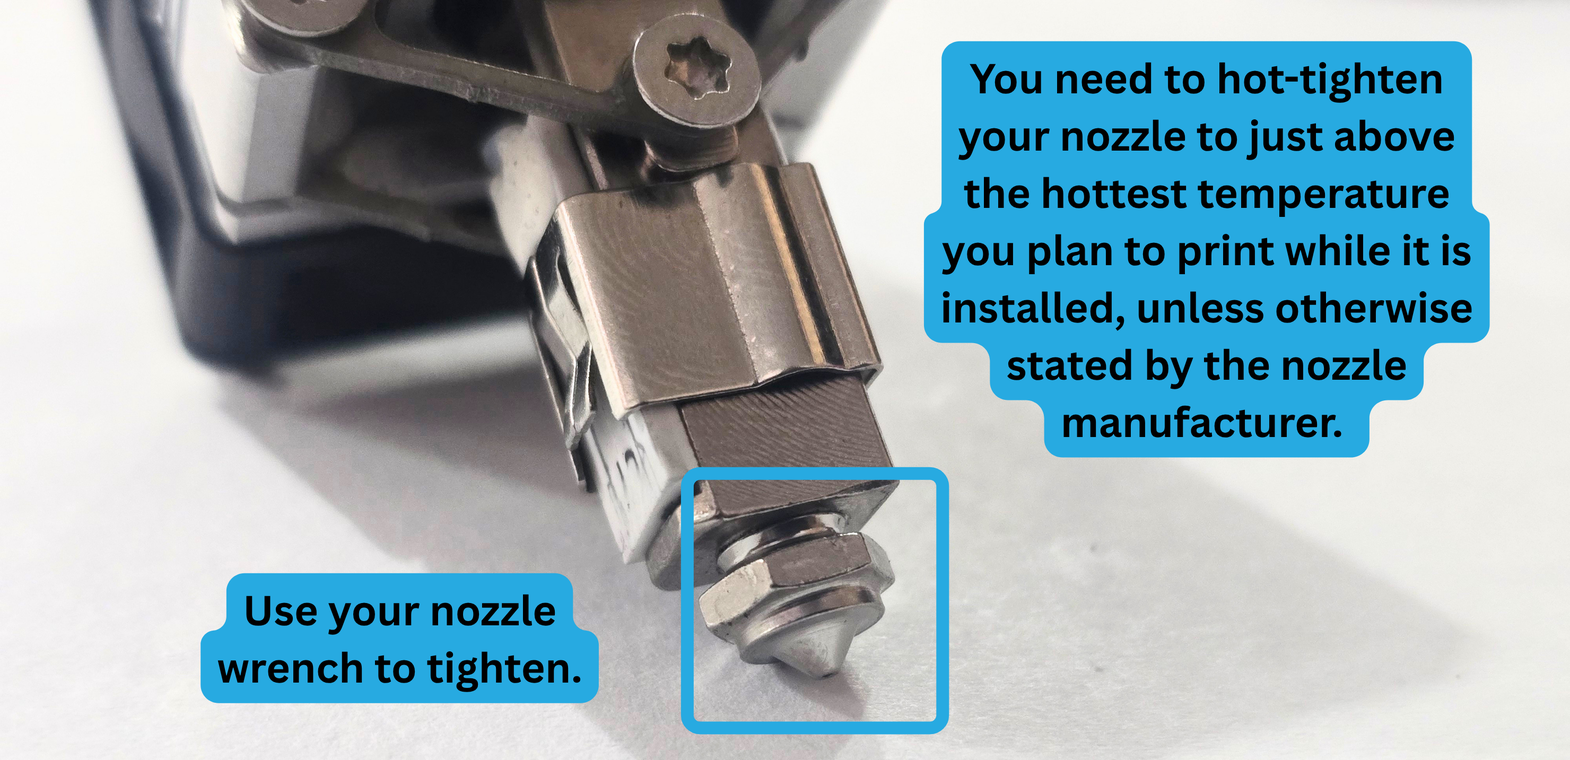
8b: Tightening your nozzle
Some nozzles need to be hot-tightened to prevent leaking.
Always tighten:
Tungsten Carbide Nozzles
Hardened Steel Nozzles
Some nozzles depend on the manufacturer.
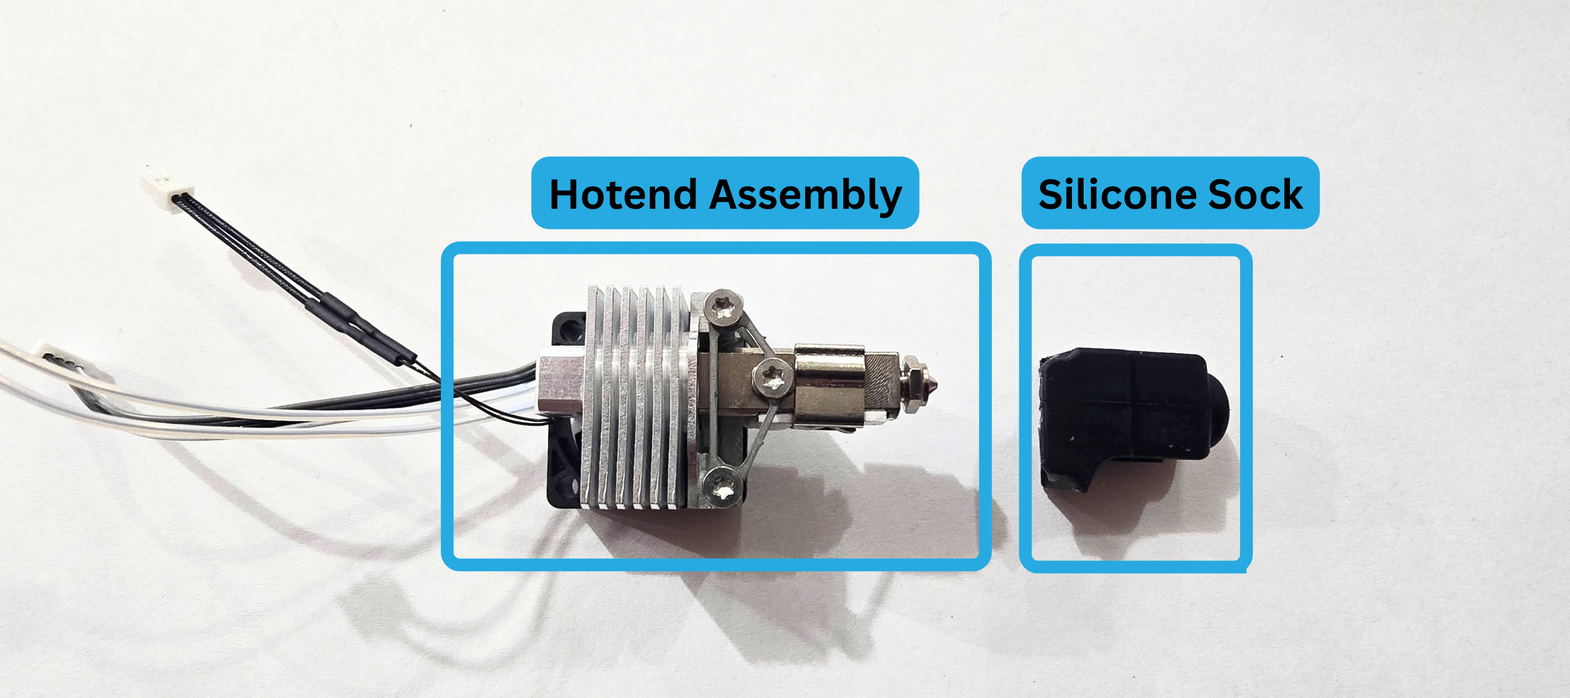
Step 9: Silicone Sock
Once your nozzle is fully tightened, it is time to install your silicone sock!
You will need:
- Pika Hotend Assembly
- Pika Silicone Sock
Make sure your silicone sock is facing the correct direction.
Install it over the top of your FIN nozzle.
When it is fully "on" you will feel it suction itself to the nozzle.
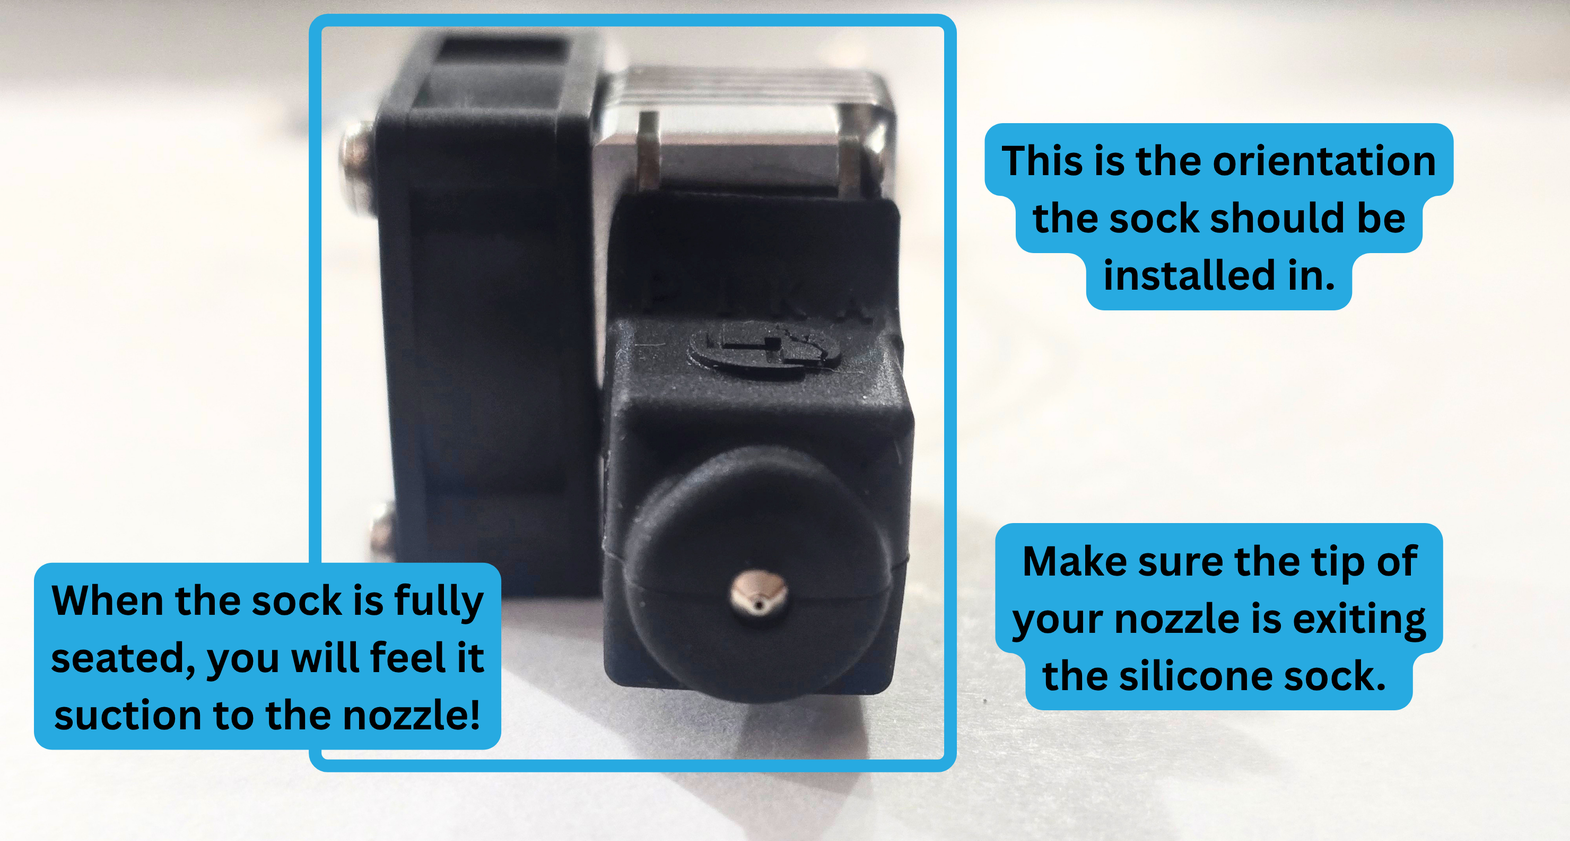
Your Pika Hotend is now ready to be installed on your printer!