Chube Conduction Heater and PT1000 Installation
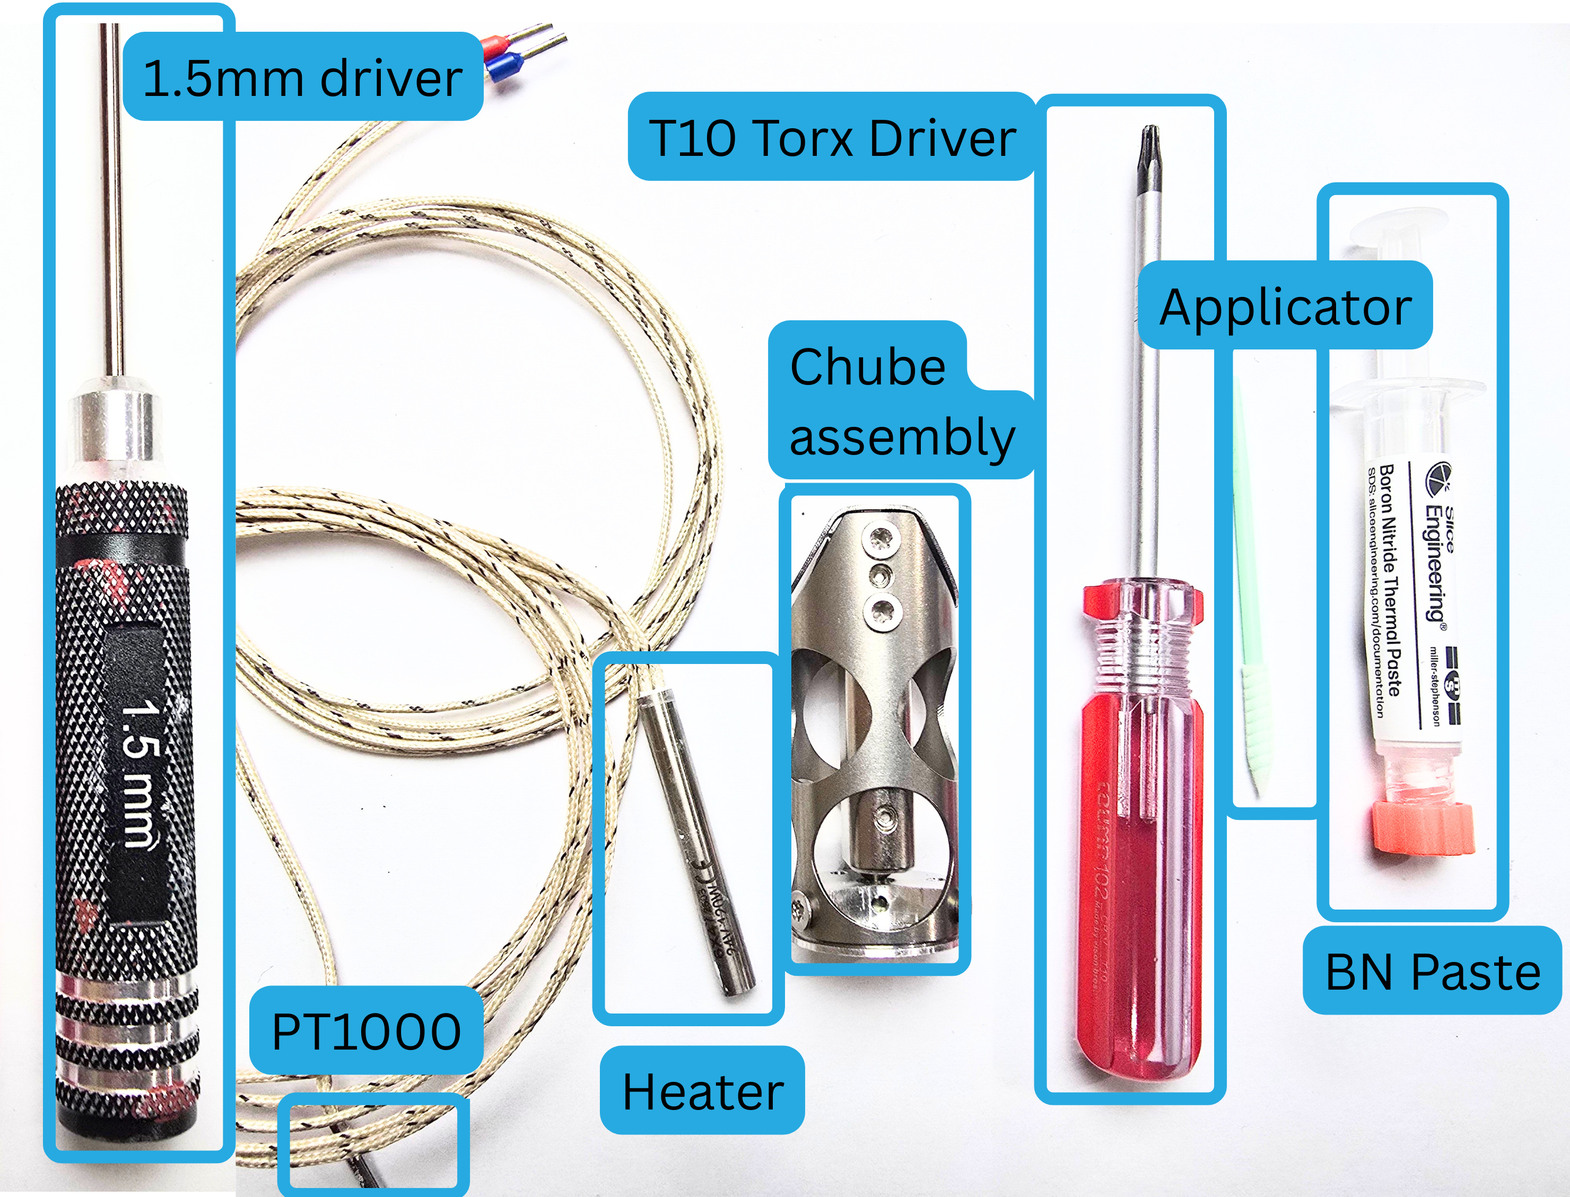
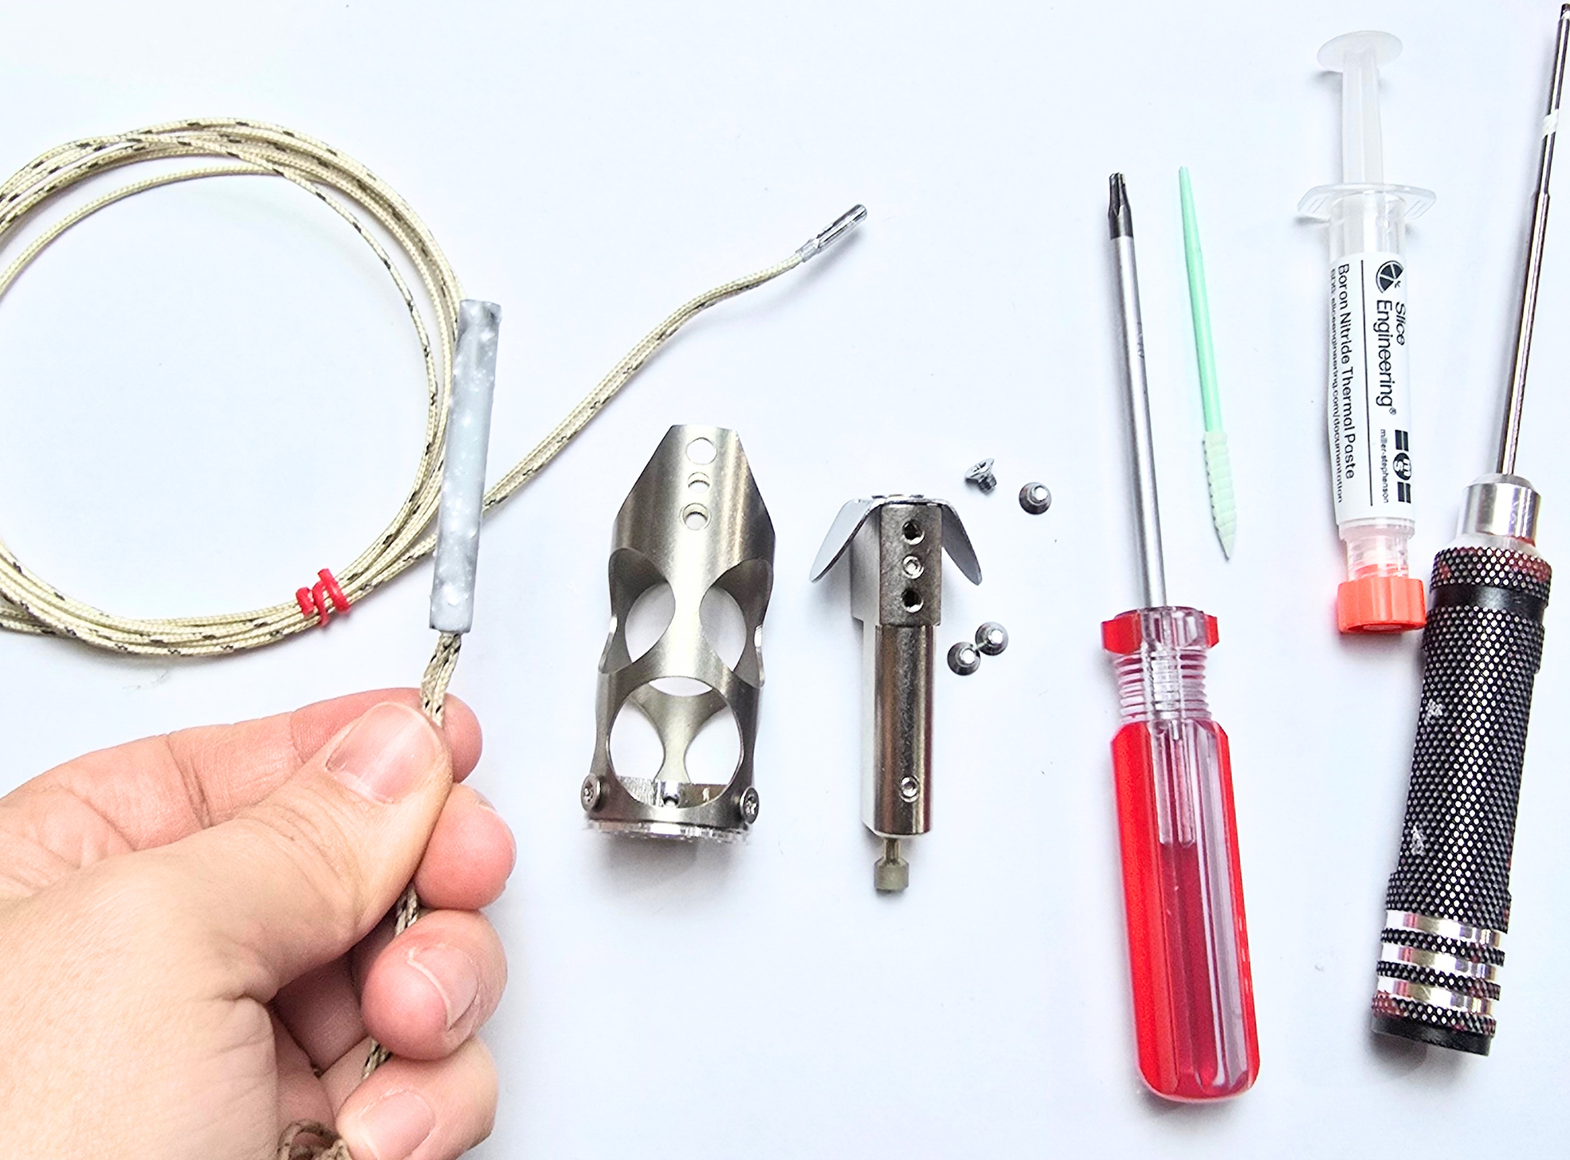
In order to properly install your heater and PT1000, you will need the following:
- Chube Conduction
- Super Volcano Heater
- PT1000
- Boron Nitride (BN) and Applicator
- T10 torx driver
- 1.5mm hex driver
Step 1:
Remove the 4 torx screws affixing the heatblock to the shroud using the T10 torx driver. Set the screws aside for later.
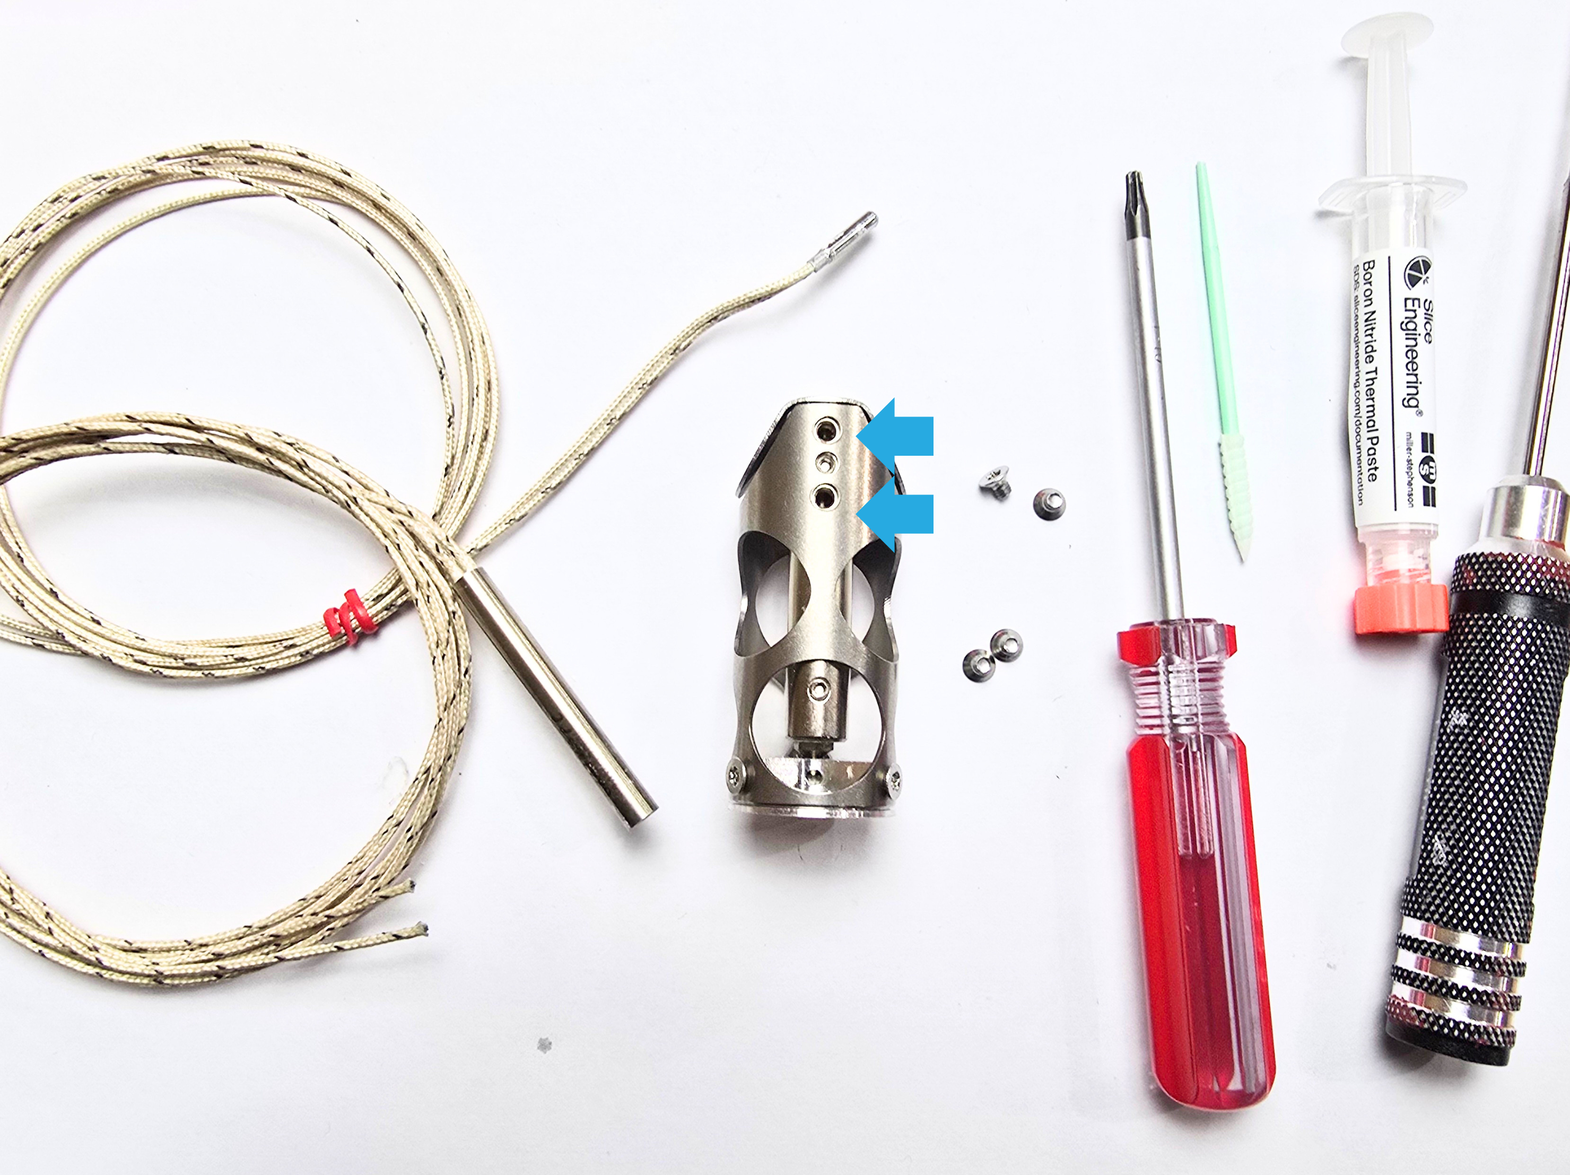
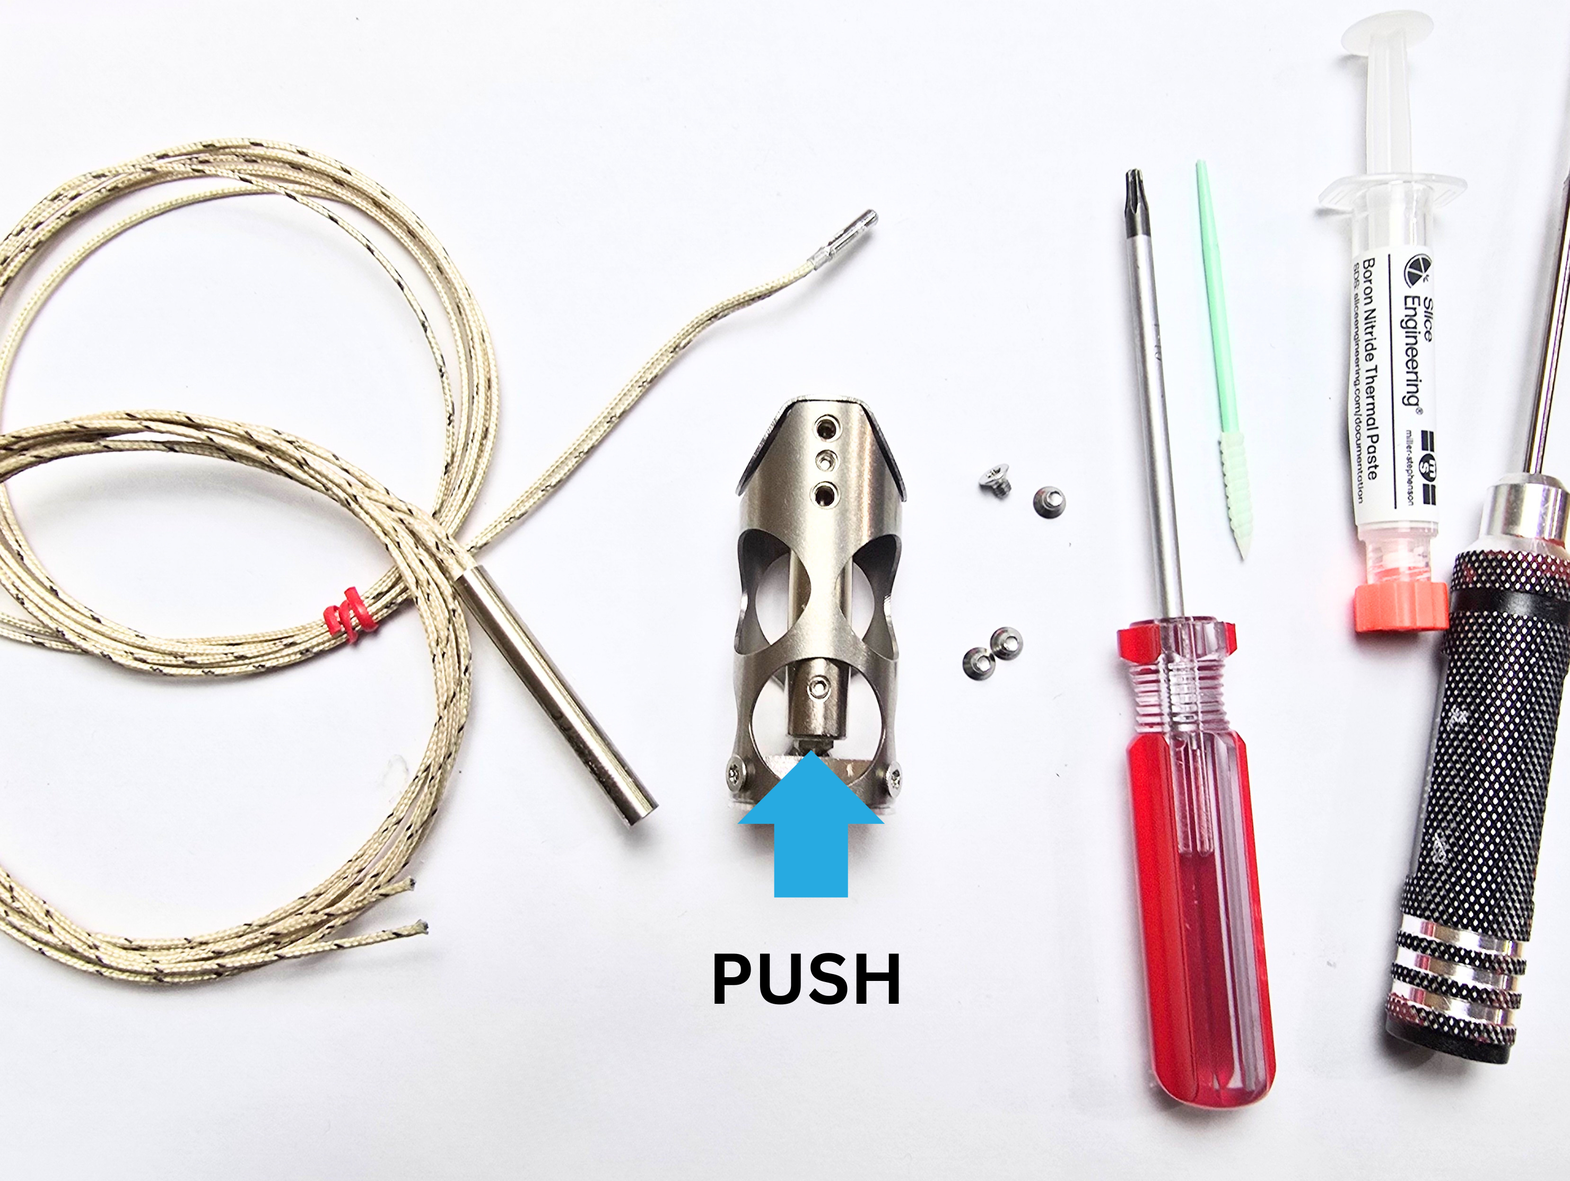
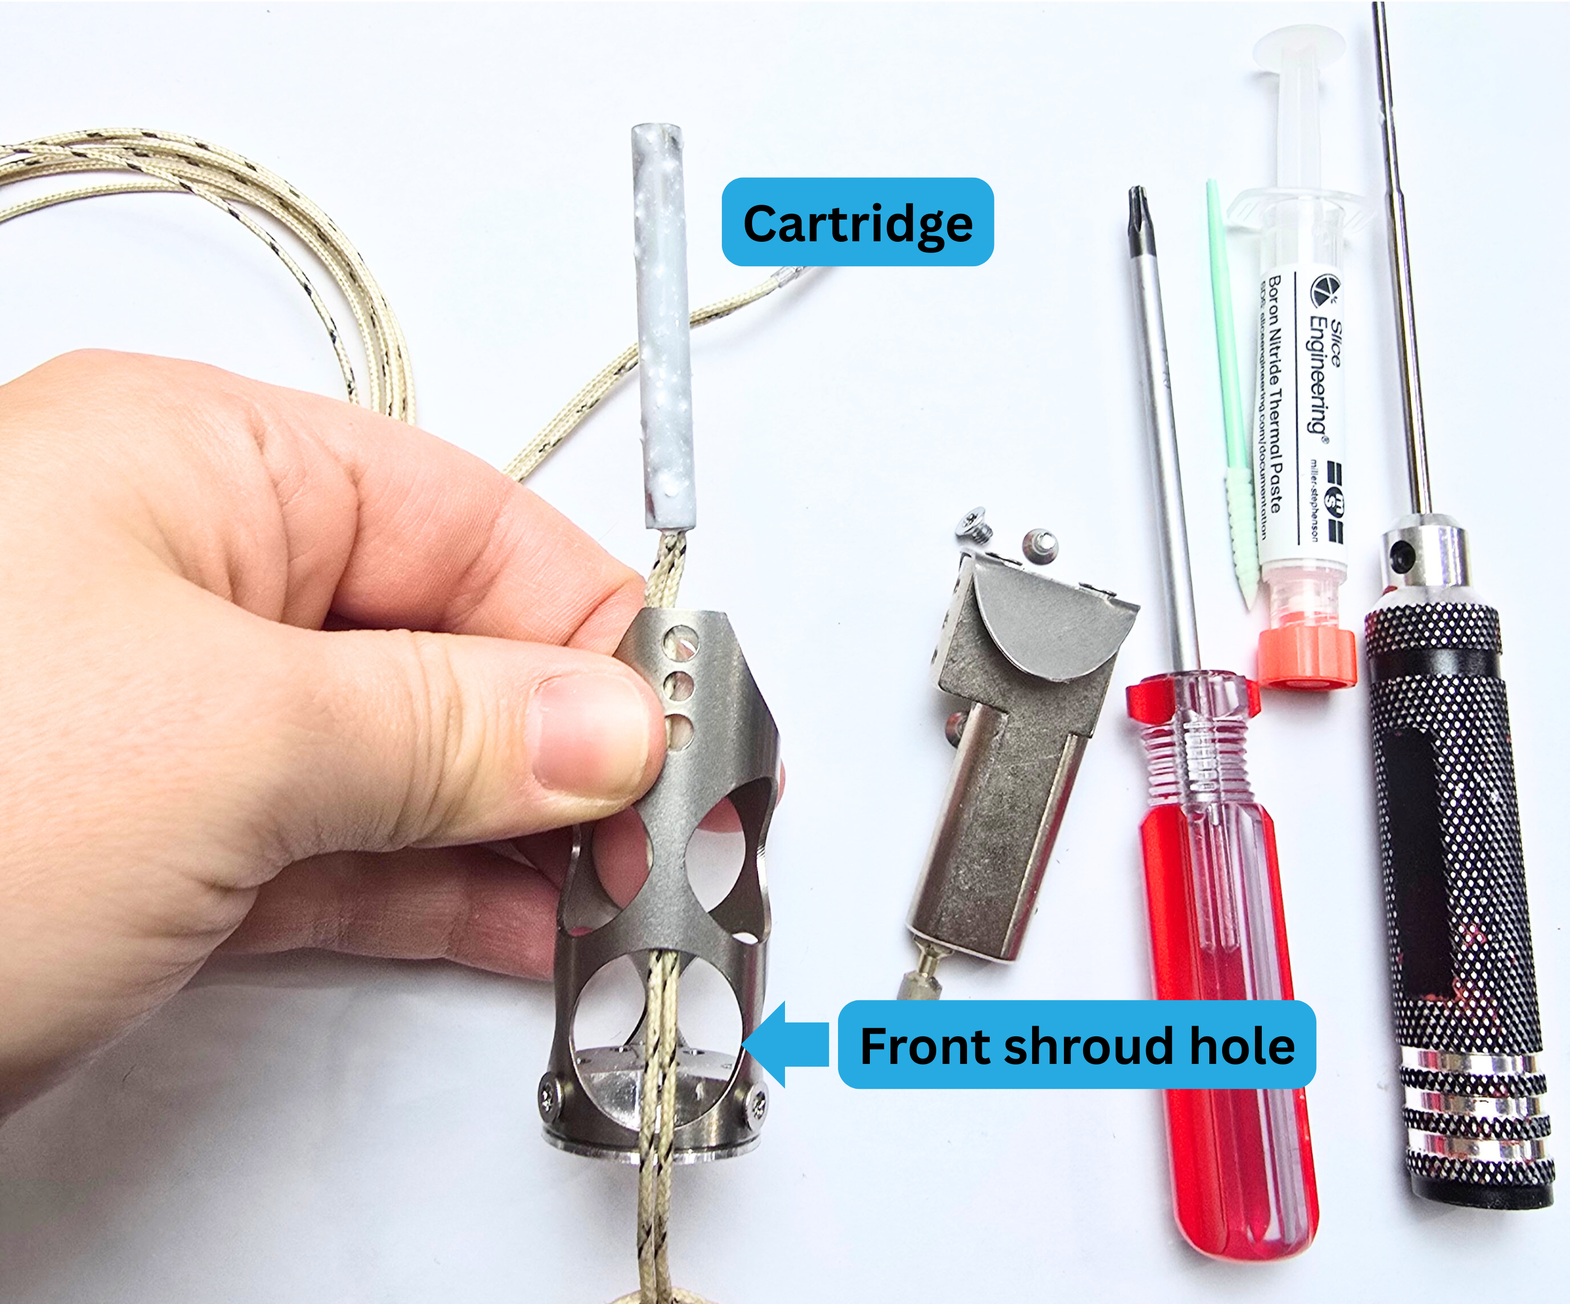
Step 2:
Remove the heatblock assembly from the shroud assembly. You can do this by pushing up on the portion of the heatblock that is accessible through the front hole of the shroud.
If your heatblock seems "stuck" it is likely catching on a grub screw. If this is happening, you can use a 1.5mm hex driver to slightly insert the grub deeper in the block. After you do this, the block assembly should be easy to remove.
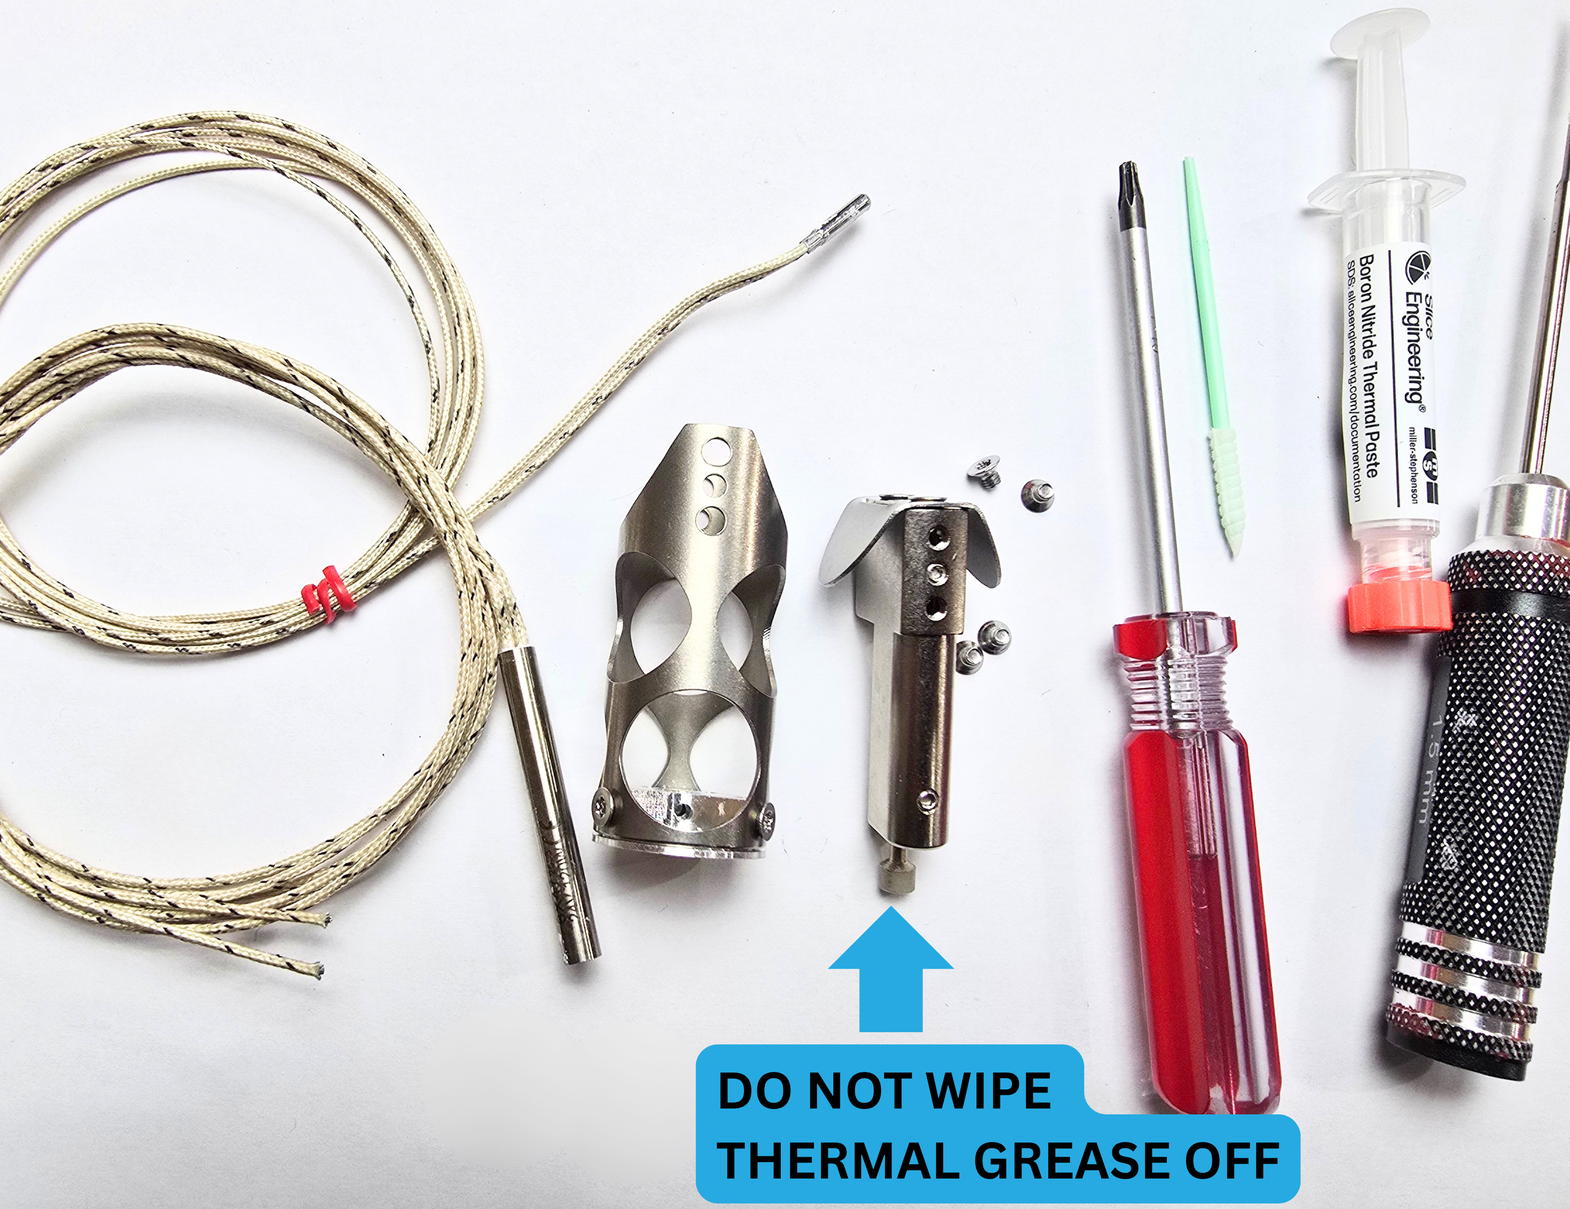
Take care with the thermal grease (silvery film) that is on the cup portion of your Chalice Heatbreak. If you wipe it off, you will need to apply more before printing with your hotend.
Step 3:
For this step, you will need:
- Heatblock assembly
- Shroud assembly
- Heater
- Boron Nitride Paste
- Applicator
Step 3a:
Put a small amount of the BN paste in a little dish, and use your applicator to apply it to the cartridge portion of the heater (the silver metal part).
Step 3b:
Pick up your pasted heater, as well as the shroud assembly. Put the cartridge side of the heater through the front hole of the shroud.
Step 3c:
Continue holding the shroud assembly and heater in one hand.
With your other hand, pick up the heatblock assembly.
Insert the heater cart into the heater-side of the heatblock.
If the heater cartridge does not go in the whole way, you will need to slightly loosen (with your 1.5mm hex driver) one or both of the grub screws on the heatblock side in order to insert the cartridge.
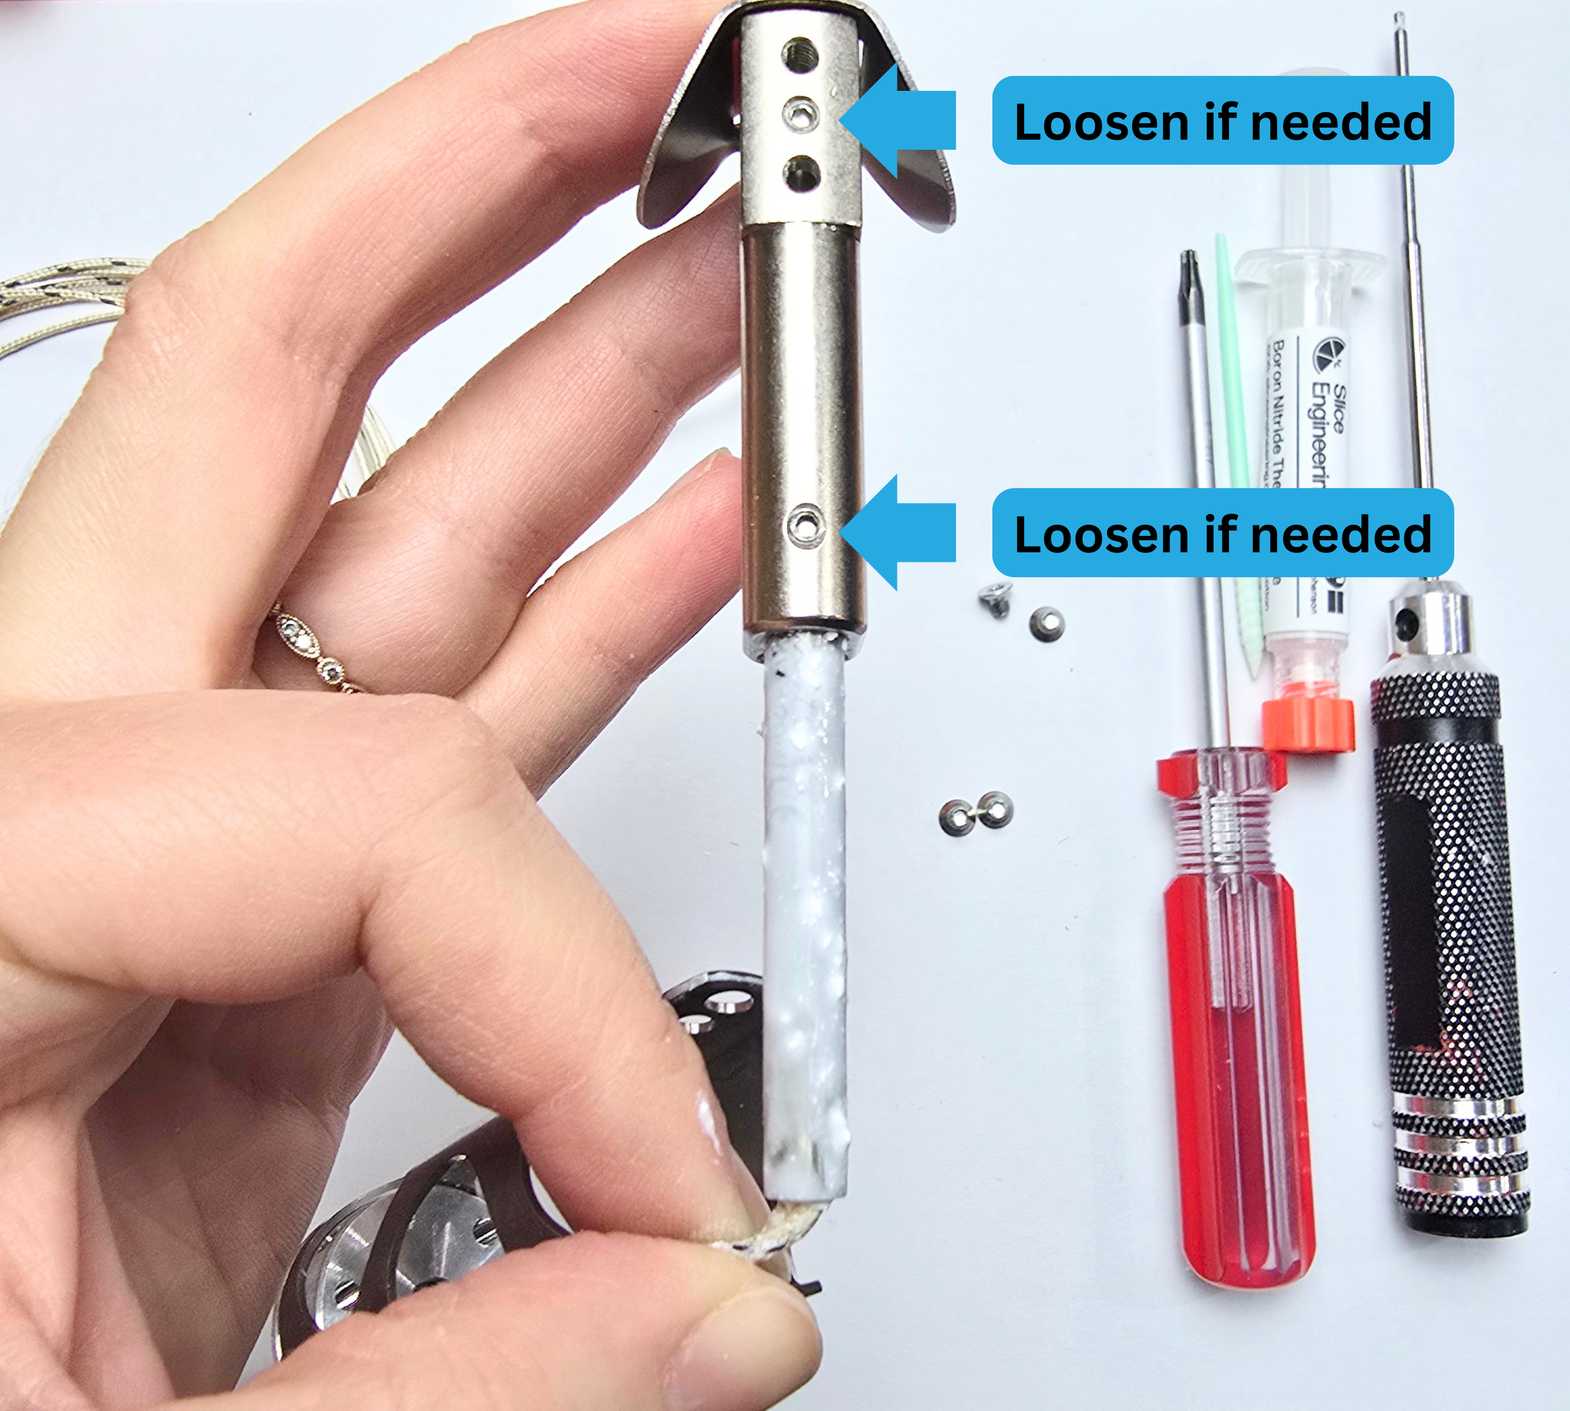
If your heater went past the first grub with no issue, and then is stuck on the second, you will need to loosen that one.
Step 3d:
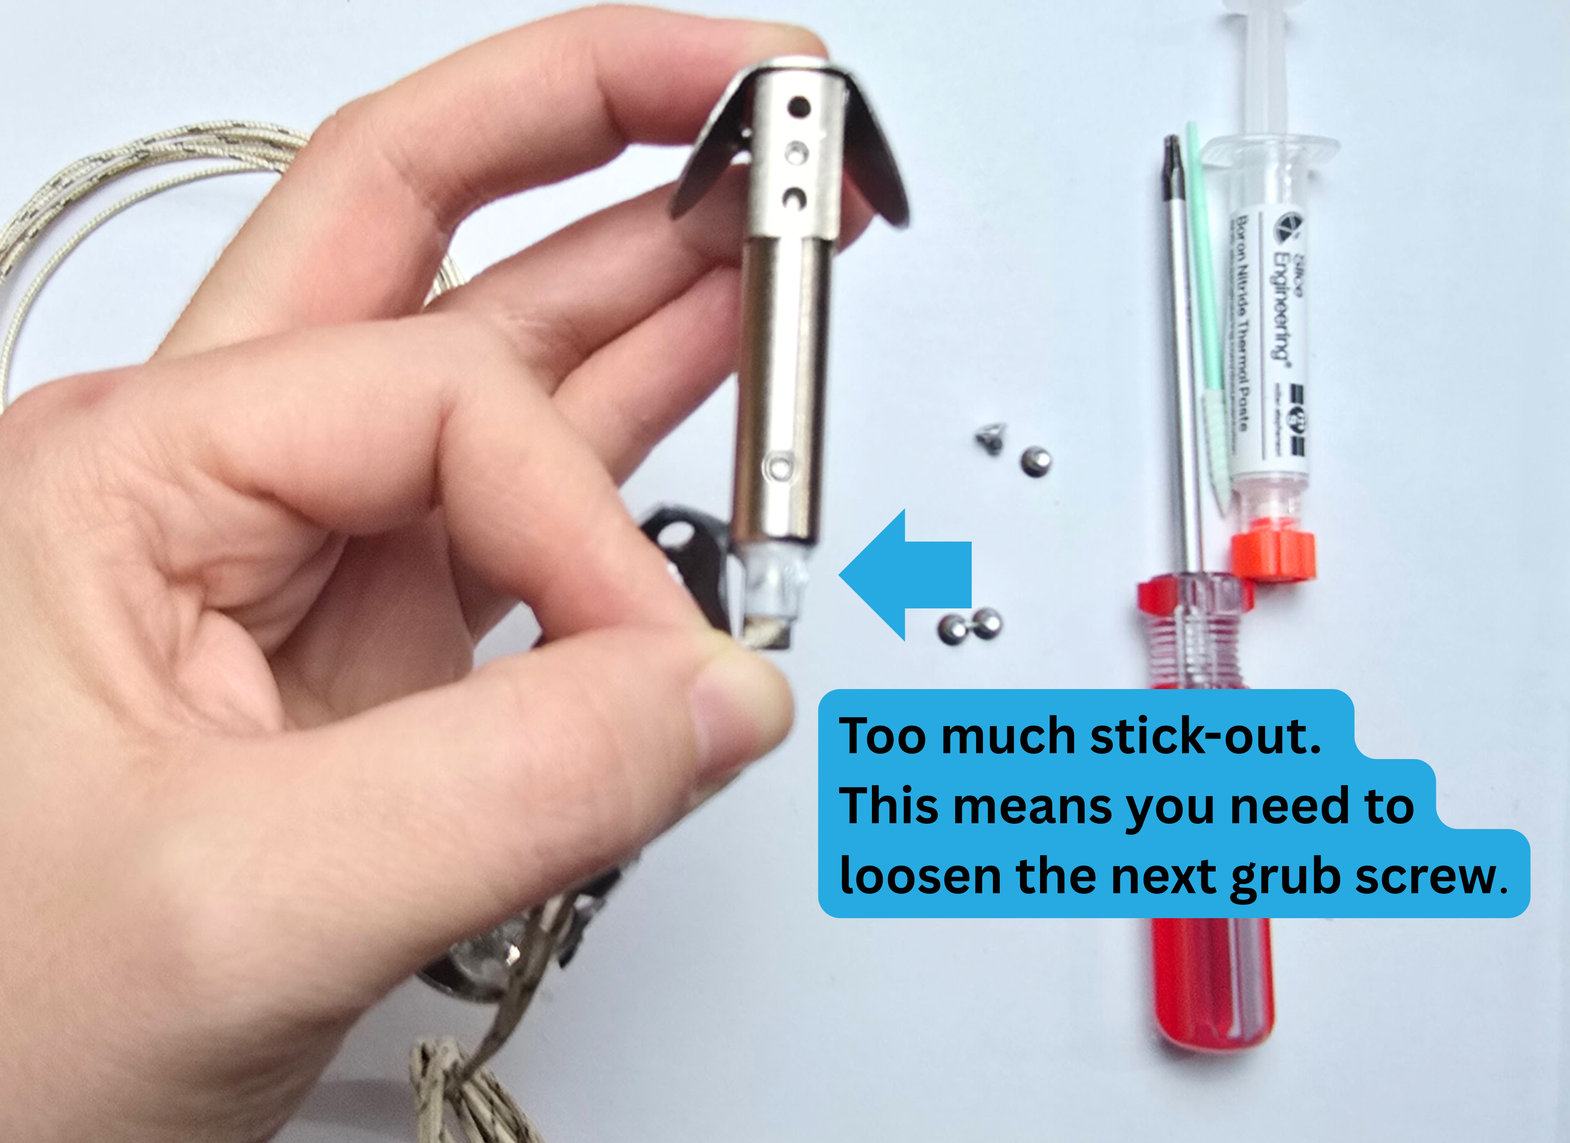
Once your heater cartridge is fully inserted, it should look like the image below. If it looks like this, you can use your 1.5mm hex driver to tighten the grub screws. Stop as soon as you feel resistance.
If you tighten the grubs down too far, you may damage your heater cartridge, and reduce the life span.
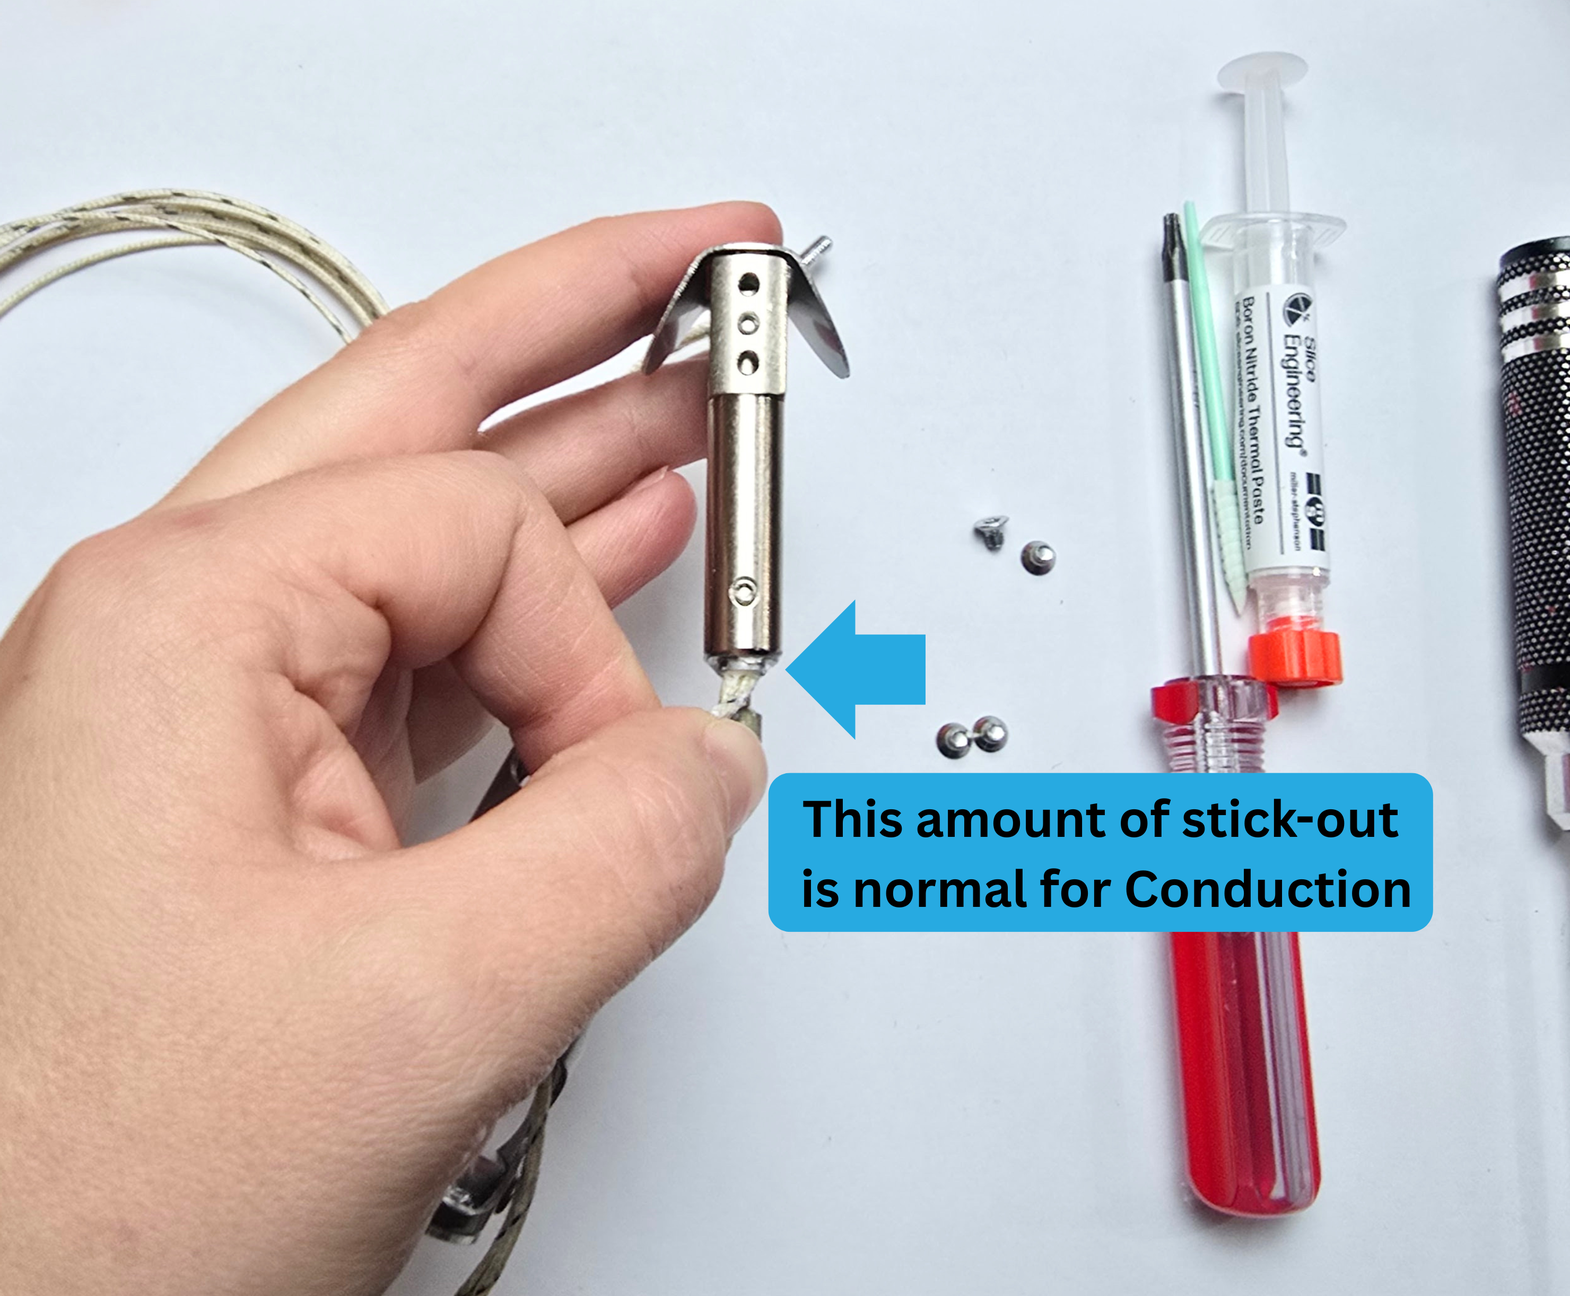
A small amount of the heater cartridge protruding like above is a normal and expected amount for Chube Conduction.
Step 3e:
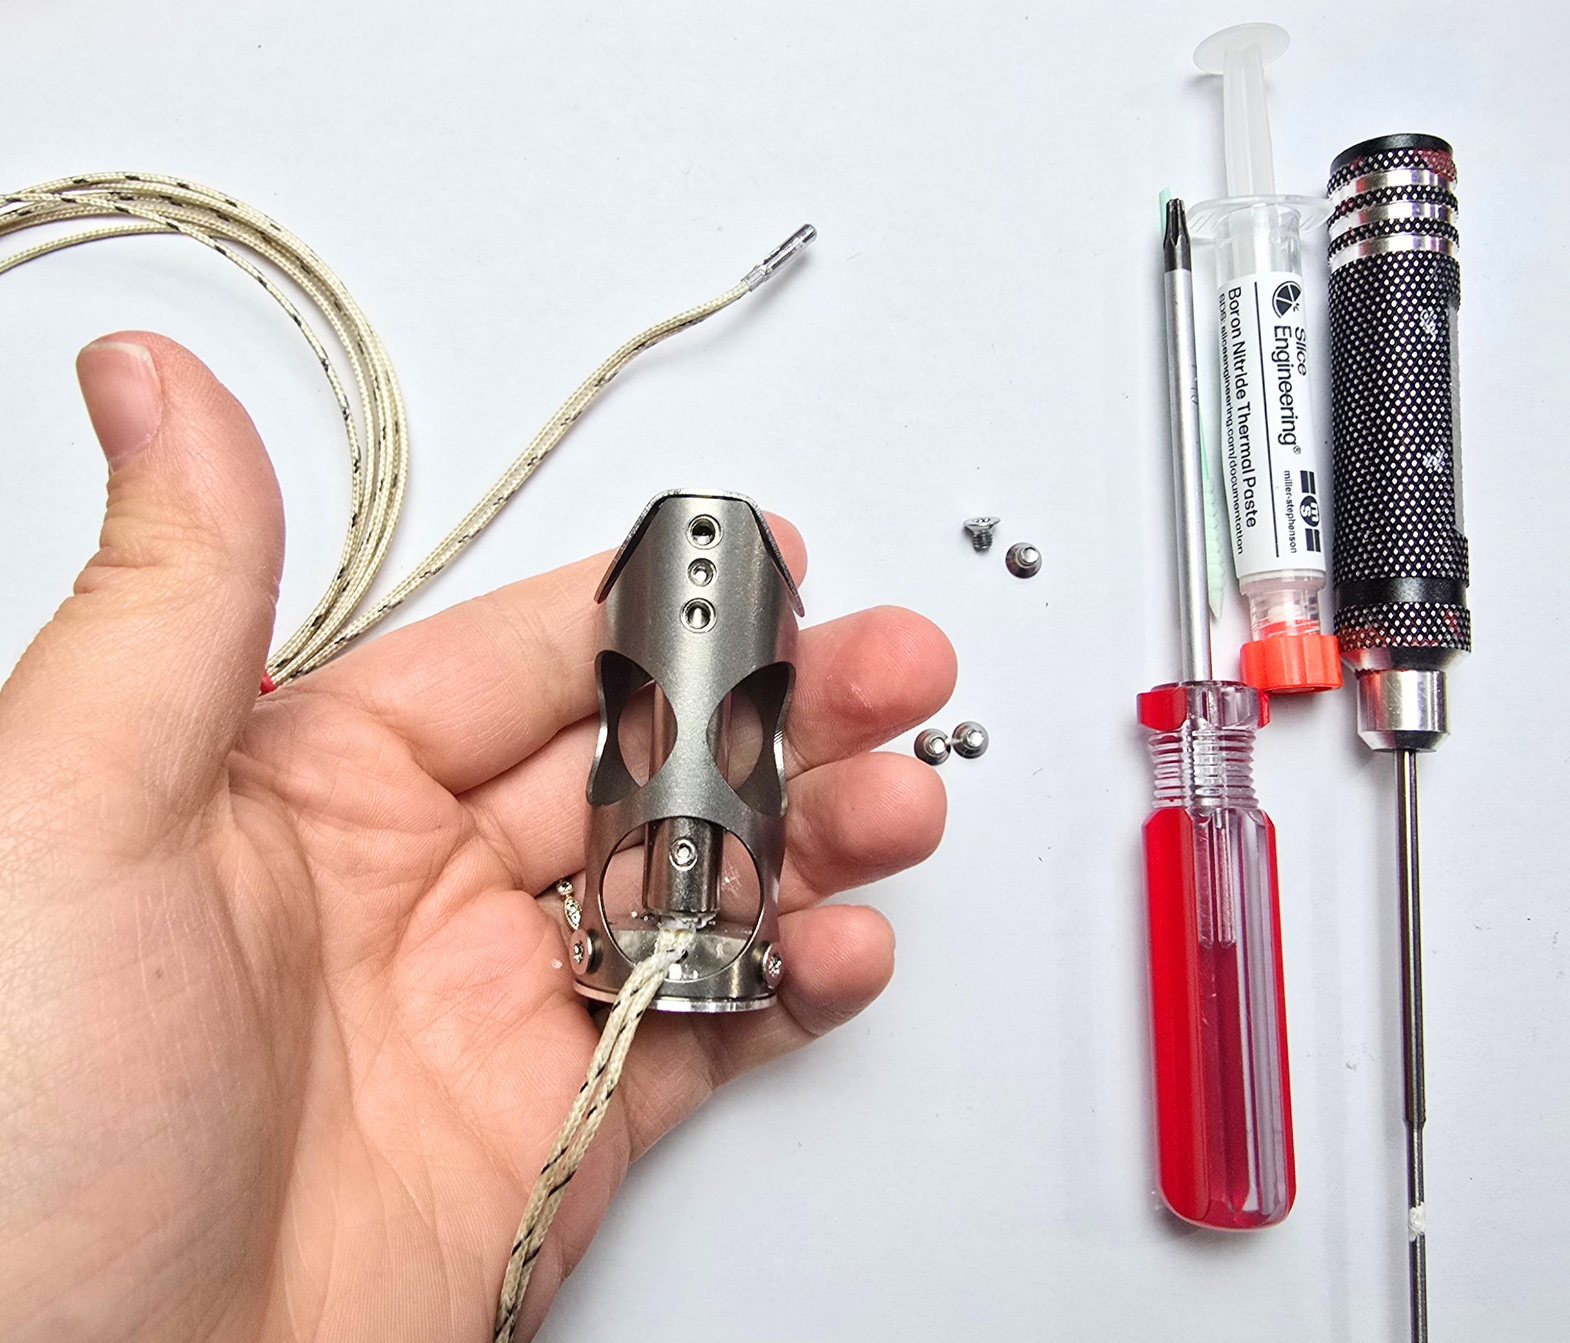
Move the block assembly down into the shroud assembly. Make sure to apply even pressure. If the block assembly catches, there may be a grub screw that needs to be slightly tightened.
If it catches further down, you may need to slightly jiggle the assembly to guide the heatbreak into the hole in the heatsink.
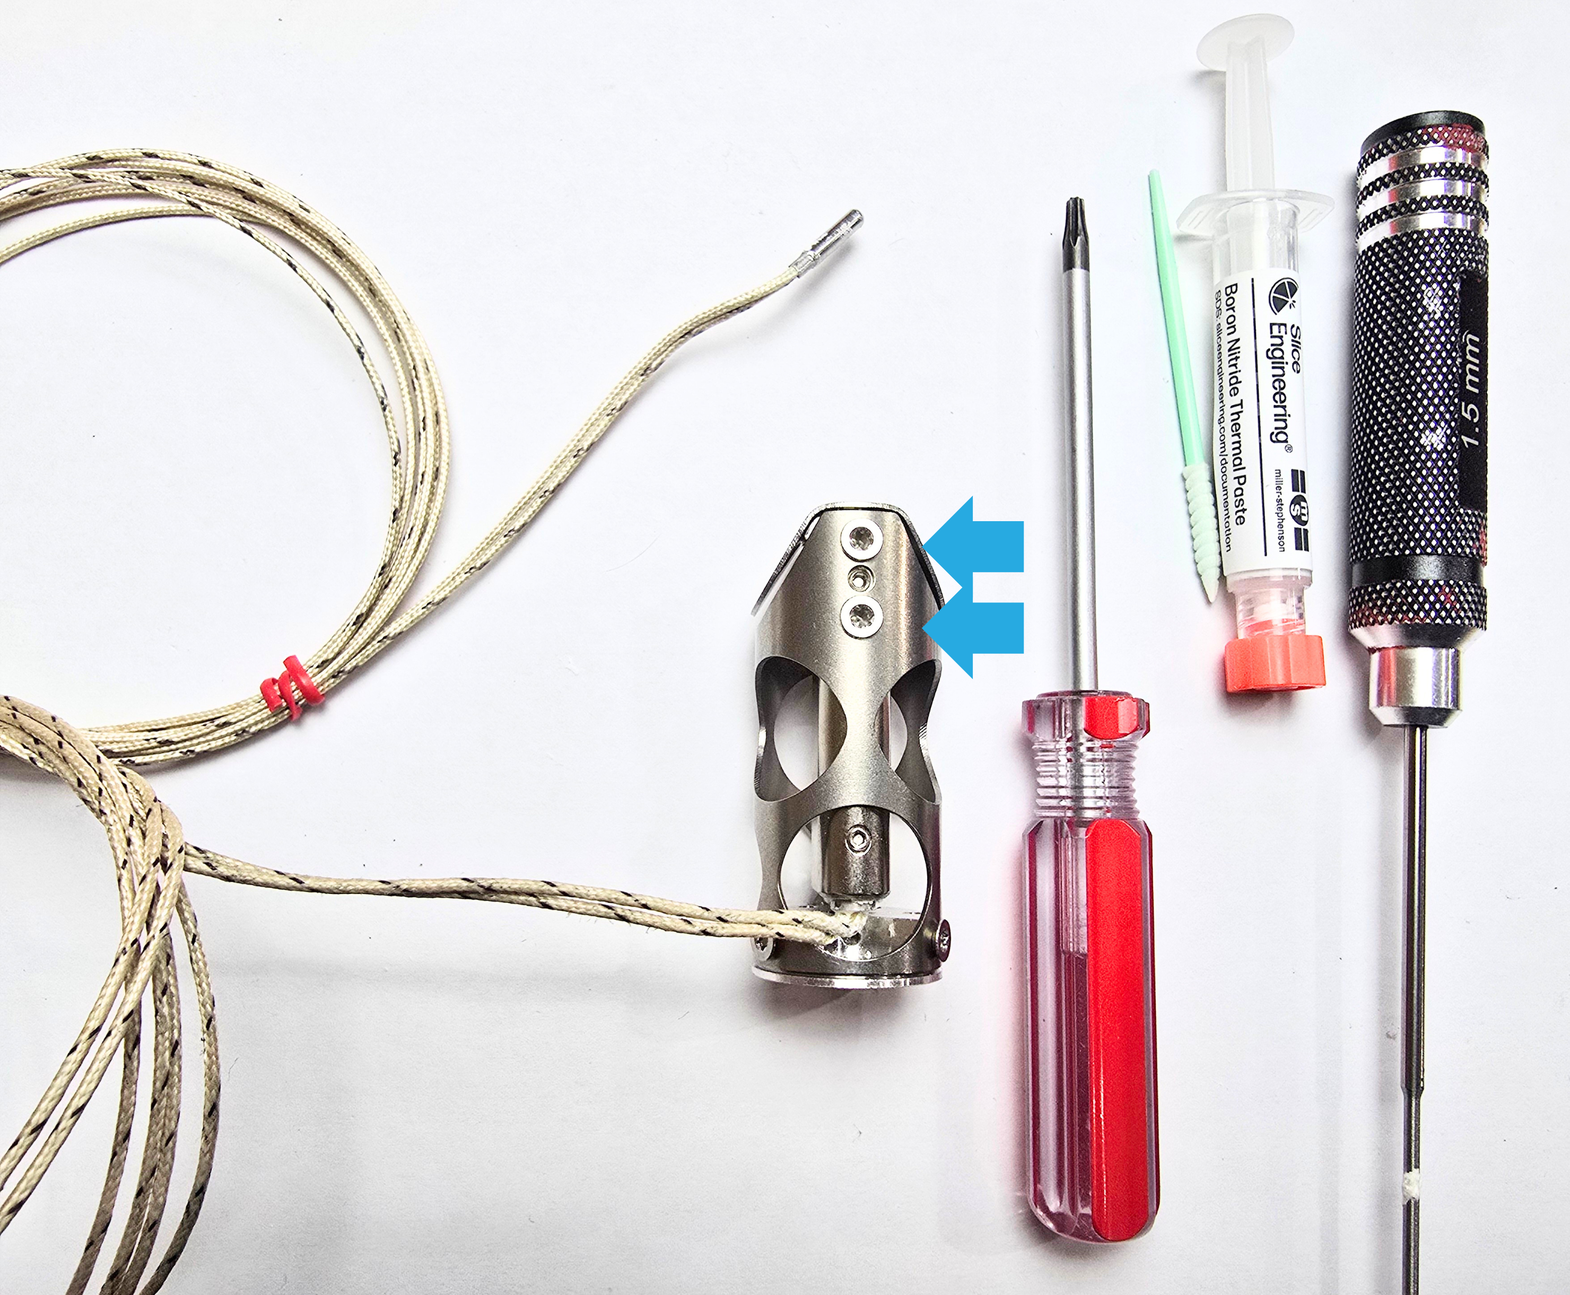
Once everything is in alignment, the assembly should look like this:
Step 3f:
Take all 4 of the torx screws, and reinstall them using your T10 torx driver.
Step 4:
For this step, you will need:
- Hotend Assembly
- PT1000
- 1.5mm hex driver
- BN Paste
- Applicator
Step 4a:
Apply a small amount of BN to the cartridge portion of your PT1000. Insert it in the PT1000 hole, located in the heatblock portion seen below.
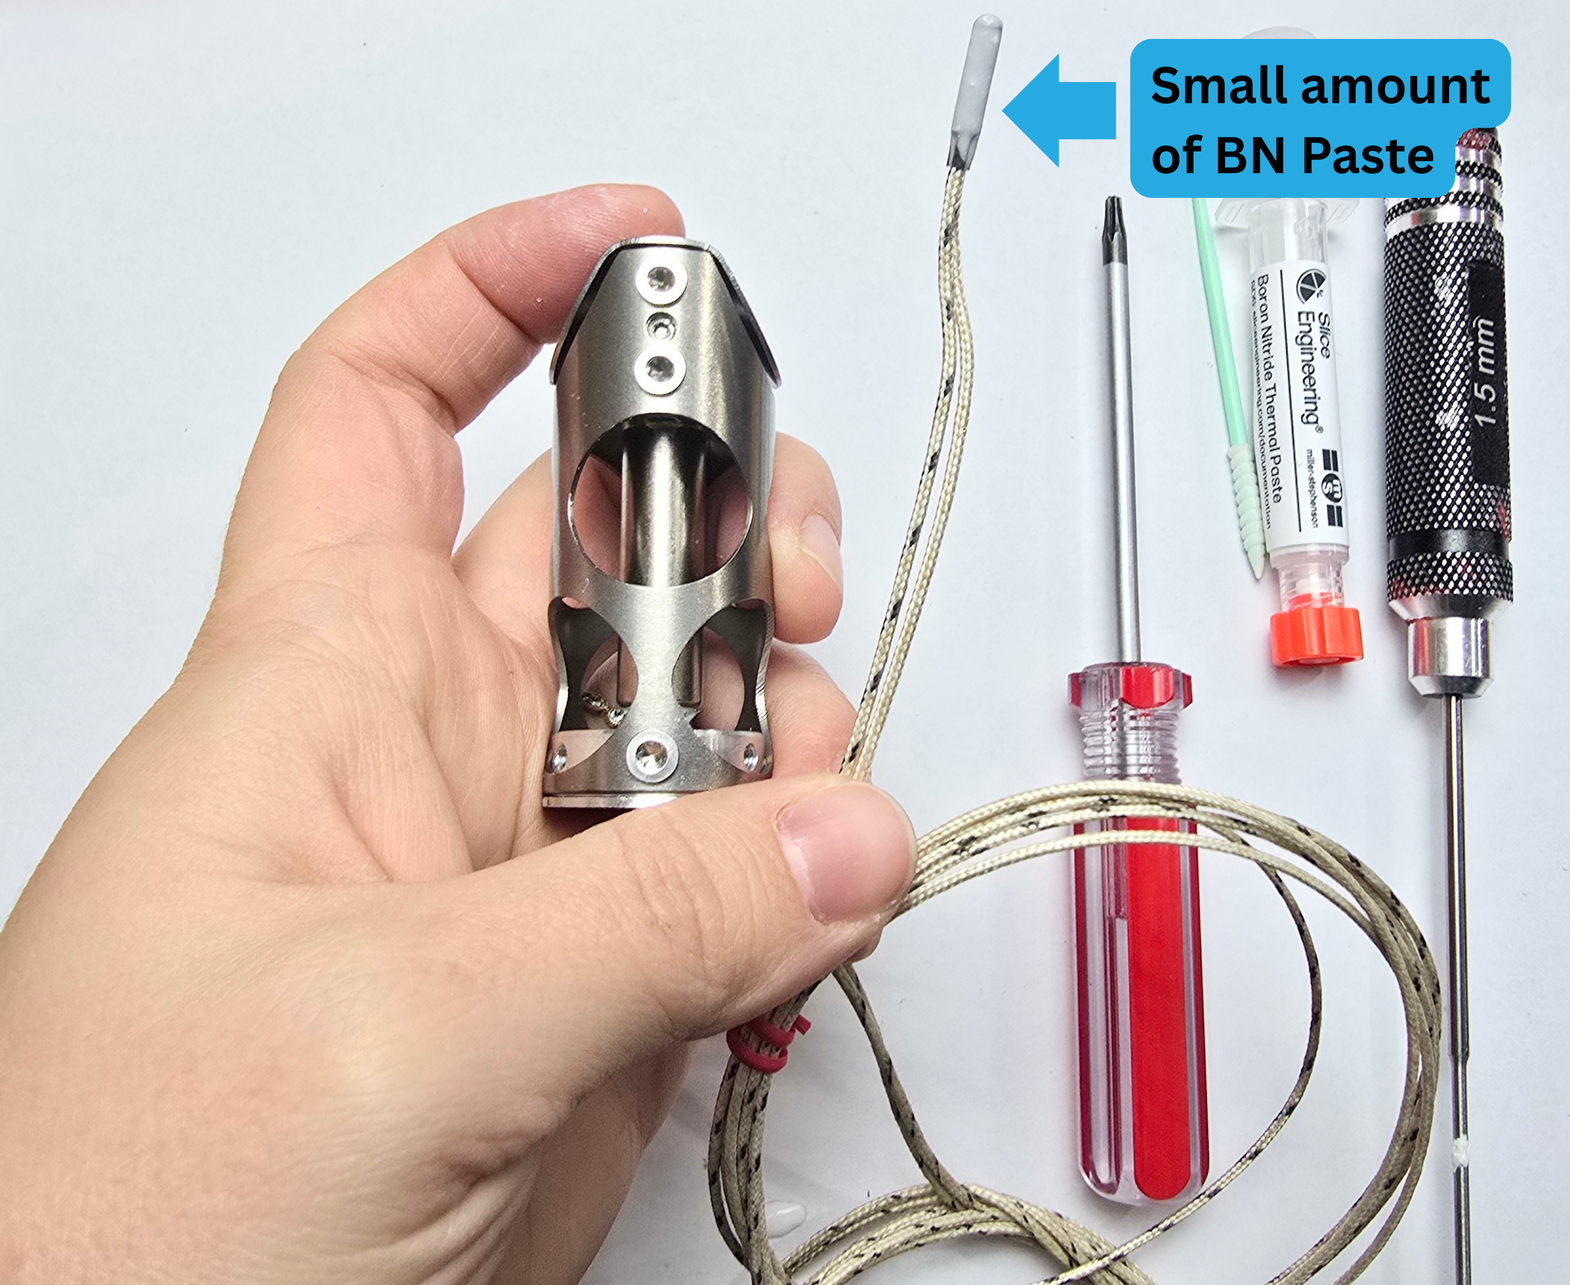
If you use too much, it will be messy!
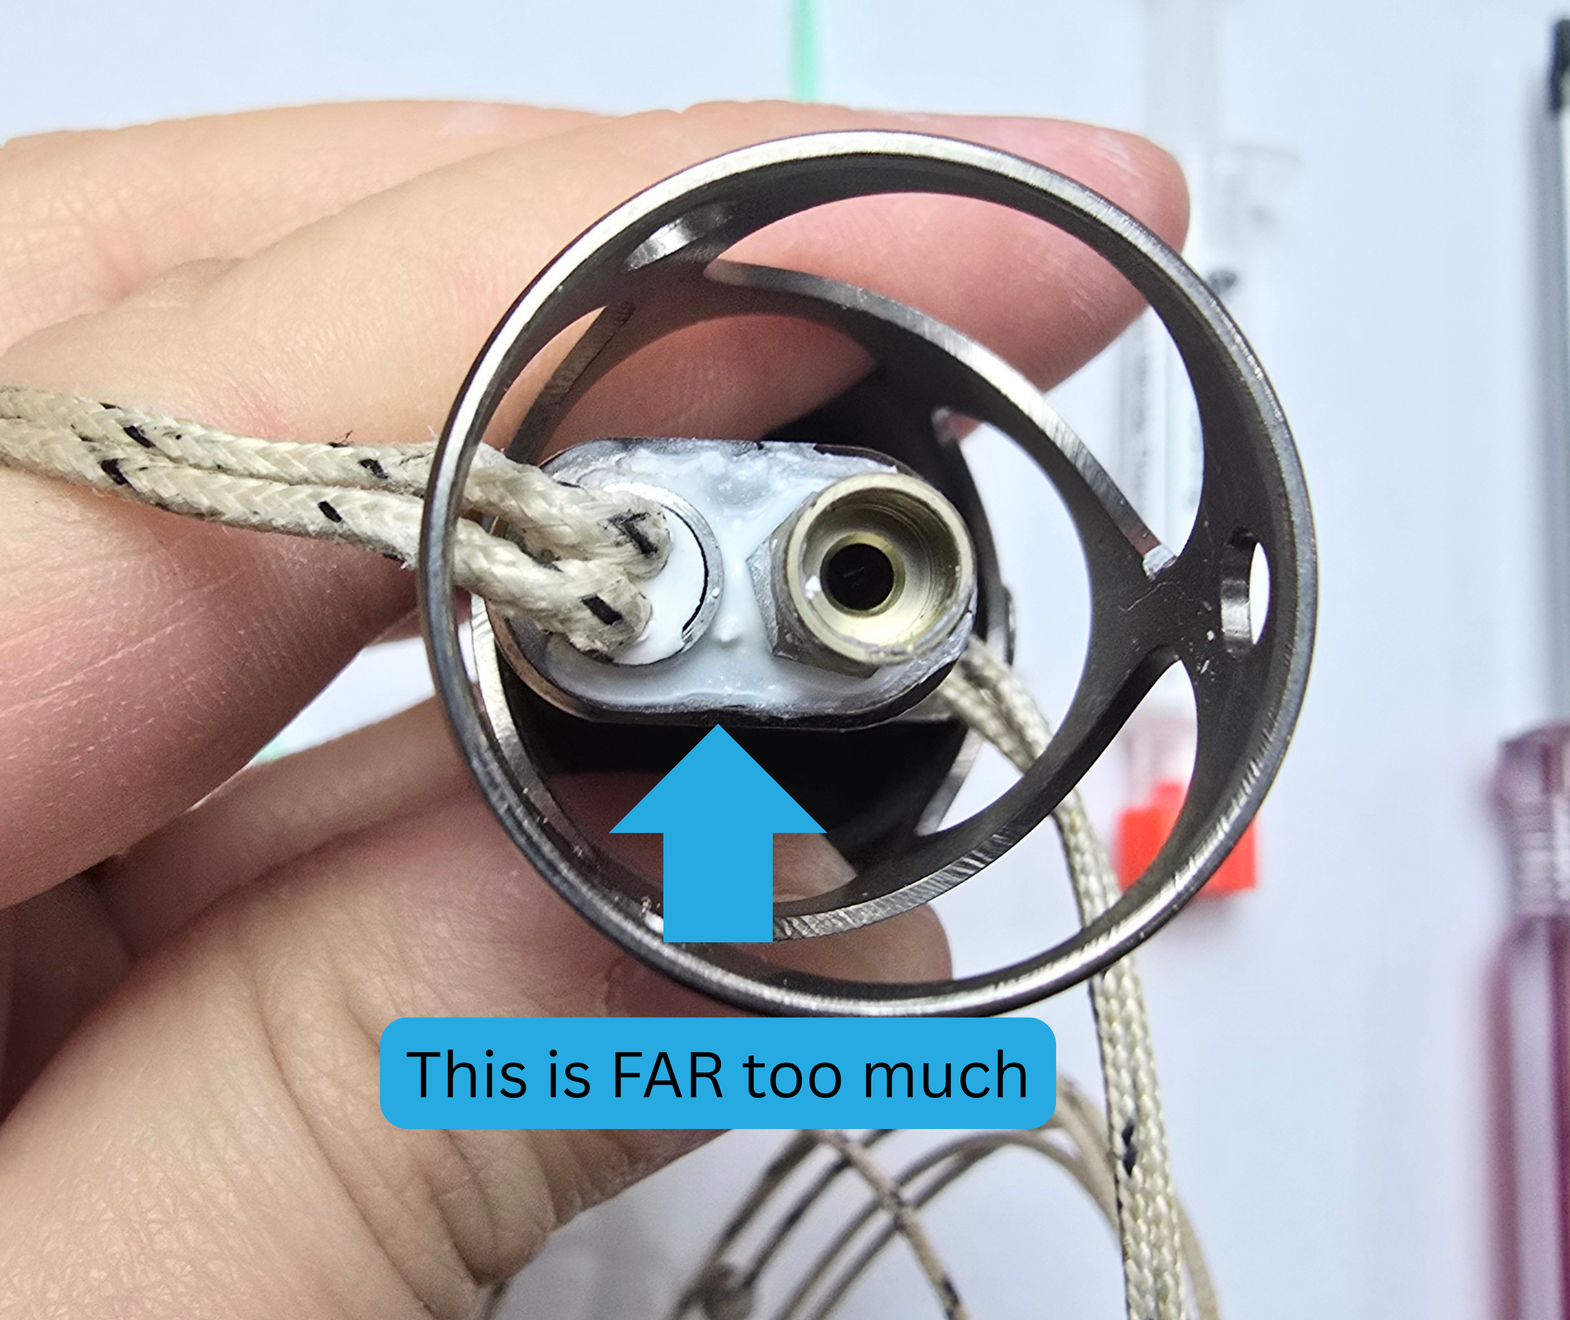
If your BN looks like the above image, you can use a Q-tip, paper towel, or any basic cleaning item to wipe it up.
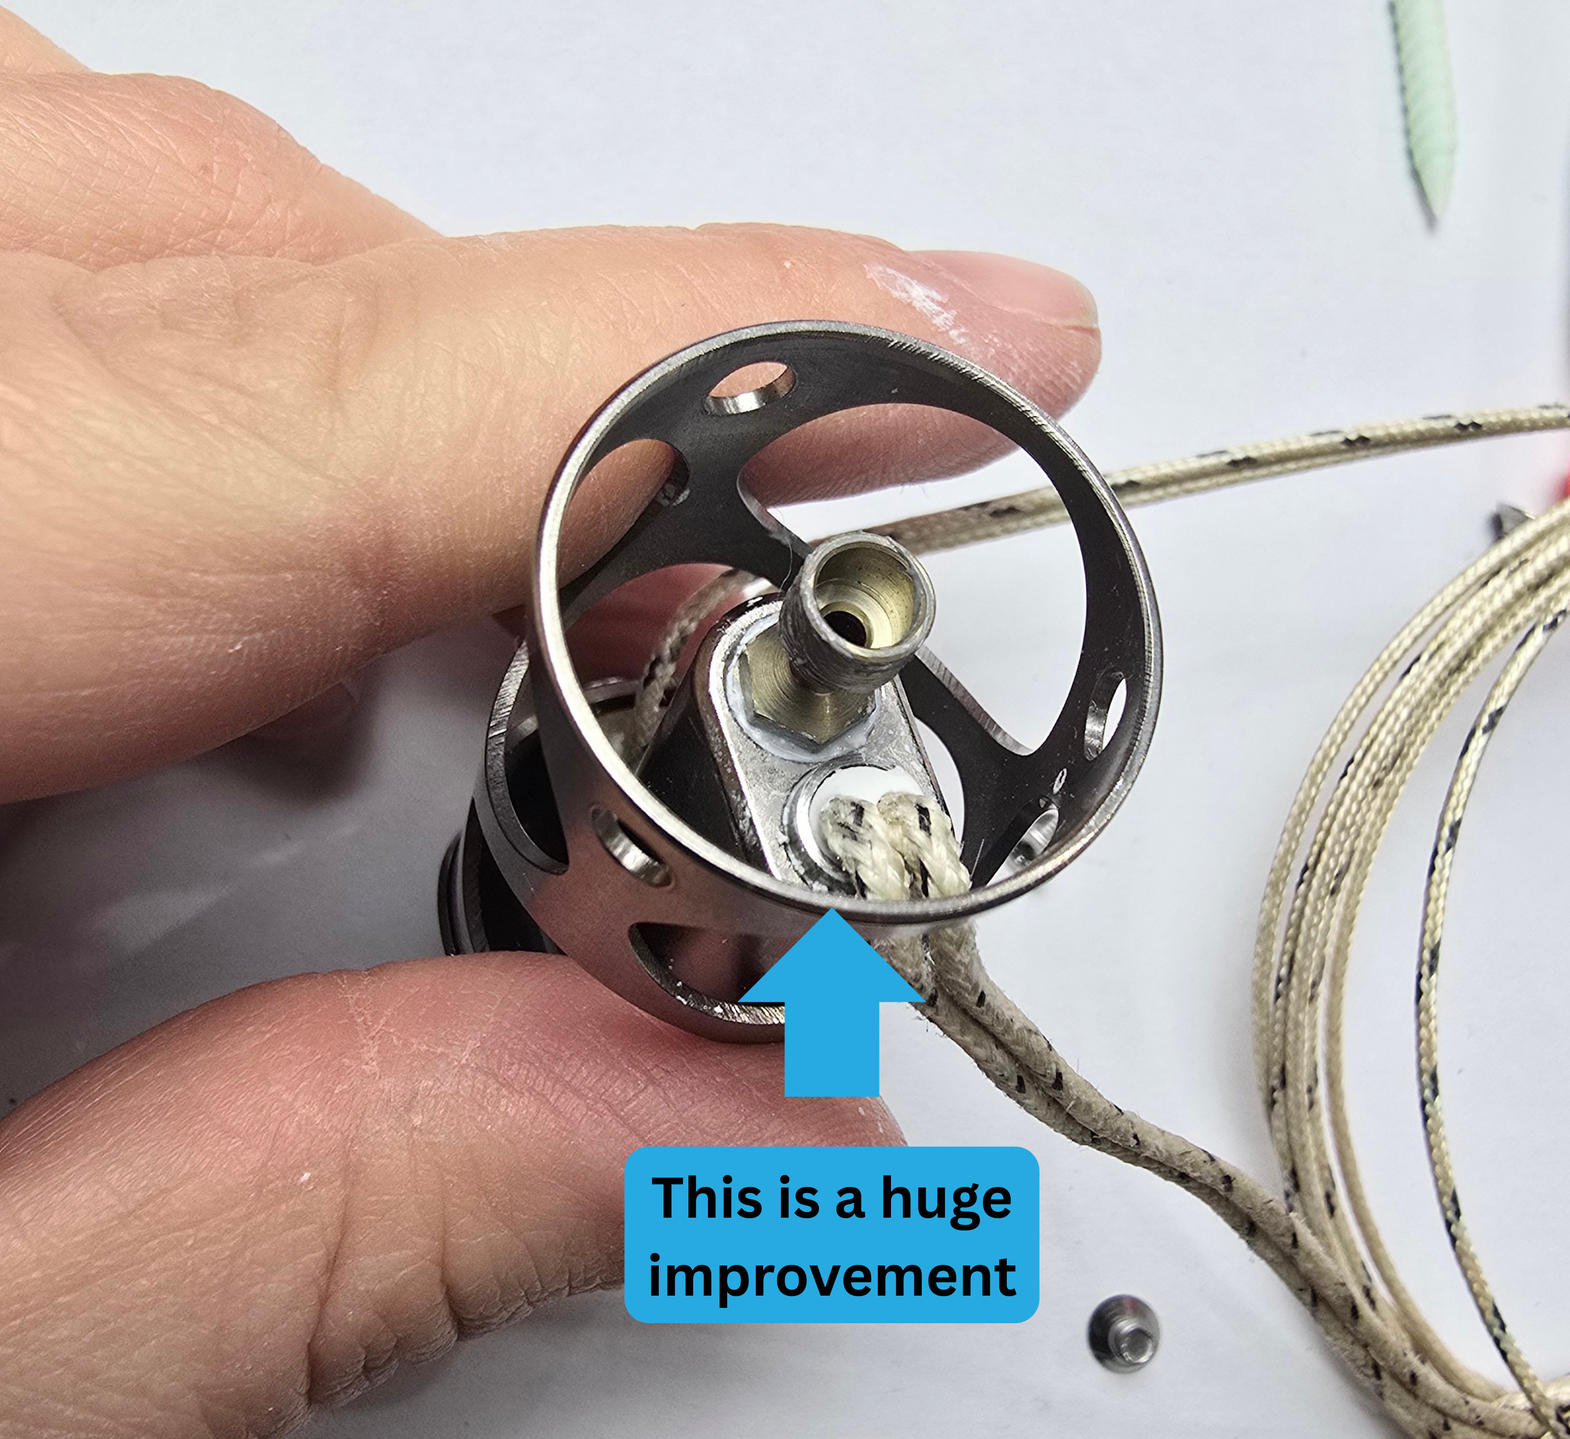
When you have wiped it up (or maybe you did it perfectly in the first place!) It should look like the above image.
Step 4b:
Use your 1.5mm hex driver to tighten the grub screw that is located on the PT1000 side of the hotend. Tighten *ONLY* until you feel it has hit the PT1000. If you "Hulk" down on it, you may damage your PT1000.

Congratulations! You have successfully installed your heater and PT1000!