Chube Air Assembly
Step 1:
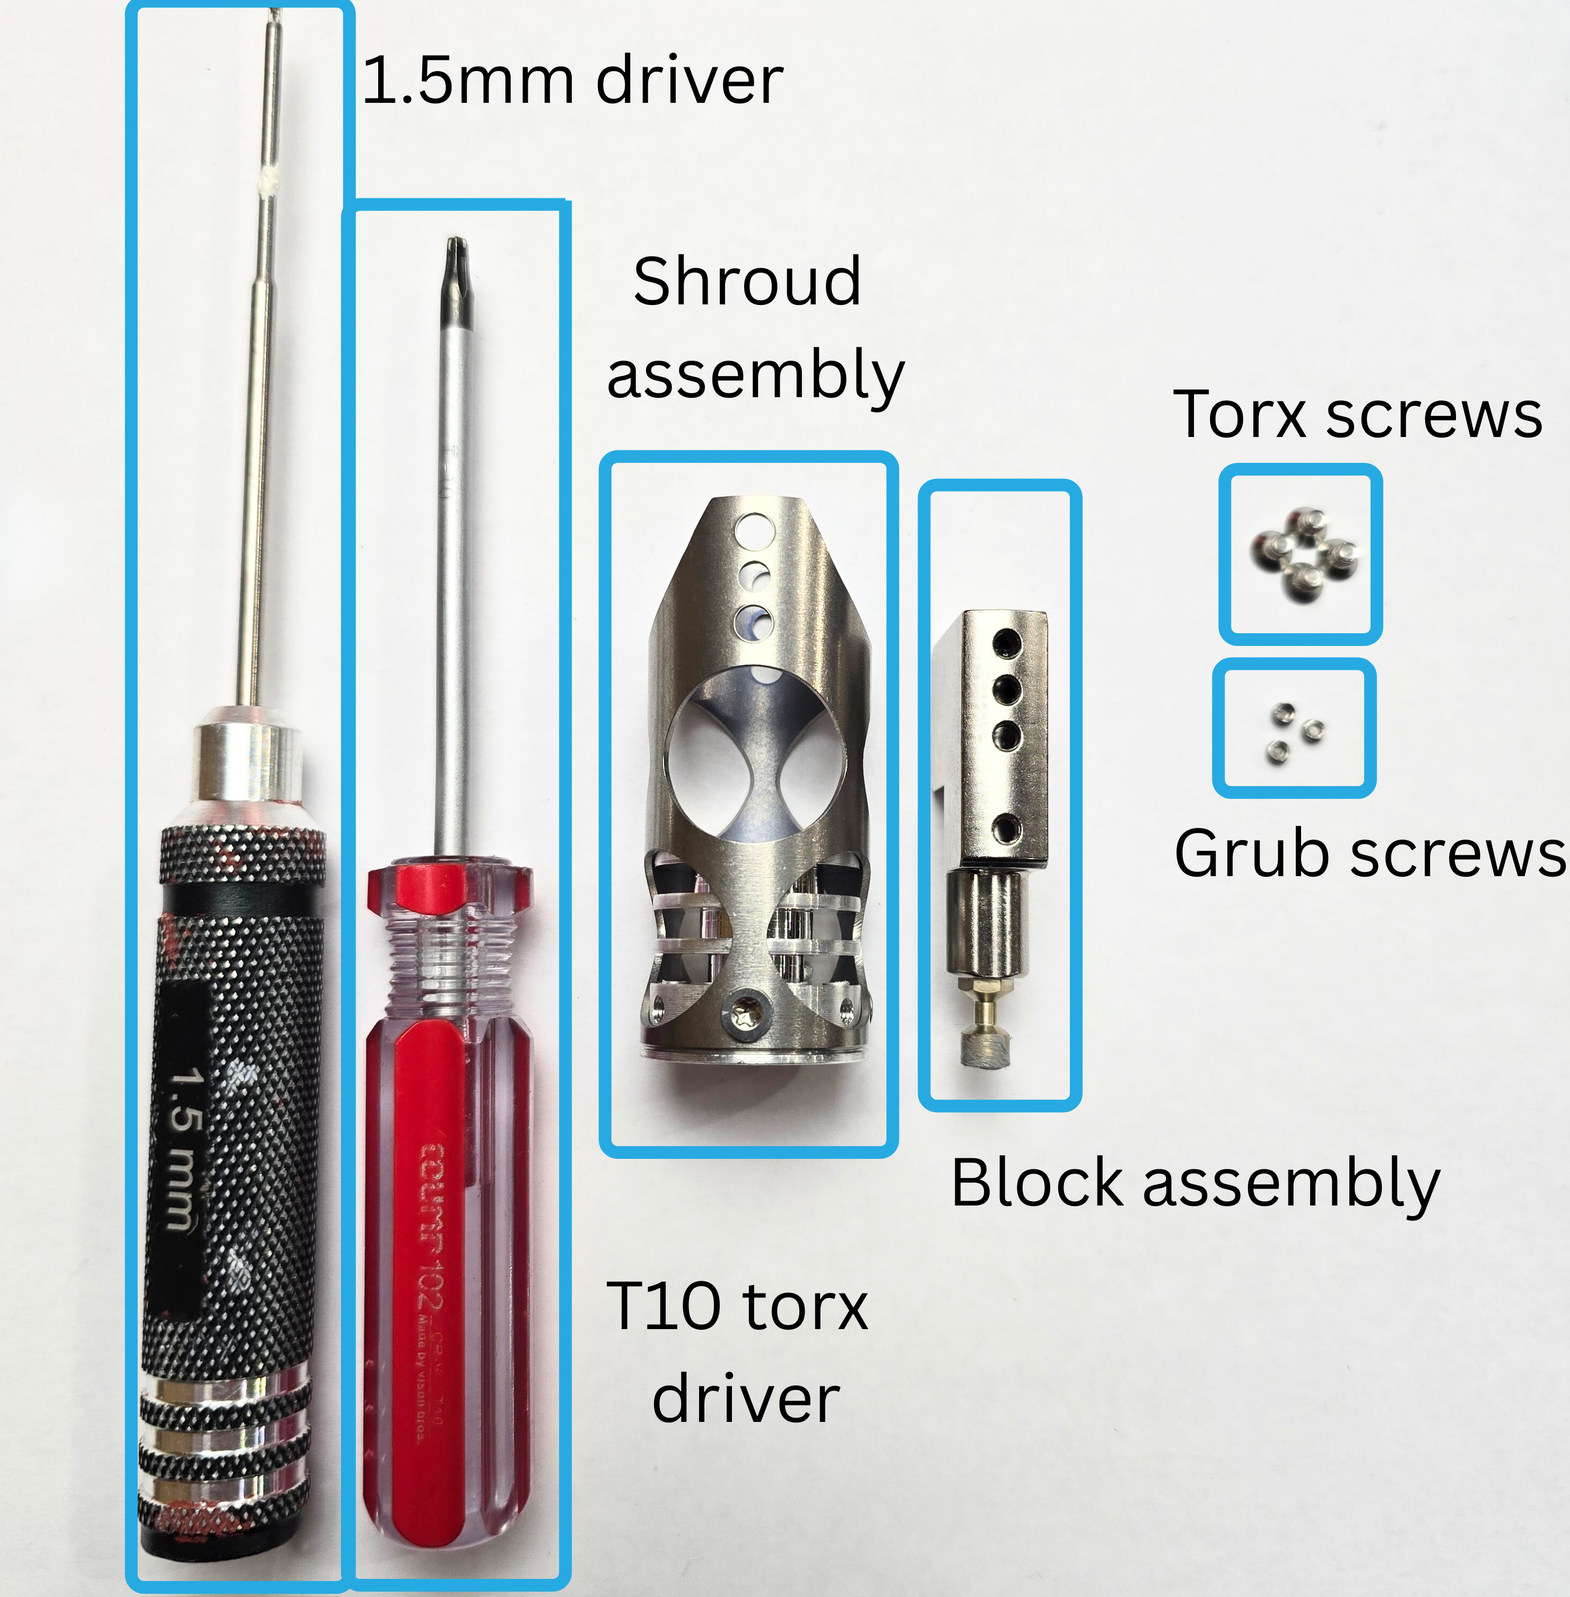
You will need the following:
- Shroud
- 3 torx screws
- Chube Air heatsink
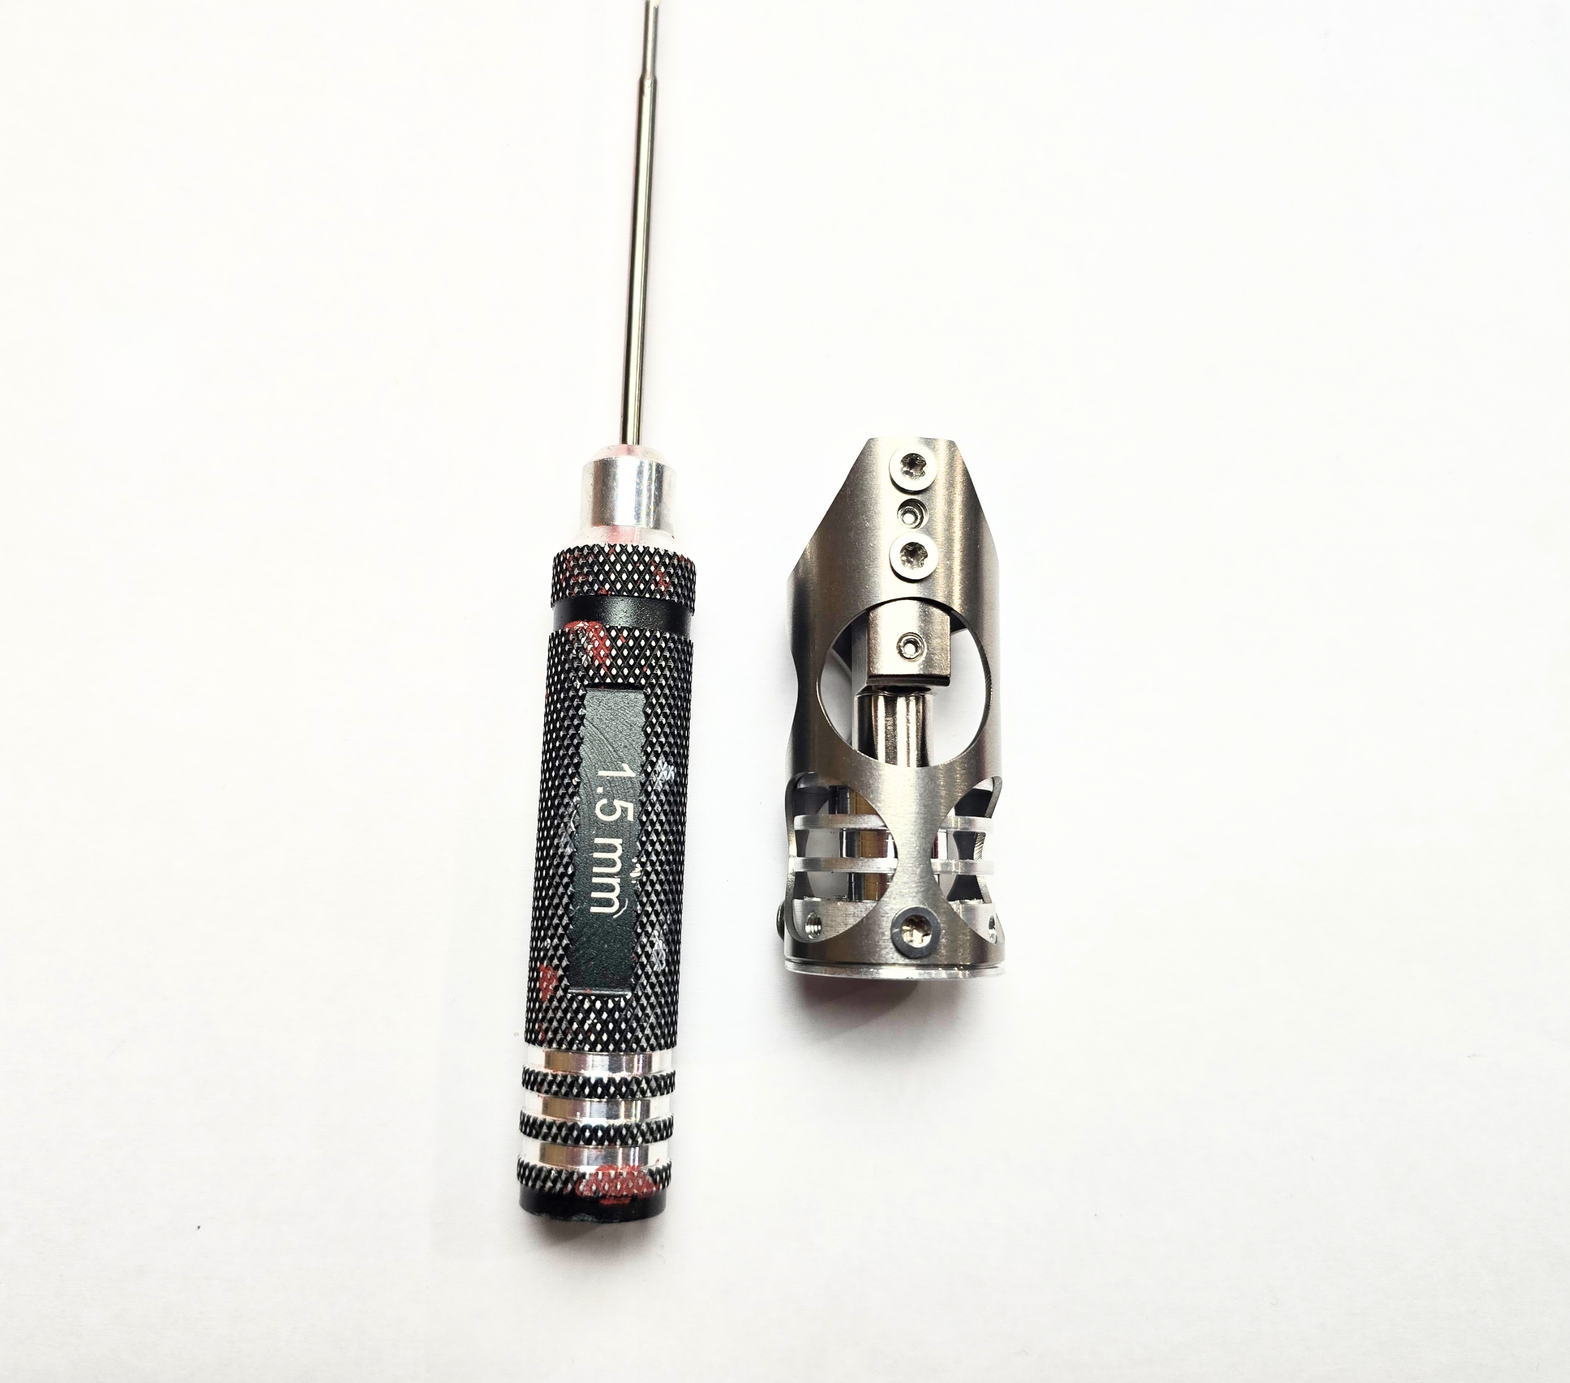
- T10 Torx Driver
1a:
Take your shroud and heatsink, and center the holes. Press the heatsink into the shroud. Make sure the holes in the shroud and the heatsink are aligned nicely. It doesn't need to be perfect, because we use self-centering screws.
1b:
Use 3 torx screws to affix the heatsink to the shroud. Tighten fully, so the screws don't easily loosen while printing.
Step 2:
Step Two:
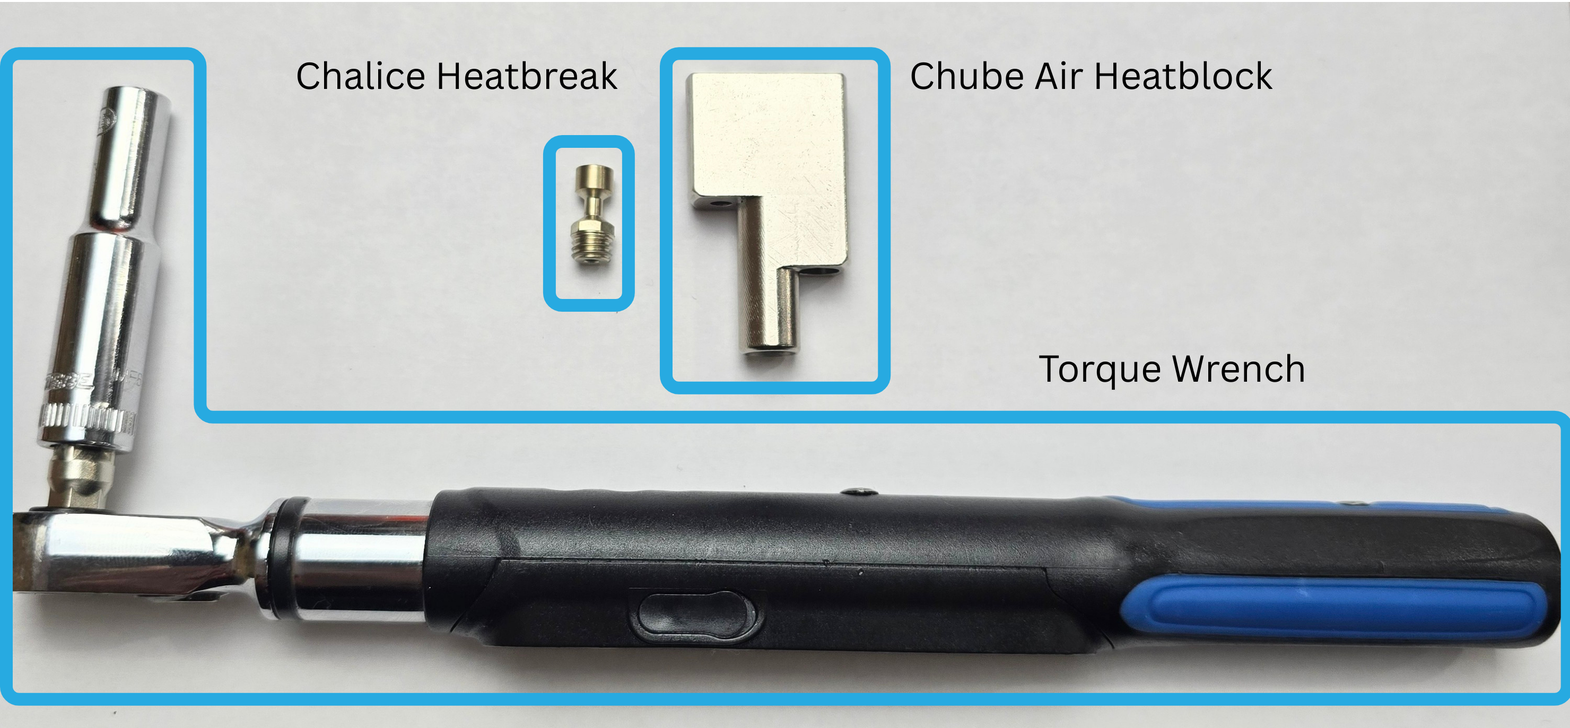
You will need:
- Torque wrench
- Chalice Heatbreak
- Chube Air heatblock
- Clamp
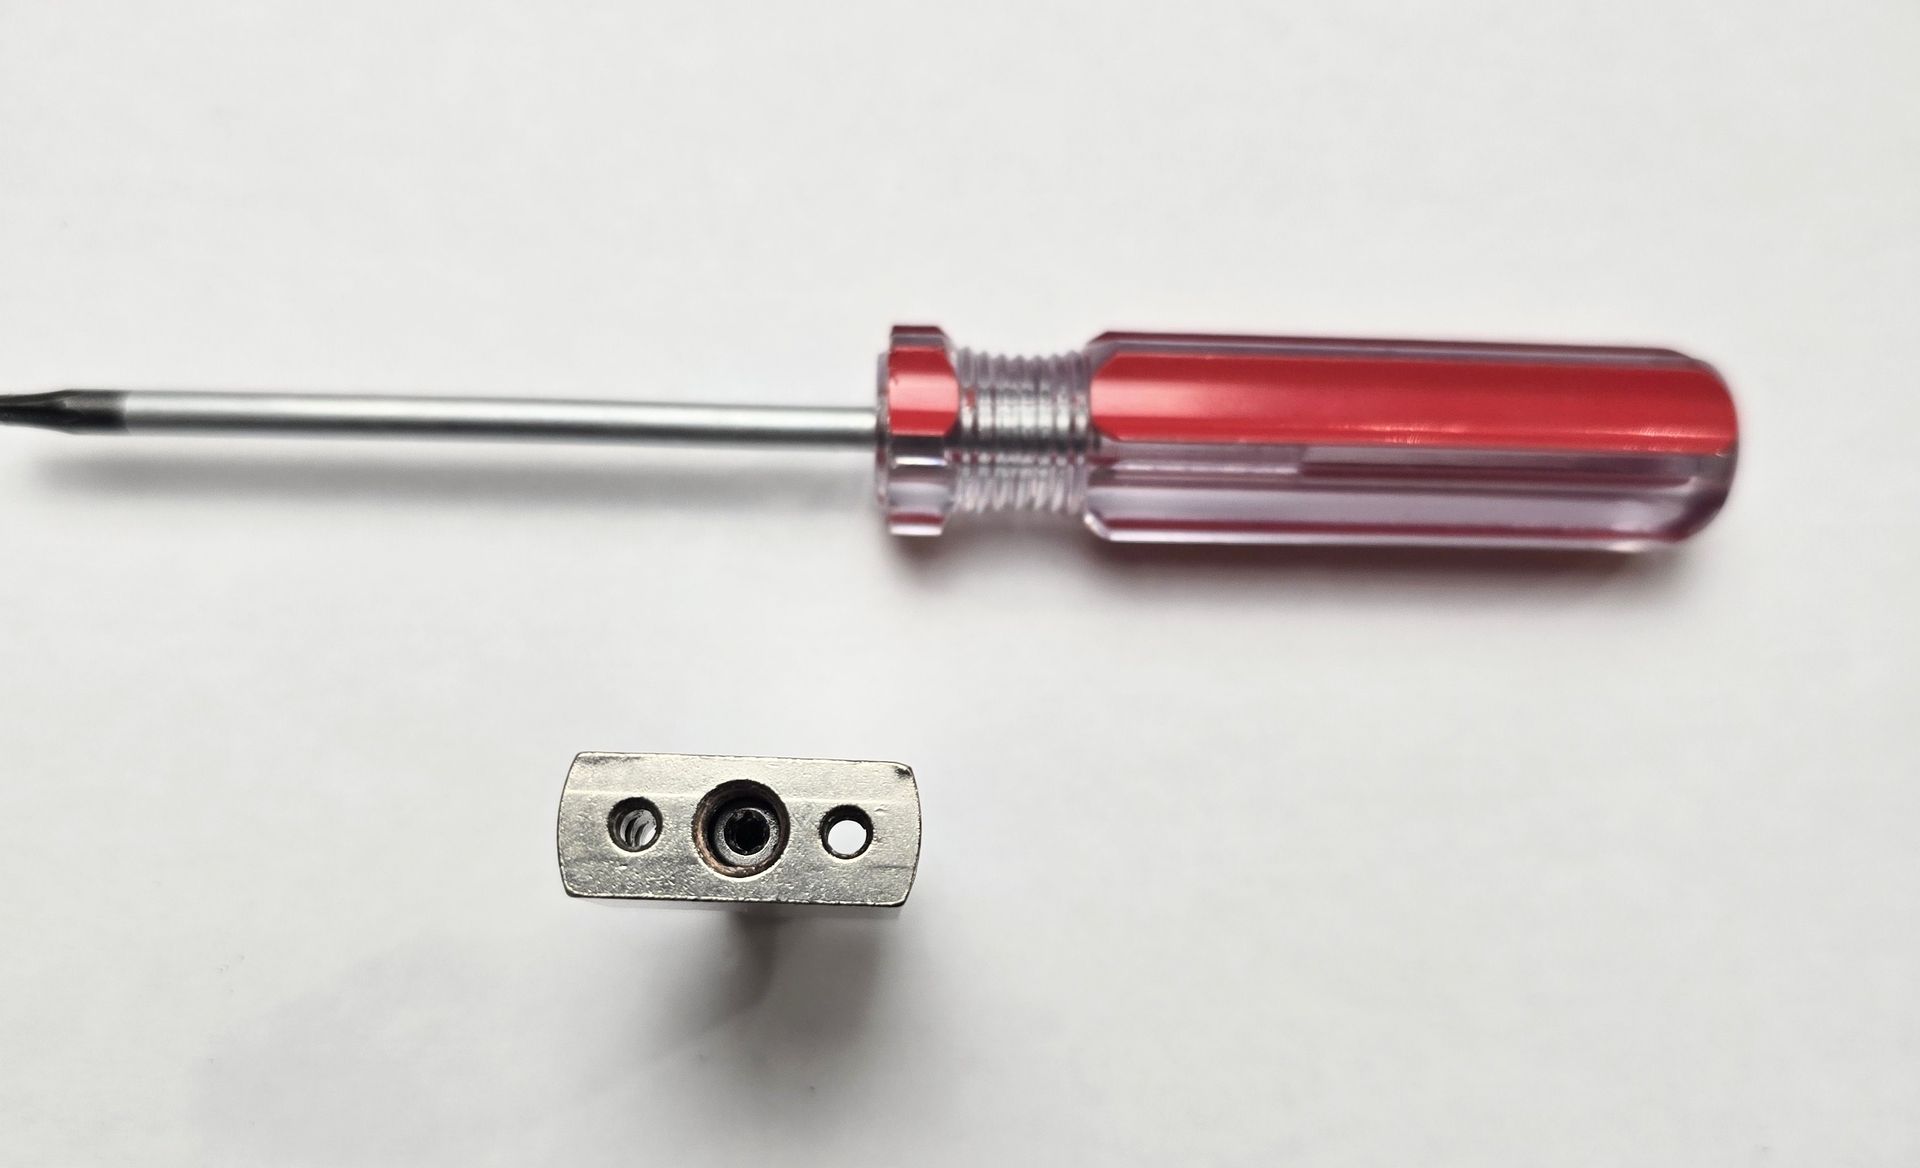
Step 2a:
Take your Chalice, and gently finger twist as far as you can into the heatblock. Make sure to install in the location below:
Step 2b:
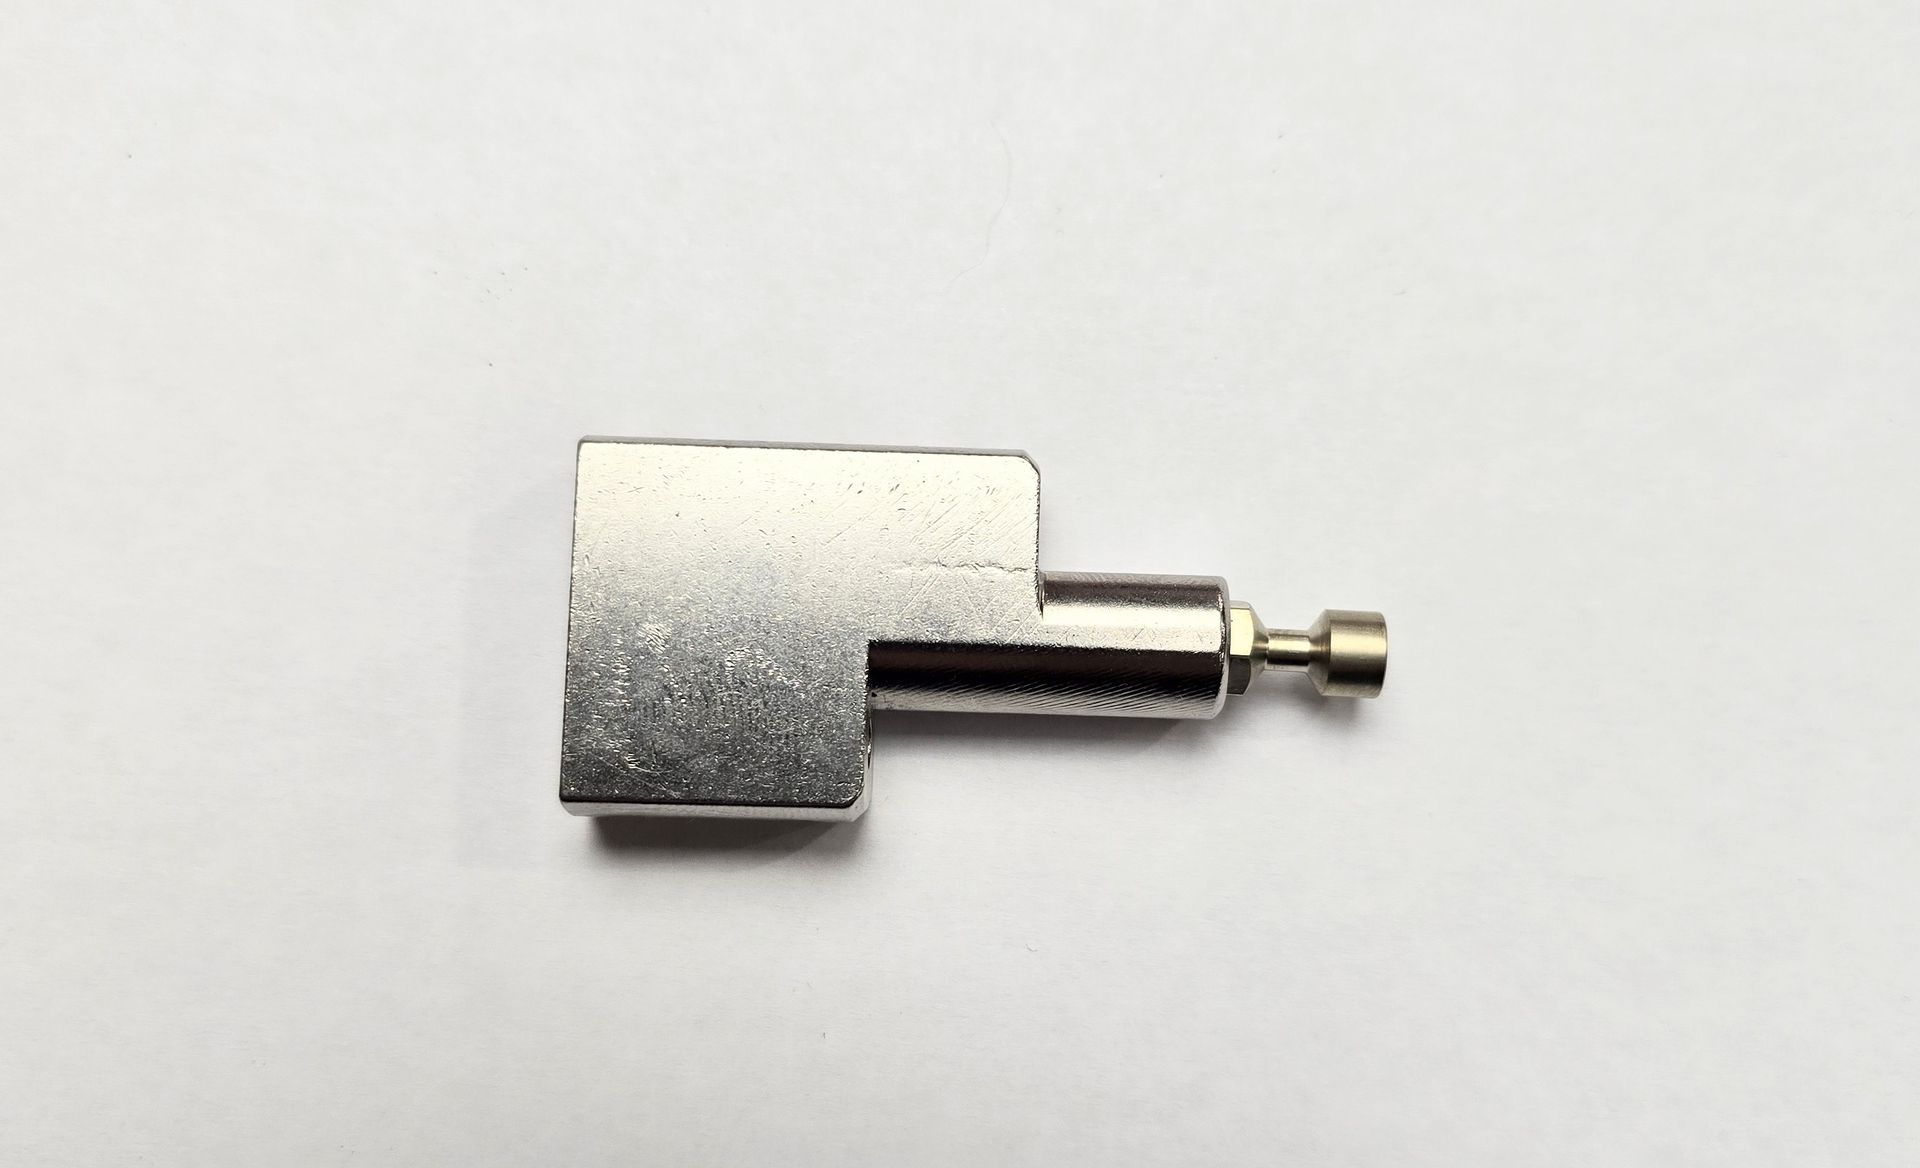
Take your clamp, and use it to hold the heatblock tight, the flat end of the block should be on a flat surface, such as a table.
Next, use your torque wrench to tighten to 3Nm (Newton Meters).
Step 3:
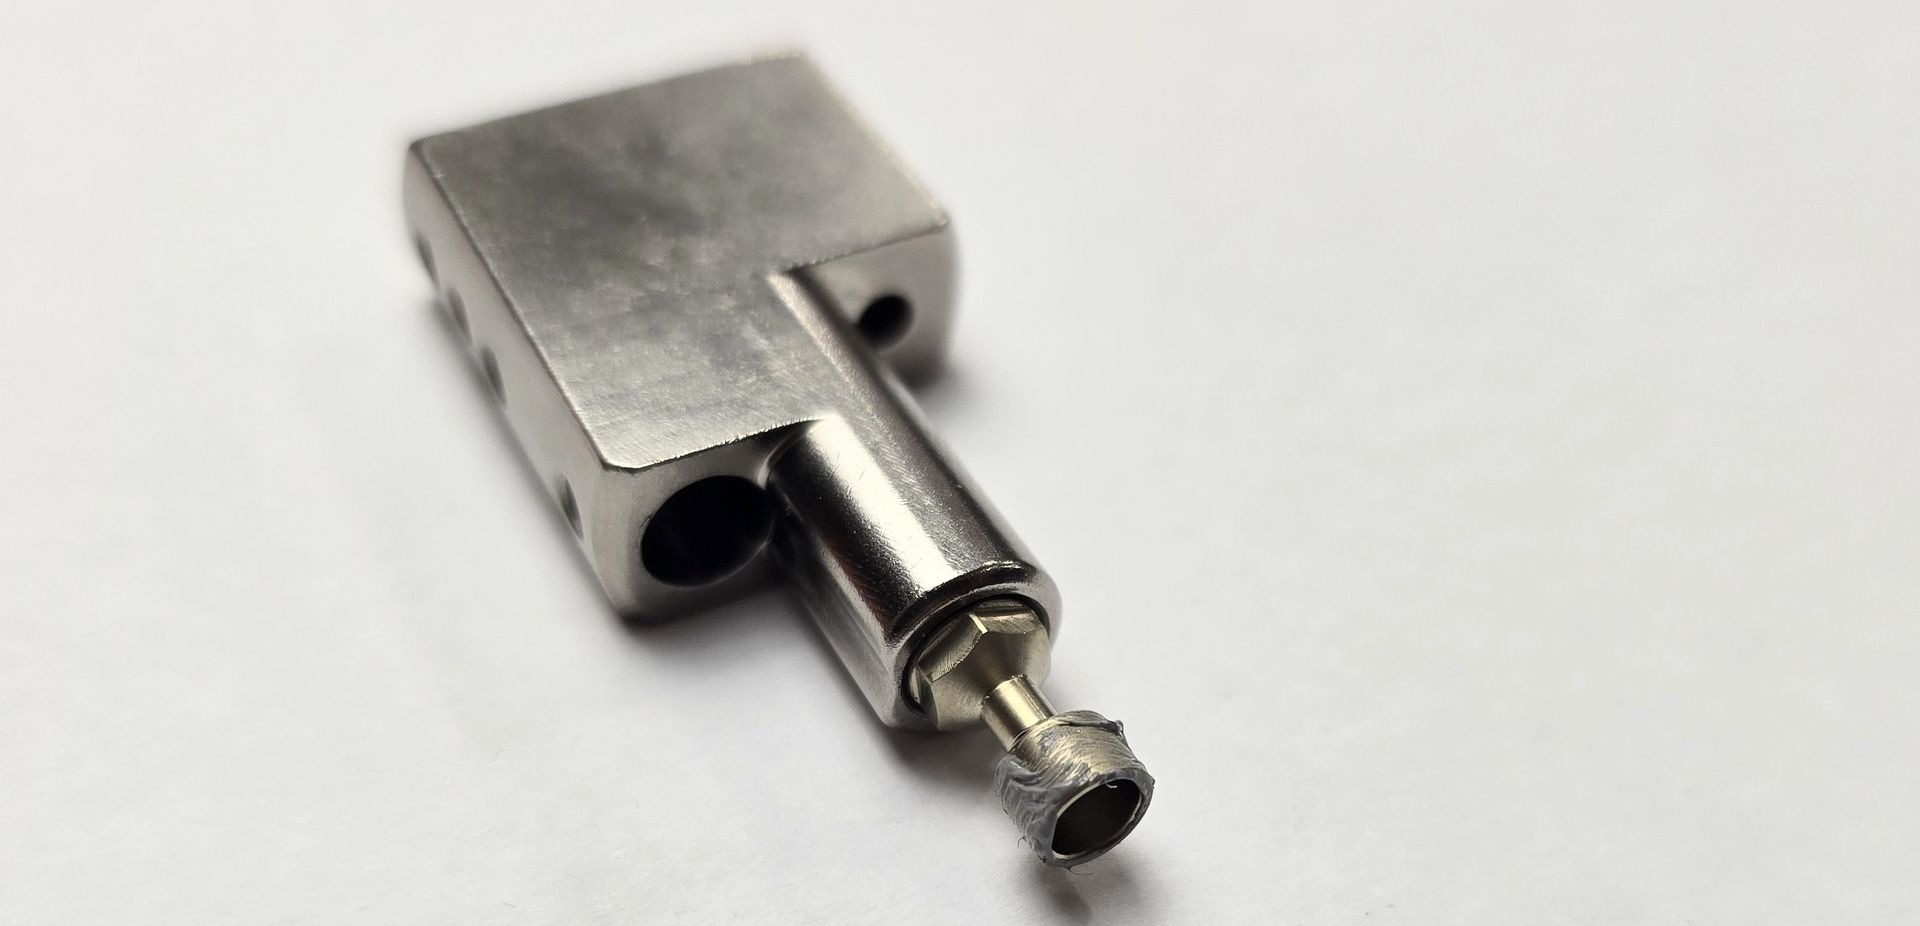
Insert your meltzone adapter into the heatblock. The torx end should enter through the nozzle side of the block. Turn it all the way down until you cannot tighten anymore.
Step 4:
You will need Thermal Grease (not BN paste), as well as an applicator.
Apply the Thermal Grease on only the outside of the cup portion of the Chalice Heatbreak. The layer should be thin, and not enter the inside of your heatbreak.
Step 5:
You will need the following:
- Chube Air Block Assembly
- Shroud Assembly
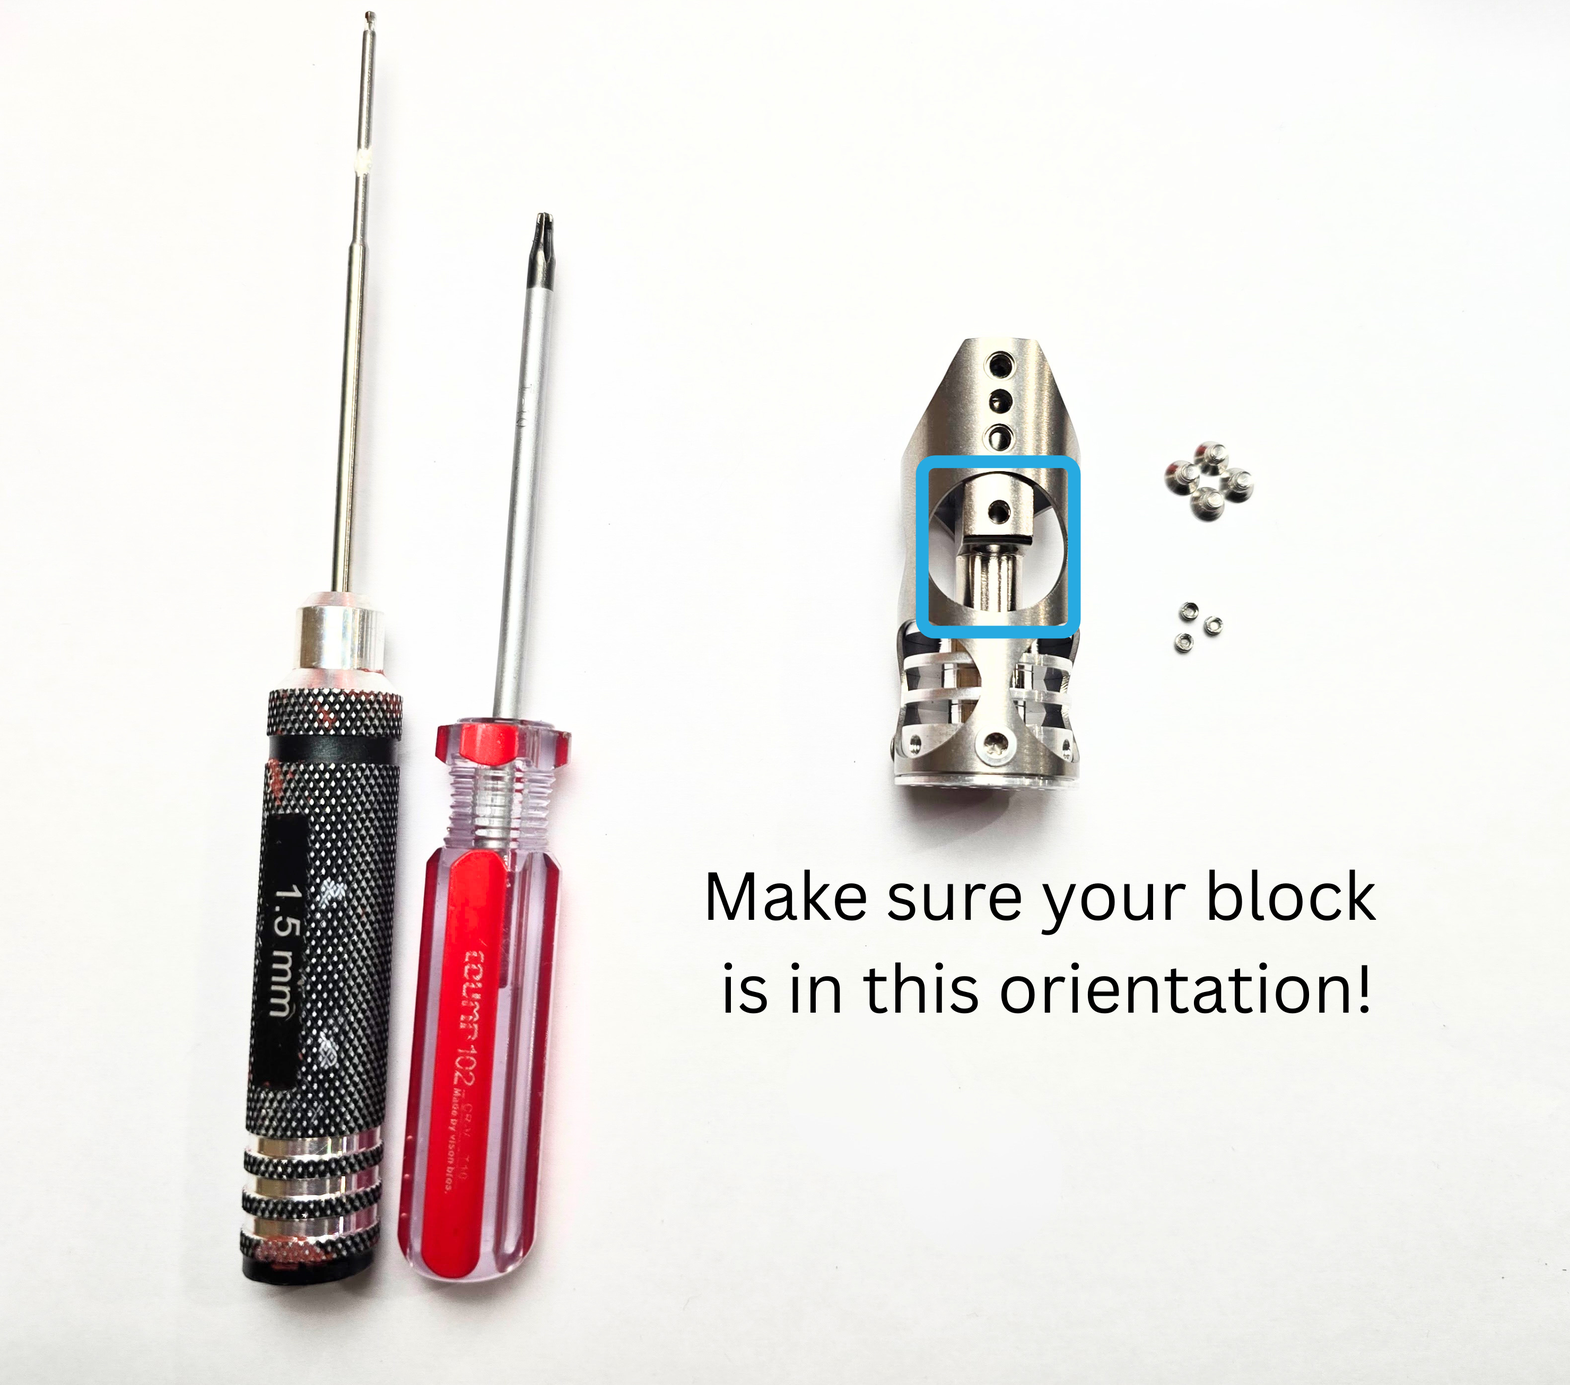
- T10 torx driver
- 1.5mm hex driver
- 4 torx screws
- 3 grub screws
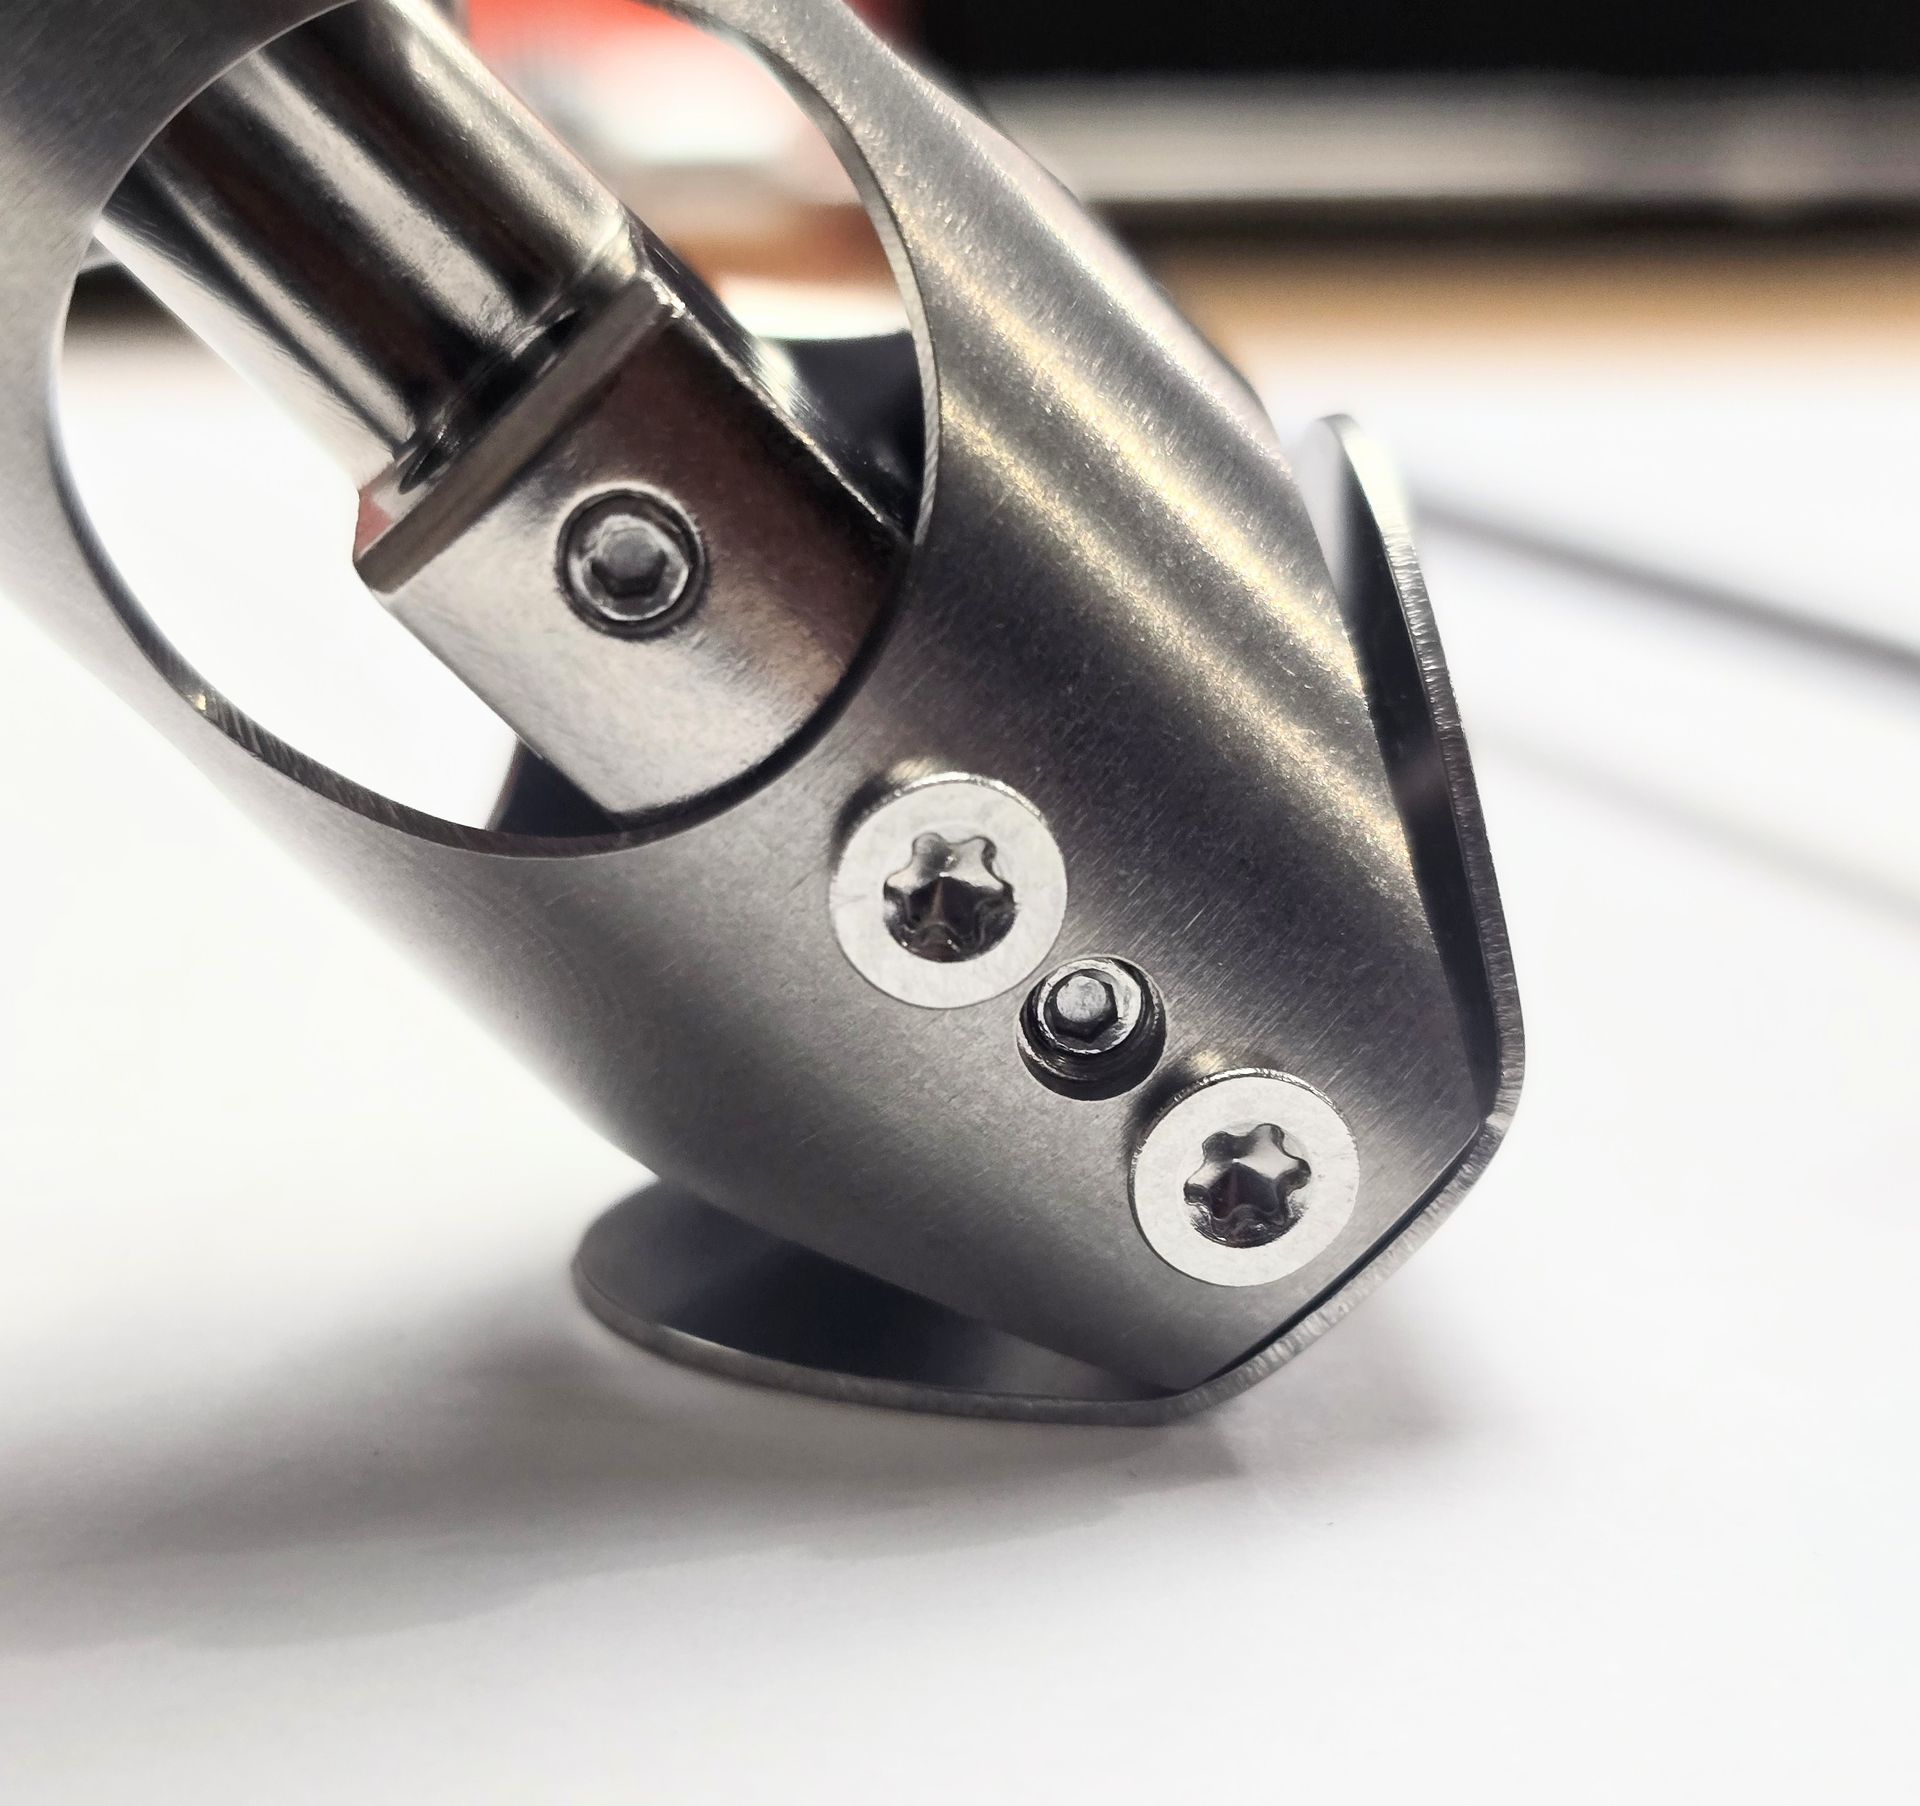
5a:
Take your heatblock assembly and your shroud assembly, and insert the block assembly into the shroud assembly.
Make sure the side of the block with 4 holes is on the side with the cutout. See below for example:
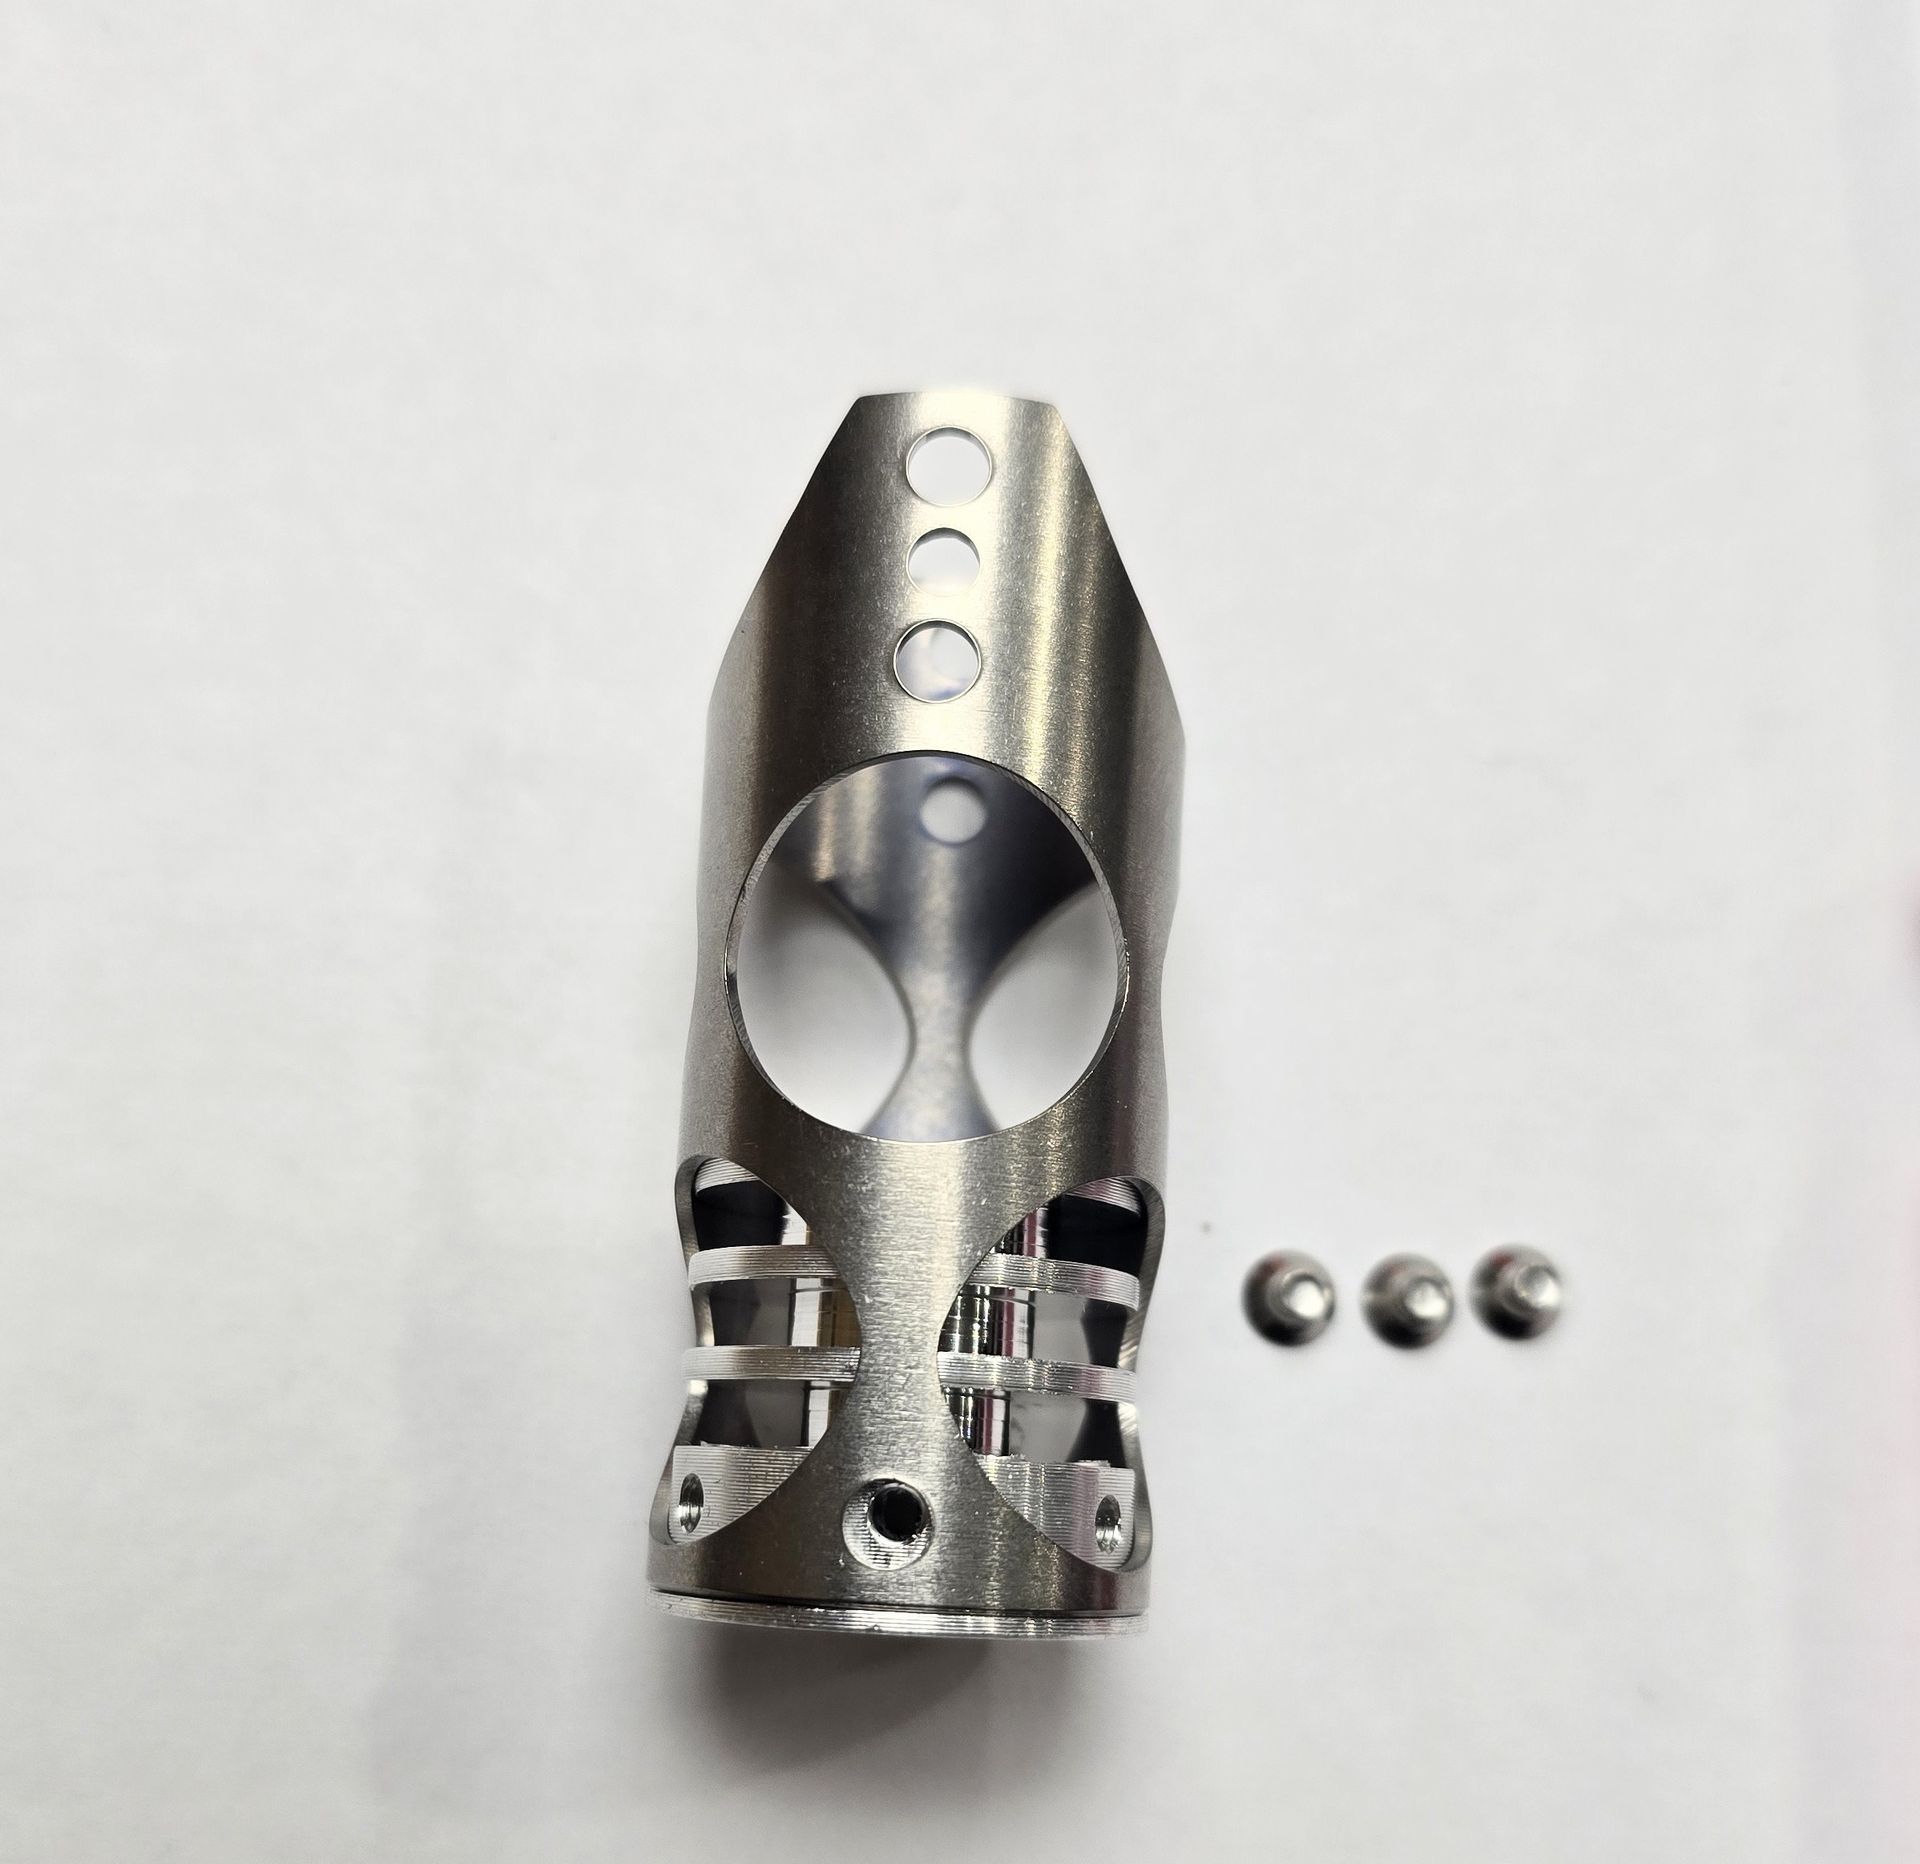
5b:
Take your 4 torx screws, and install them in the holes shown below, on both sides of the hotend.
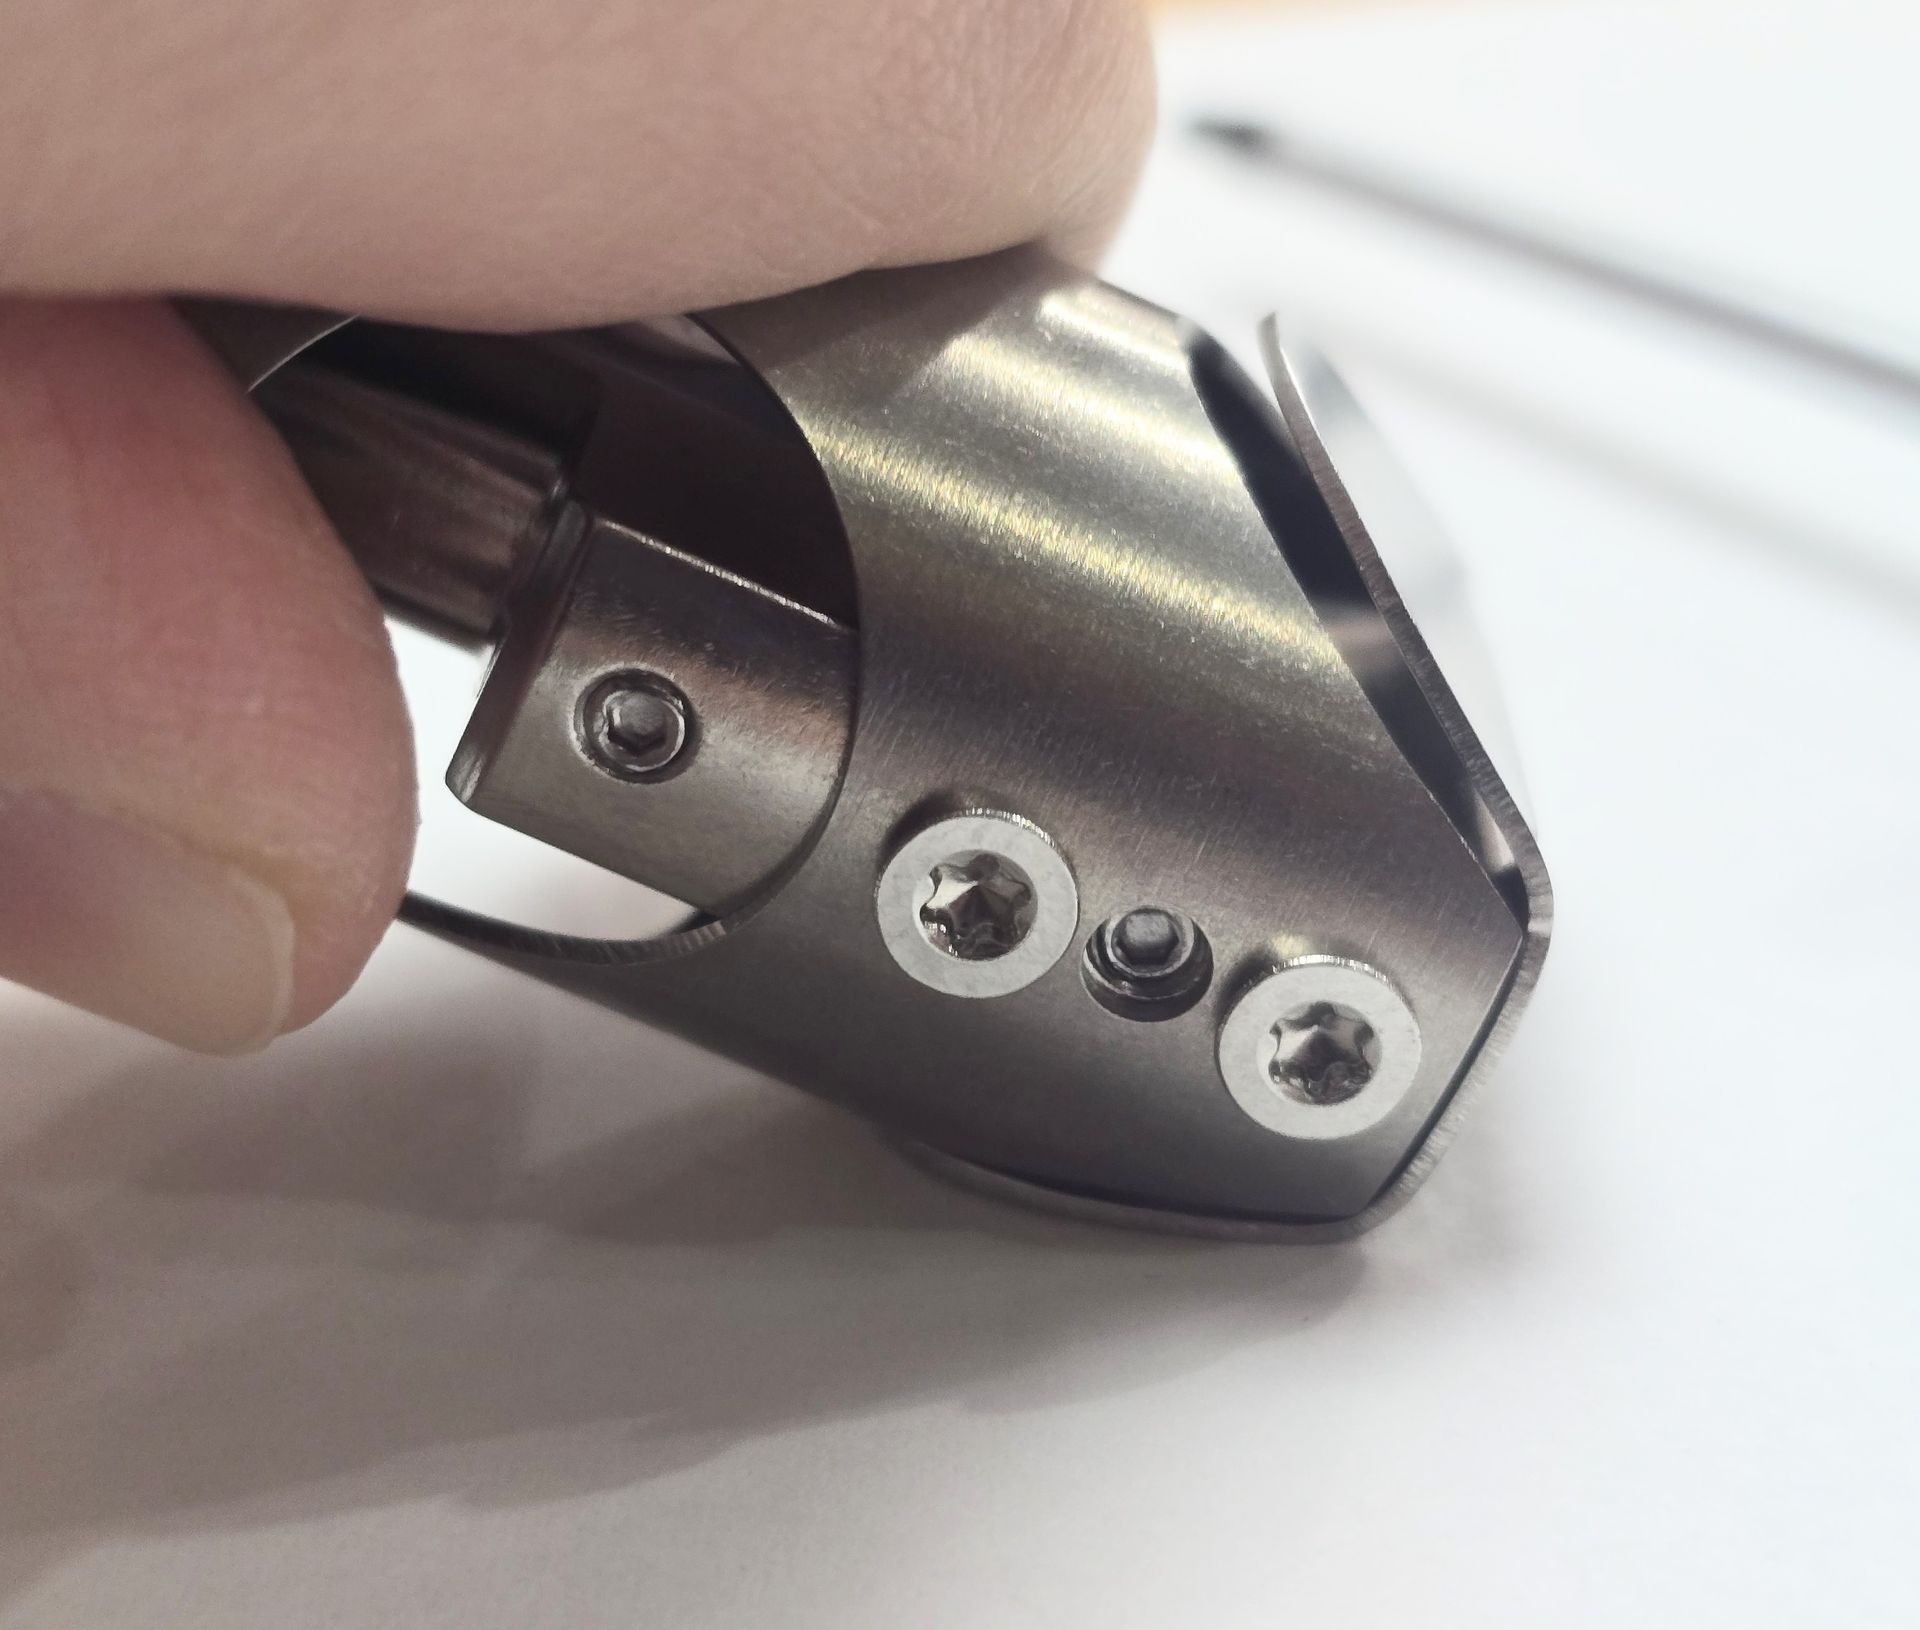
5c:
Install your 3 grub screws in the remaining heatblock holes.
For this you will need your 1.5mm driver.
Only install the grub screws until their tops are equal with the visible part of the heatblock.
Going too deep may result in lost grub screws.
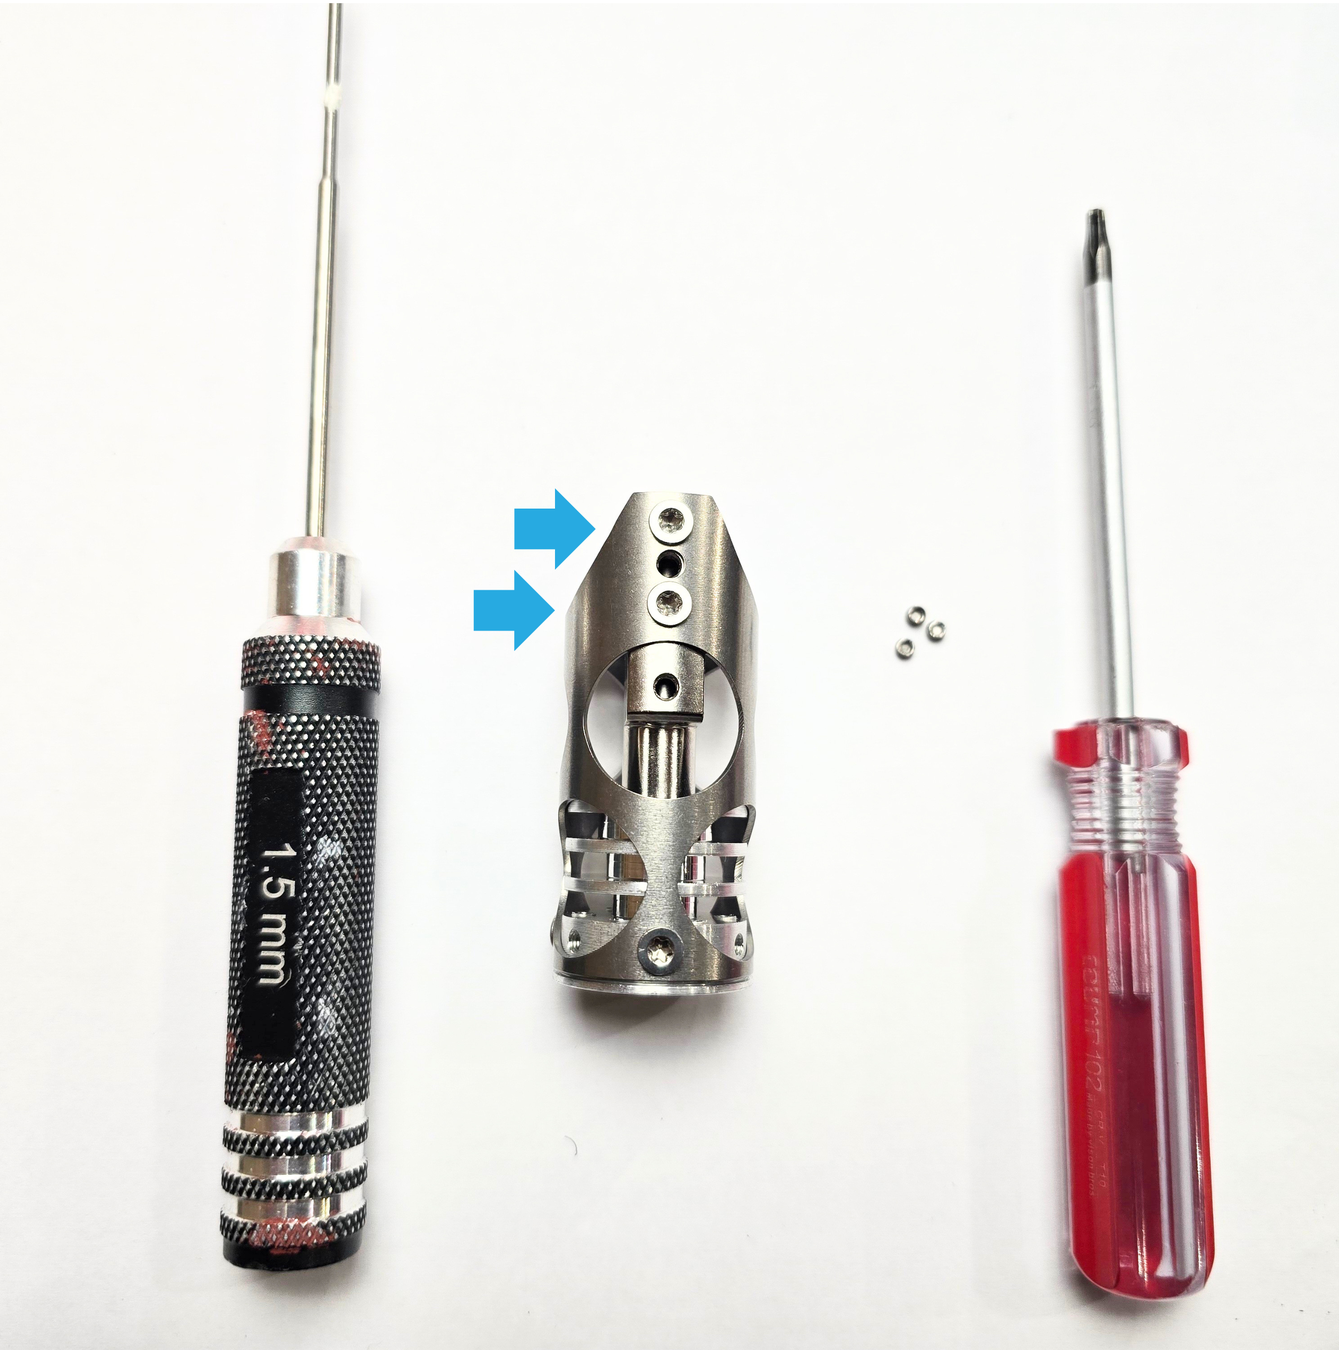
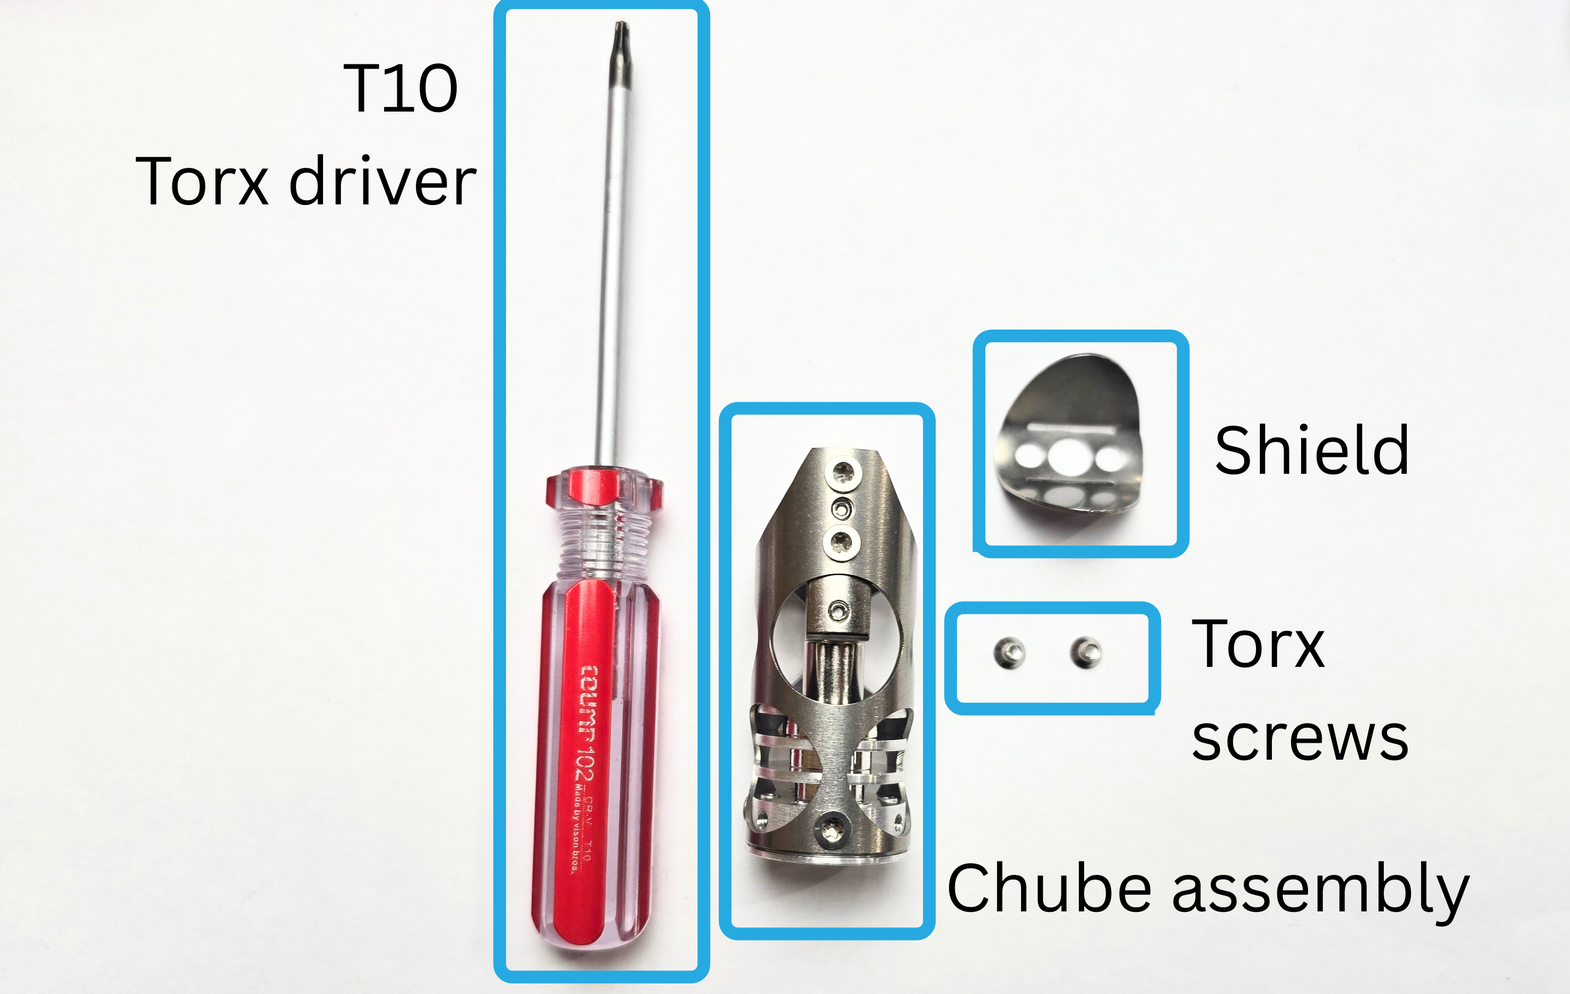
Step 6:
For this step you will need:
- Chube Air Assembly
- Shield
- 2 torx screws
- T10 torx driver
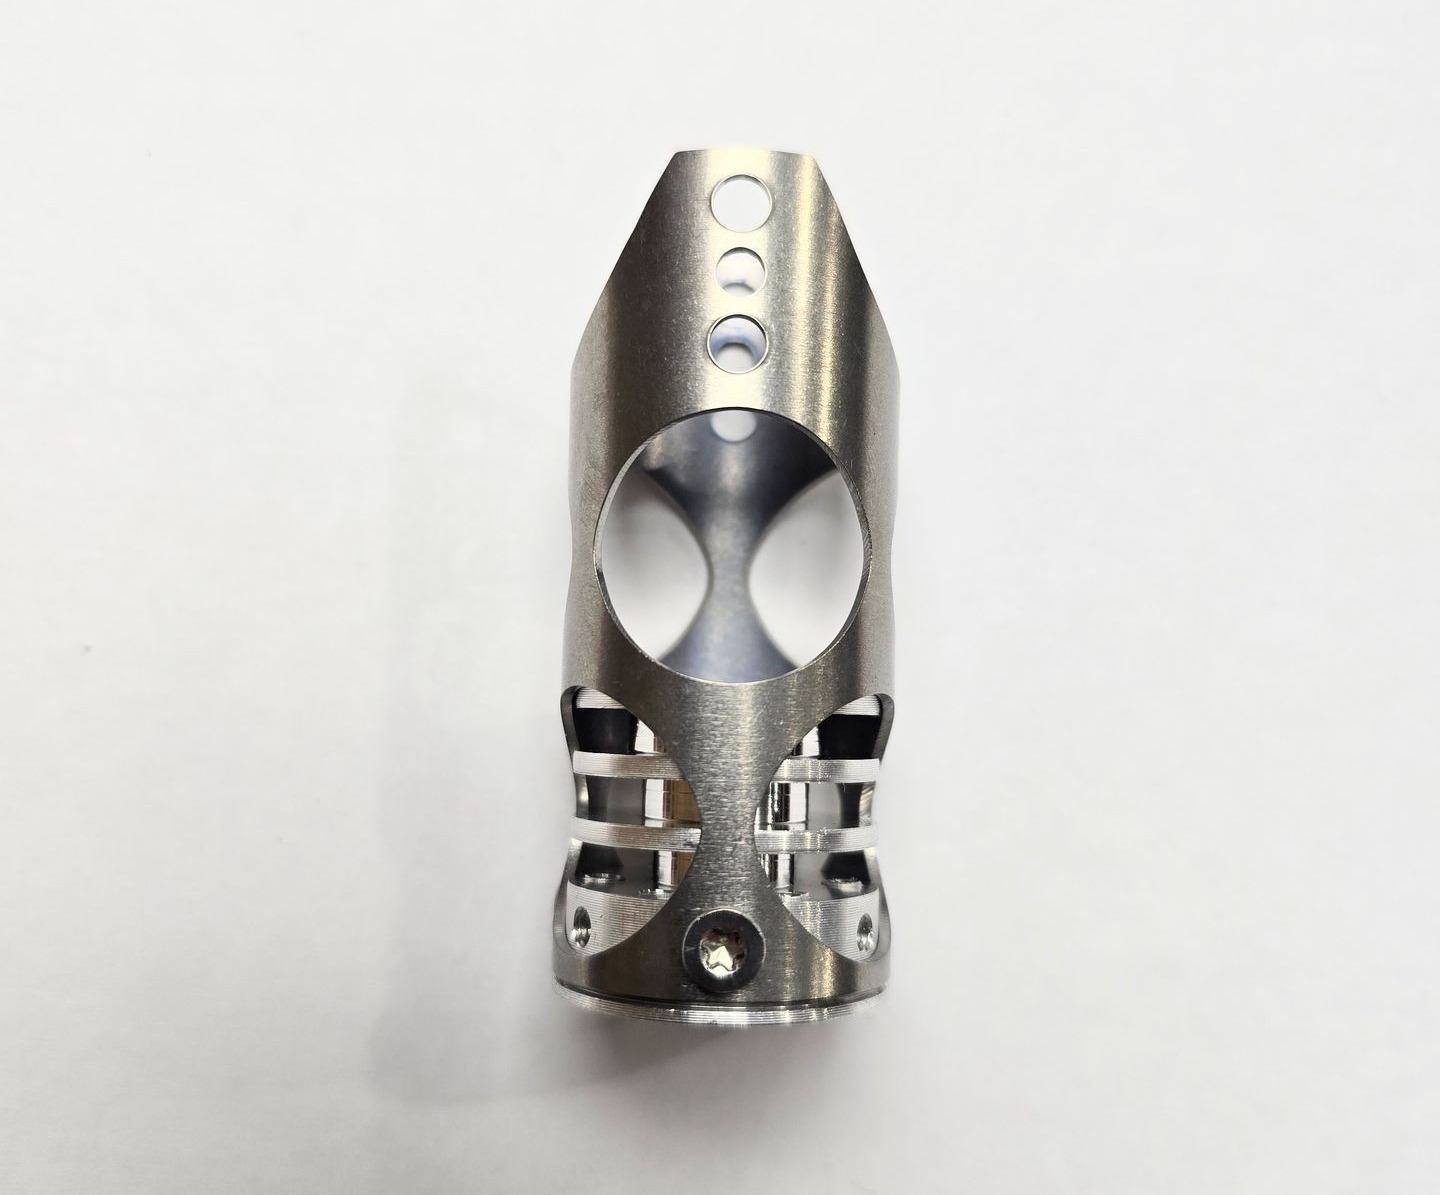
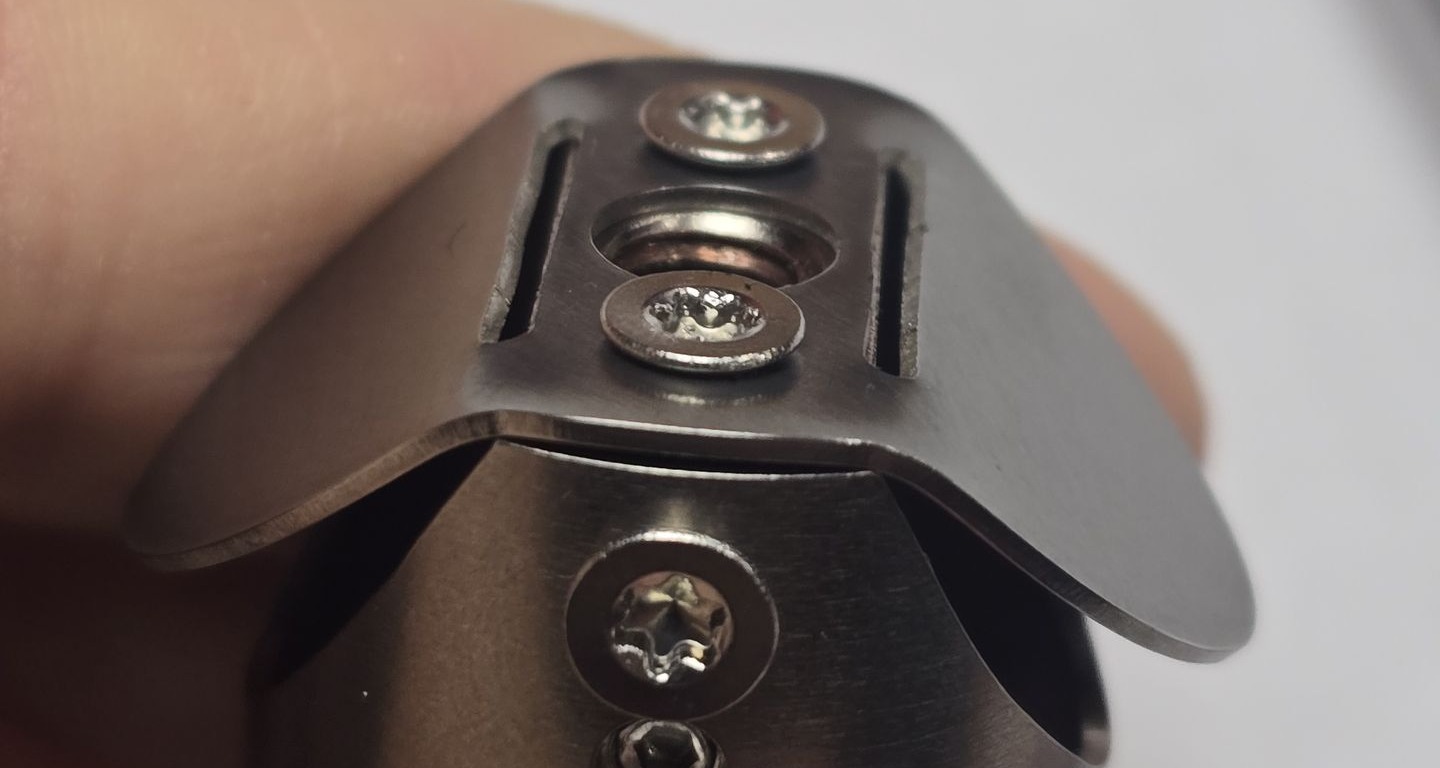
Step 6a:
Take your torx screws, and use them to install the shield on the top of the Chube assembly. If there is a gap, like below, you need to tighten your screws down. There should not be a gap between the heatblock and the shield.
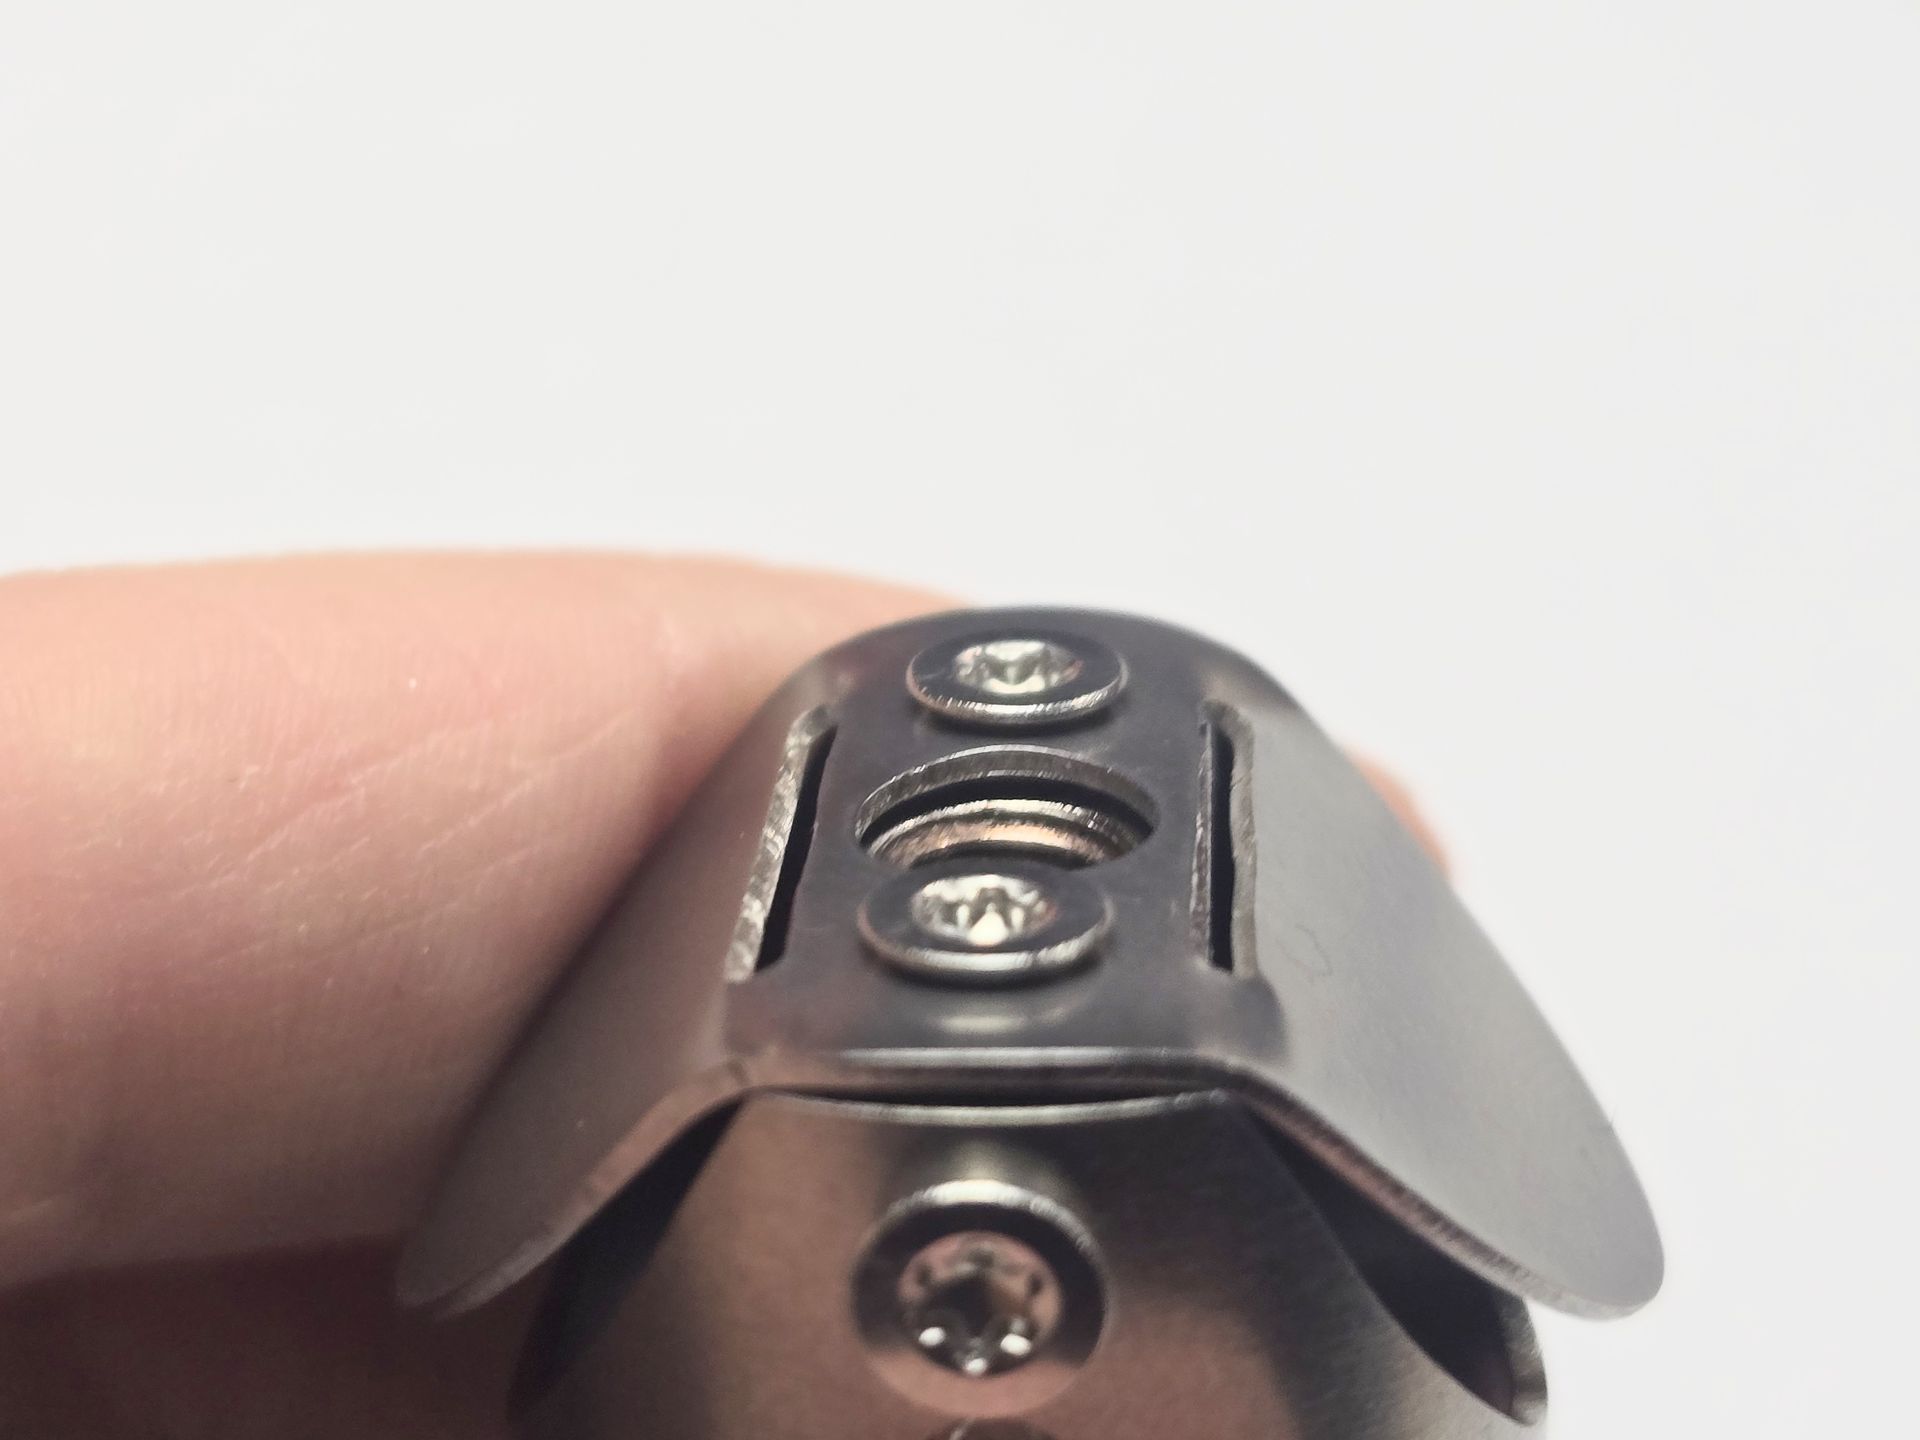
The image below shows the correct shield tightness:
Step 6b:
As you can see, the sides of the shield are sticking out. The easiest way to flatten them, is by pressing them against a hard, flat surface, such as a table.
After applying pressure, it should look like the following image:
Do this to both sides of the shield.
And there you have it! Your Chube Air is fully assembled.